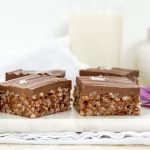
Mars Bar Rice Krispie Slice
Light, crispy, puffy Rice Krispies coated in a luscious Mars Bar chocolate caramel, topped with a thick layer of chocolate with some sea salt to balance the sweetness, these Mars Bar Rice Krispie Slices are an addictive flavour and texture bomb.
Makes 9 or 16
Ingredients
- 240g Mars Bars – I used 5 bars which weighed 51g each plus small cook's treat!
- 100g unsalted utter
- 40g/2 tablespoons golden syrup
- 85g – 100g Rice Krispies
- ¼ teaspoon fine salt
- 250g – 300g milk chocolate, depending how thick you like the top layer. I used 300g
- sea salt for sprinkling on top
Instructions
-
Collect together your equipment (see Recipe Notes below) and ingredients.
-
Make the Rice Krispy Base: cut the Mars Bars into small pieces and put in a microwave-safe large bowl.
-
Add the butter, golden syrup and salt to the bowl.
-
Microwave for a minute and mix very well. Microwave for a further 15 – 30 seconds and mix like mad until the mixture is very smooth. I like to use a balloon whisk. If it is still not fully melted, microwave again but in 10 second bursts. Be careful not to overcook the mix – if you do this it will seize, become clumpy and it is basically ruined! Alternatively, heat in a saucepan over a low heat, stirring very regularly.
-
When the mixture is smooth, add sufficient Rice Krispies to coat – they should be covered in the mixture but not too gooey. I add the Rice Krispies in stages – generally in thirds. Fold carefully so you do not crush the Rice Krispies.
-
Transfer to the prepared baking dish and press down with a spoon to compact the Rice Krispies and make a nice even surface.
-
Top with chocolate: break the chocolate into a microwave safe bowl or jug. Carefully melt in the microwave and spread over the Rice Krispy mixture. (See Recipe Notes.)
-
Sprinkle some sea salt, to taste, where you imagine the centre of each slice will be.
-
Set aside to cool and give the chocolate time to harden and set. You can pop it in the fridge to speed up the process. Cut into 16 squares – or 9 if you have a very sweet tooth!
-
I prefer these stored and served at room temperature. However, if you like to eat your chocolate directly out of the fridge, or you live in a hot climate, store and eat directly from the fridge!
Recipe Notes
Equipment:
- kitchen scales and measuring spoons
- large microwave safe bowl or saucepan to make the base
- 20cm/8inch square or 23cm/9inch baking tin lined with baking parchment (I use a 20cm pan)
- microwave safe jug or heatproof bowl to melt the chocolate
Be very careful melting the chocolate. Chocolate can be very difficult to work with. You can overheat it very easily and the mixture will go grainy. When this happens, there is no way to resolve it I’m afraid!
Microwave: I give the chocolate a minute in the microwave, take it out and stir it well, then let it sit for a few minutes to see if it continues melting sufficiently to melt all the chocolate. If not, I then continue with the microwave but in 10 – 15 second bursts.
Bain Marie: if you do not have a microwave, put the chocolate in a heatproof bowl over a saucepan of gently simmering water. Do not let the base of the bowl touch the water. Heat until the chocolate is very nearly melted then take it off the heat and take the bowl off the saucepan. Be very careful not to burn yourself as the bowl will be hot and steam will escape from the saucepan. Allow the mixture to sit for a few minutes for the residual heat to melt the remainder of the chocolate. Again, be careful not to over-heat.