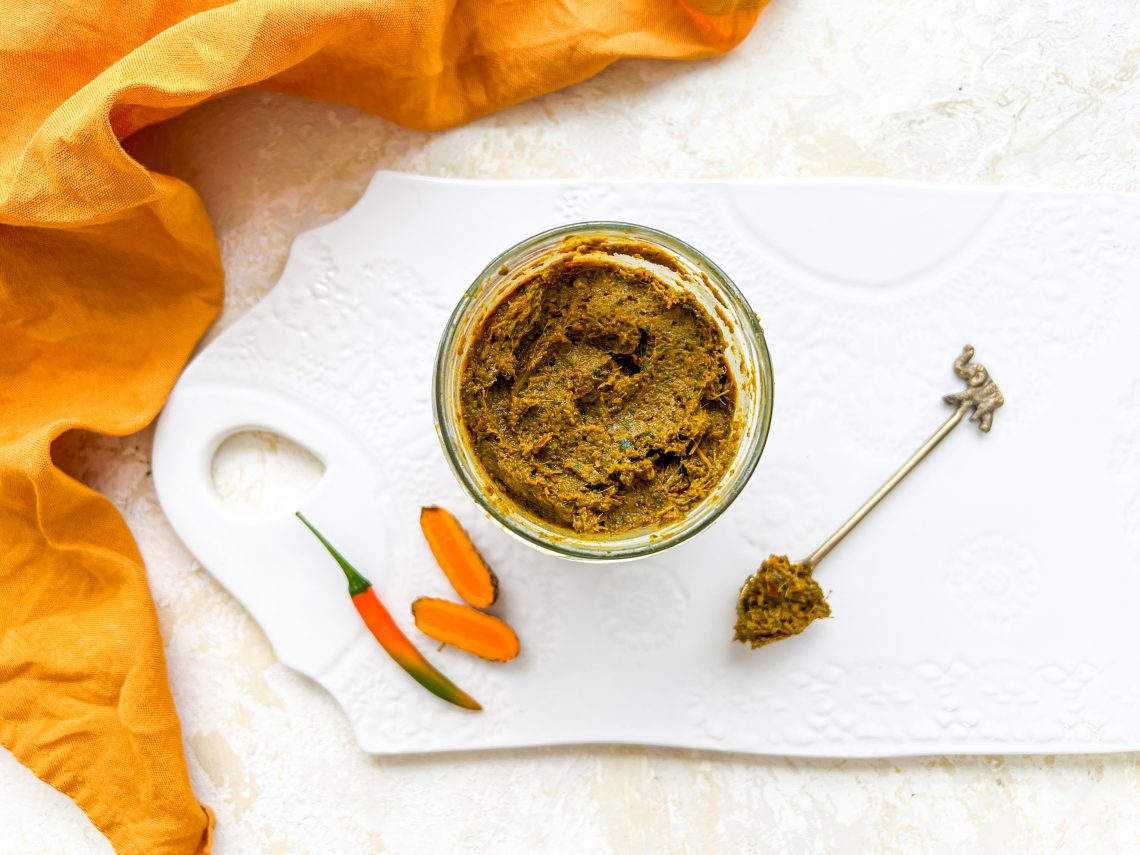
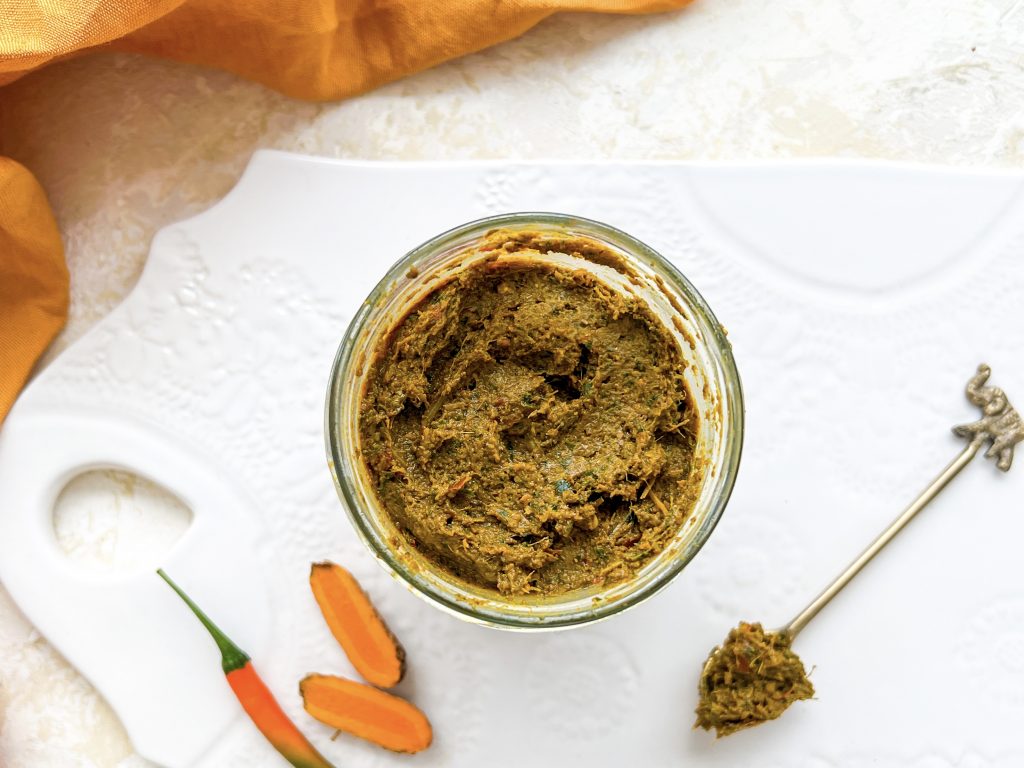
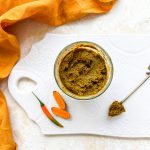
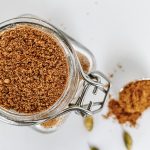
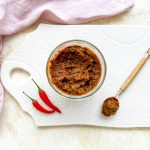
Thai Yellow Curry Paste
The most important ingredient in Thai yellow curries, this wonderful paste can be used with meat, fish, eggs and vegetables, in curries, stir fries and soups, as well as dips, marinades and salad dressings. It is typically milder than the classic red and green curry pastes and uses more Indian inspired spices and flavours. As such it works particularly well with fish and for those who prefer milder flavours. Like all curry pastes you can adjust the spiciness by reducing the quantity of chillies. It is quick to make and stores exceptionally well for a few weeks in the fridge, or up to six months in the freezer.
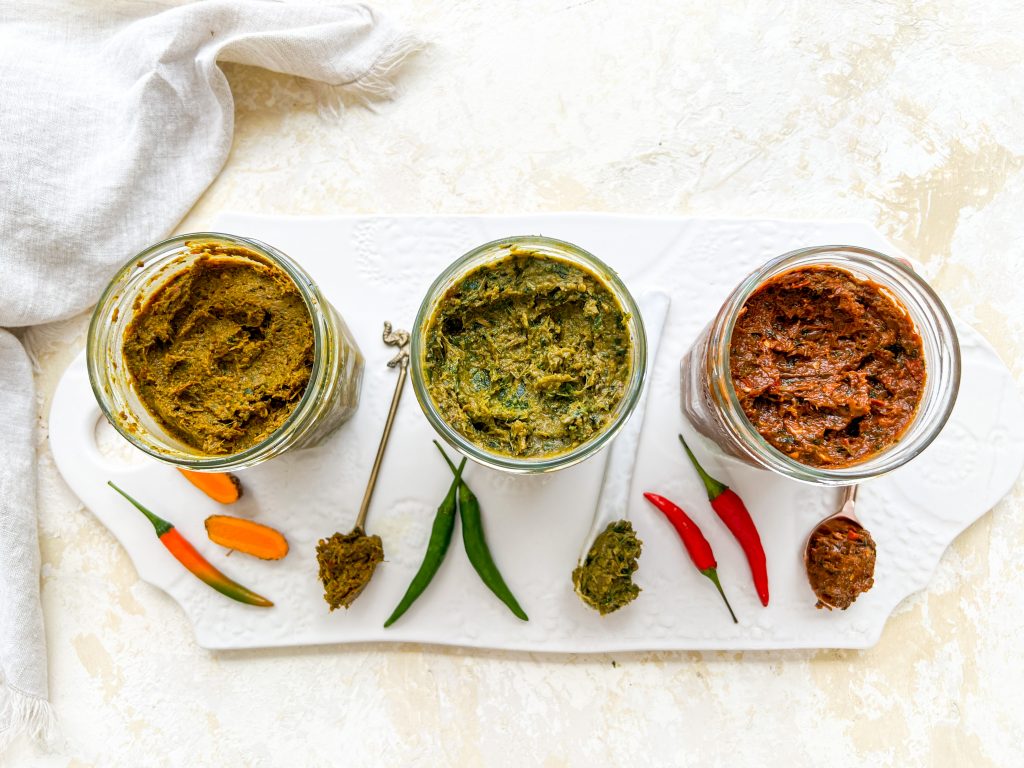
The ingredients list is rather long for this recipe and, unless you have an extremely well supplied supermarket, involves a trip to a specialist Asian store. As there are a lot of common ingredients in Thai Green and Thai Red Curry Pastes, I tend to make all three at the same time and ensure I make enough to freeze. This reduces the amount of trips to specialist shops and makes efficient use of the specialist ingredients you need. It is time efficient, there is less food waste and you will have three incredible fresh curry pastes to see you through the winter. Hurrah!
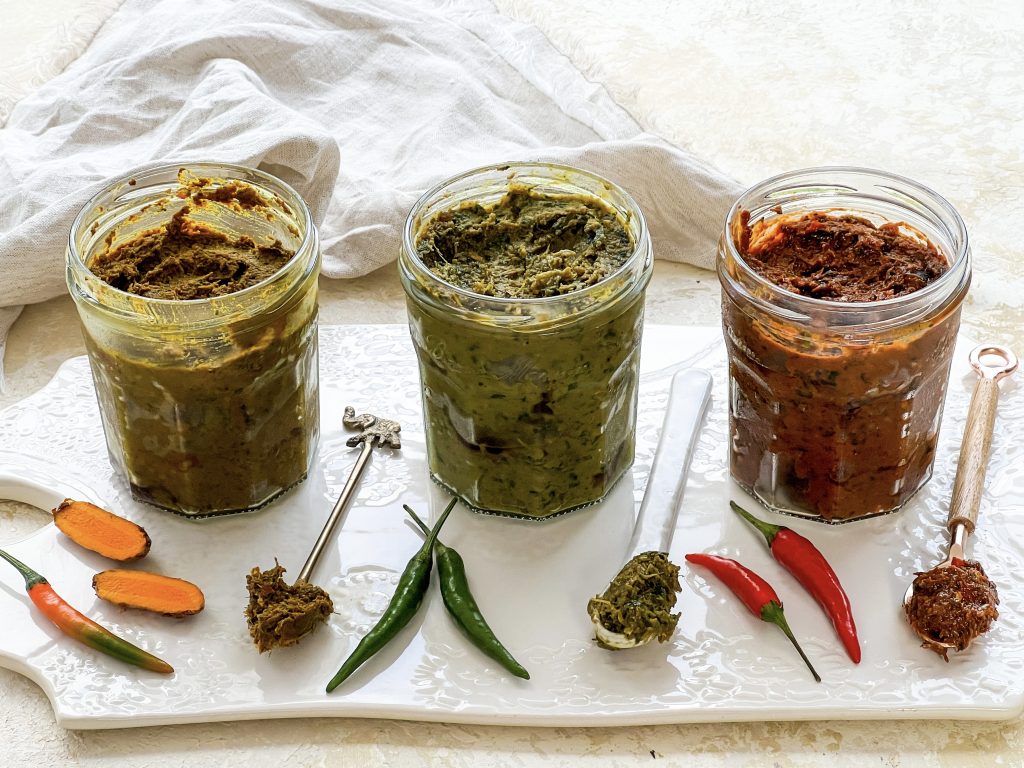
What is the difference between Thai Green, Red and Yellow Curry Pastes?
Traditionally these pastes were made using the same ingredients, it was merely the colour of the chillies used, and hence the colour of the paste, which varied. However, over time, they have developed to include slightly different ingredients, and as ever, with classic and traditional food and dishes, there are an infinite number of recipes with slight variations. There seems to be little consensus on which is the hotter paste, red or green, although yellow is most commonly the mildest. A red paste made by one chef can be far hotter than a green paste made by another, and vice versa.
Where is the recipe from?
The recipes I use have developed and changed over the years but are based on recipes from my favourite Thai Cookery book called ‘Spirit House’. The Spirit House is a renowned and award winning contemporary Asian restaurant and cookery school in Noosa, Queensland, Australia.
Why roast the garlic and shallots?
The way I prepare the garlic and shallots is not classic to this recipe. Normally they are added uncooked. However, when you roast whole bulbs of garlic and shallots in the oven for 40 minutes they become soft and creamy and develop a rich, mellow, sweet flavour. This adds depth and complexity to the paste and helps to create the lovely soft and smooth texture you are seeking. If you choose not to roast the garlic and shallots, do not add the same quantity raw. The flavours would be overpowering. I recommend adding 3 peeled shallots, around 60g prepared weight, and around 12 – 15 peeled cloves of garlic, around 40 – 45g prepared weight.
How to make Thai Yellow Curry Paste
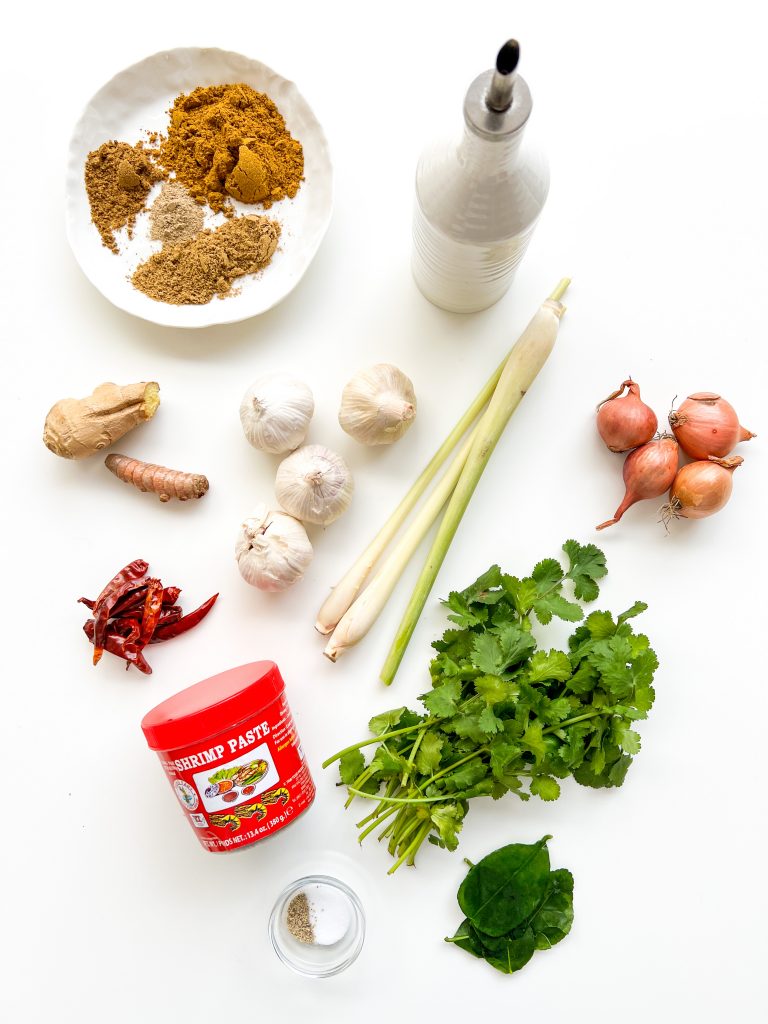
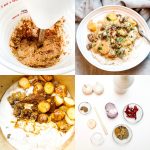
Collect all your ingredients together:
- vegetable oil
- whole bulbs of garlic
- shallots, peeled
- dried red chillies
- curry powder
- ground coriander
- ground cumin
- turmeric powder
- cardamom powder
- lemongrass, peeled and finely chopped
- galangal or ginger, chopped
- fresh turmeric, chopped
- kaffir lime leaves, tough centre stalk of each leaf removed and roughly shredded
- coriander roots, chopped
- coriander leaves and stems
- shrimp paste
- ground white pepper
- fine salt
How to make this amazing yellow curry paste:
- The garlic: slice the top quarters off the whole bulbs of garlic. Put the garlic in the centre of a piece of foil. Loosely gather the foil up at the sides of the the garlic and pour ½ teaspoon of vegetable oil over each bulb. Seal the foil around the top of the garlic bulbs, place on a baking tray in the pre-heated oven for 40 minutes, or until soft. Remove from the oven and allow to cool for around 5 -10 minutes.
- The shallots: peel the shallots and place into the centre of a second piece of foil. Drizzle with the remaining 2 teaspoons oil, and seal the foil around the top of the shallots. Place in the oven, on the baking tray with the garlic, and cook for 30 – 35 minutes, or until soft. Remove from the oven and allow to cool for around 5 -10 minutes.
- The dried chillis: put the dried chillies in a heatproof bowl and cover with boiling water. Leave for 30 minutes to soften.
- Spices: Heat your frying pan to medium hot and add the curry, coriander, cumin, turmeric and coriander spices. Cook for 10 – 15 seconds, stirring, until fragrant. Transfer to your food processor.
- Galangal/ginger, lemongrass and turmeric: remove the hard base from the lemon grass, peel the outer layers and roughly chop. Roughly chop the galangal/ginger and turmeric. There is no need to peel the galangal/ginger or turmeric. Add to the food processor.
- Kaffir lime leaves: remove the tough centre stalk from each lime leaf and roughly shred. Add to the food processor.
- Dried red chillies: remove the stems from the dried chillies, if necessary, and discard. Finely chop the chillies and add to the processor.
- Remaining ingredients: roughly chop the coriander roots, stems, leaves and add to the food processor with the shrimp paste, white pepper and salt.
- Blitz: blitz all these ingredients in a food processor until they are broken down and chopped as small as possible.
- Garlic and shallots: unwrap the cooked and slightly cooled garlic and very carefully squeeze the cooked cloves into the food processor. Add any juices from the foil into the processor as well.
- Also add the shallots and any juices to the food processor and blitz until thoroughly mixed and creamy.
- Store in the fridge: transfer to a sterilised jar, seal with a lid and store in the fridge.
- Store in the freezer: if you’d rather freeze the paste, measure into 1 tablespoon size portions and place onto a baking parchment lined baking tray or chopping board. Roughly cover with cling film and place in the freezer. When solid, transfer to an airtight container or freezer bag. They can be stored in the freezer for up to 6 months. Defrost before use.
Ingredients 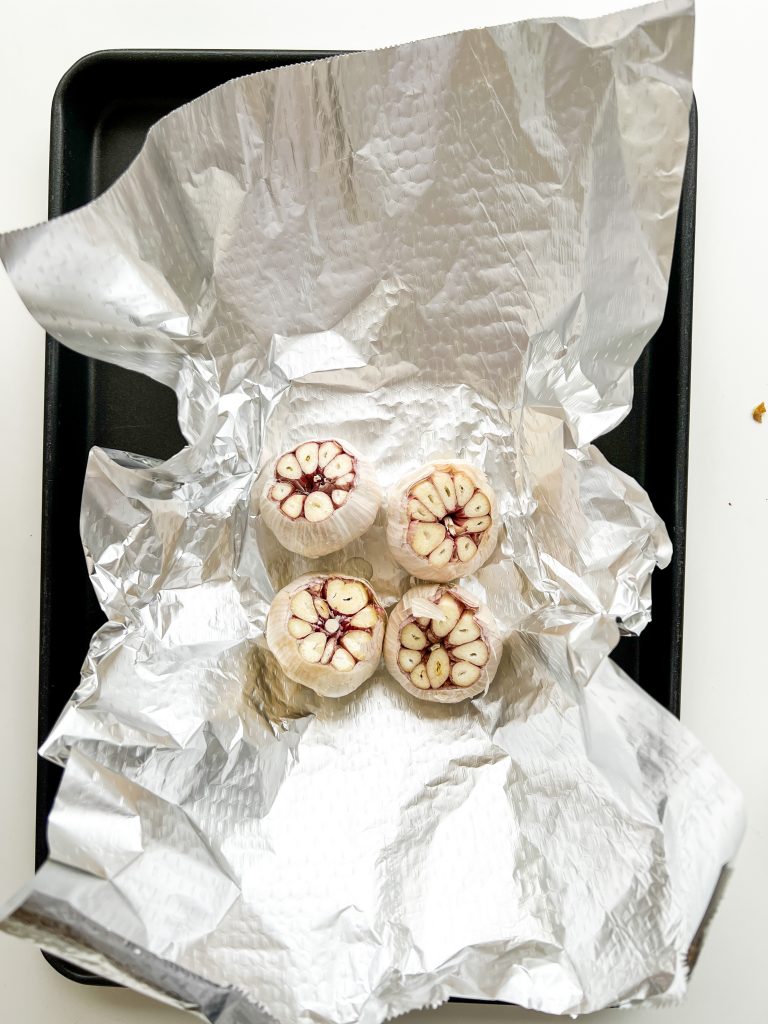
1 Garlic 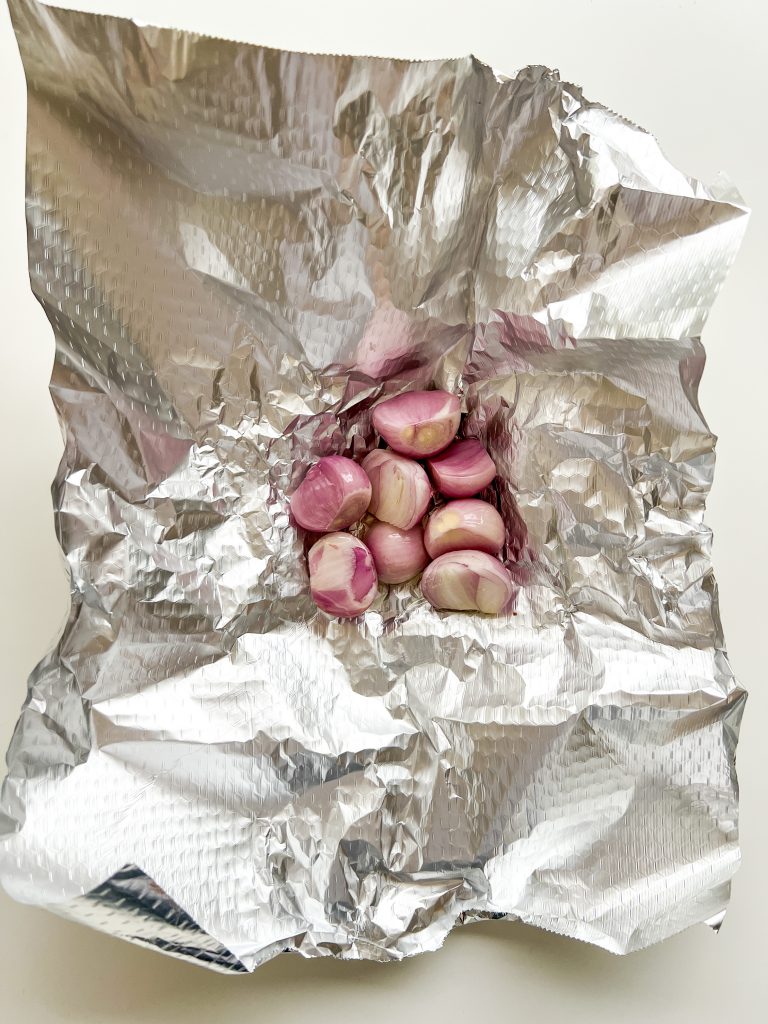
2 Shallots 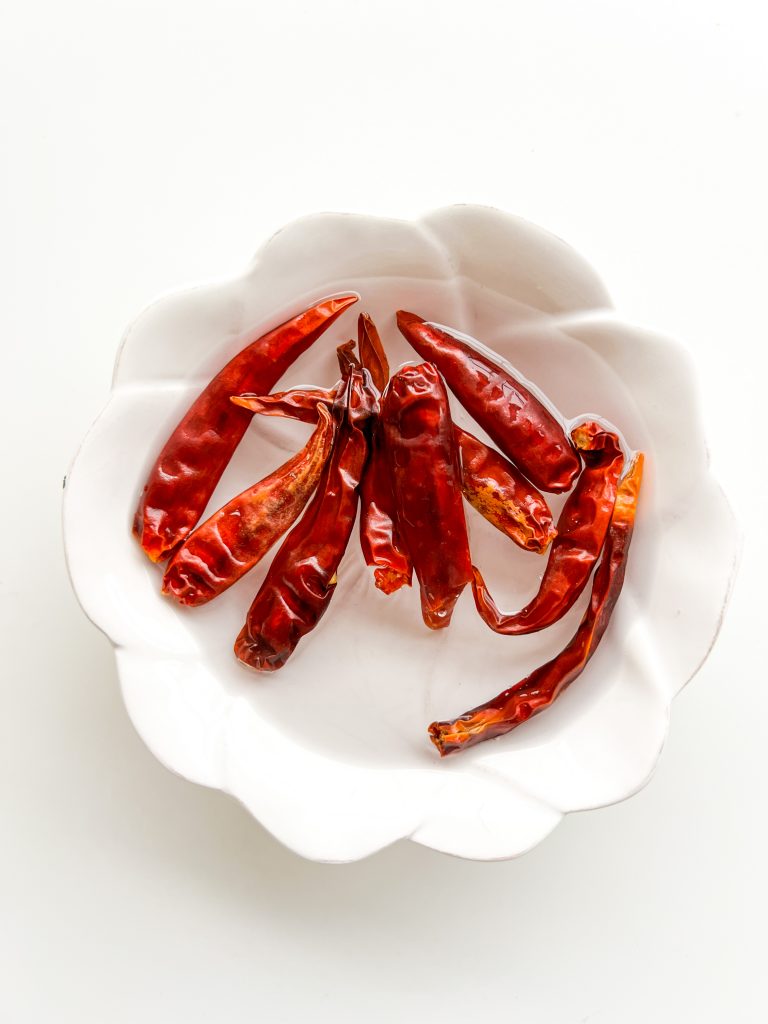
3 Dried chillies 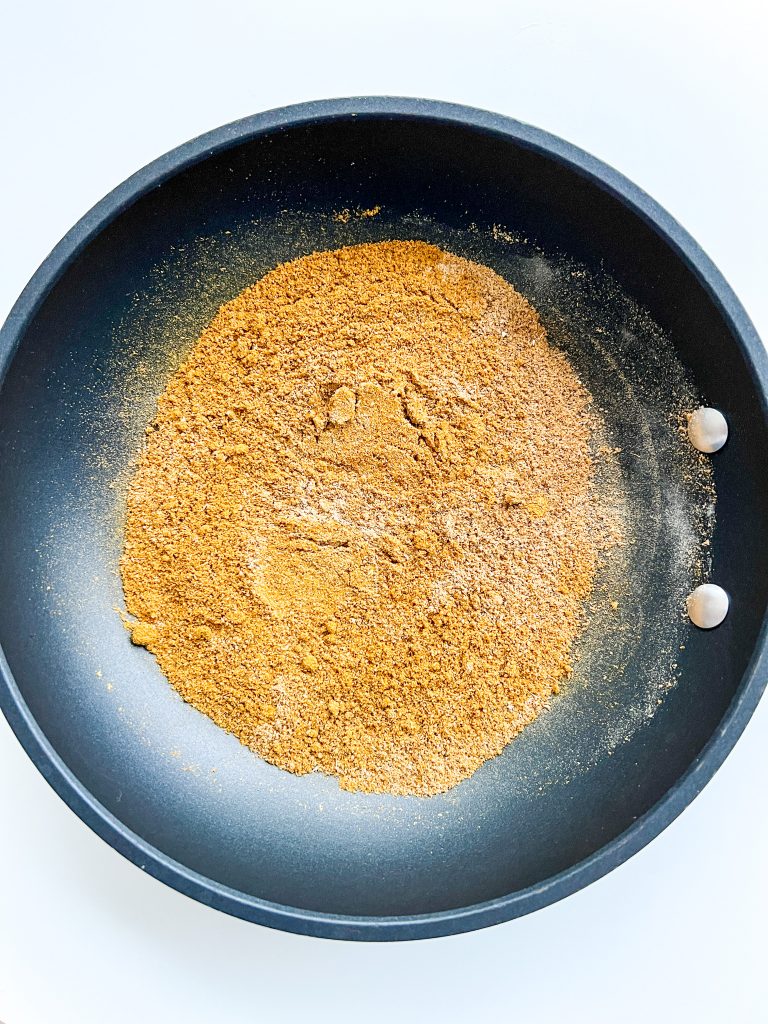
4 Spices 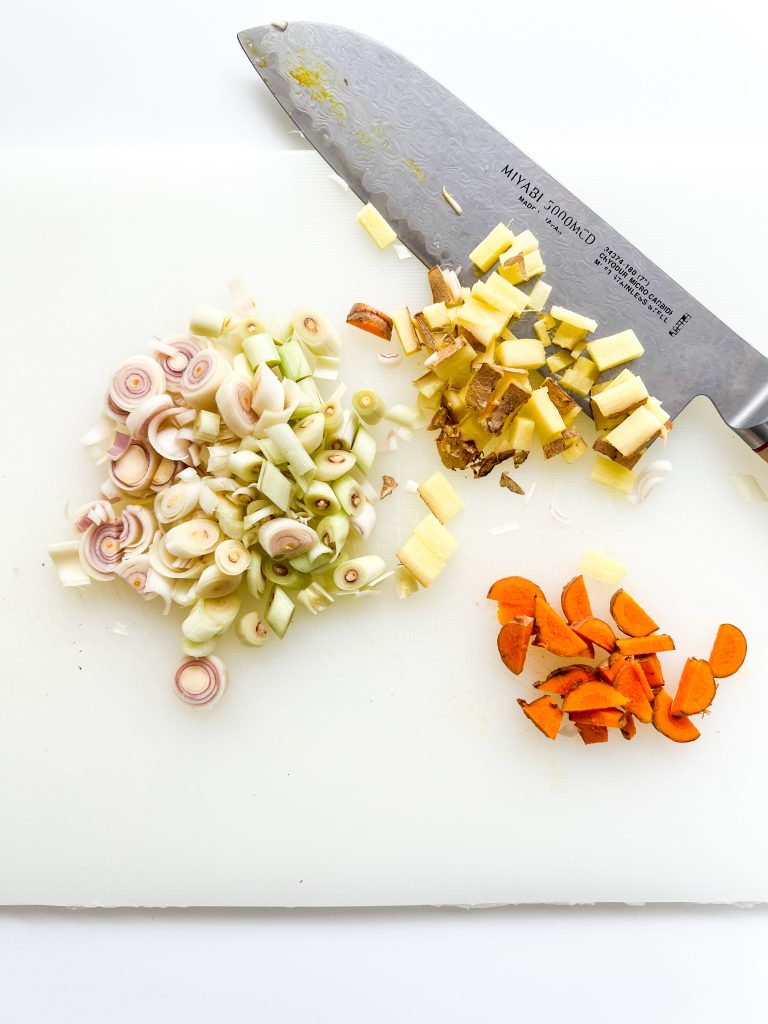
5 Galangal/ginger, lemongrass, turmeric 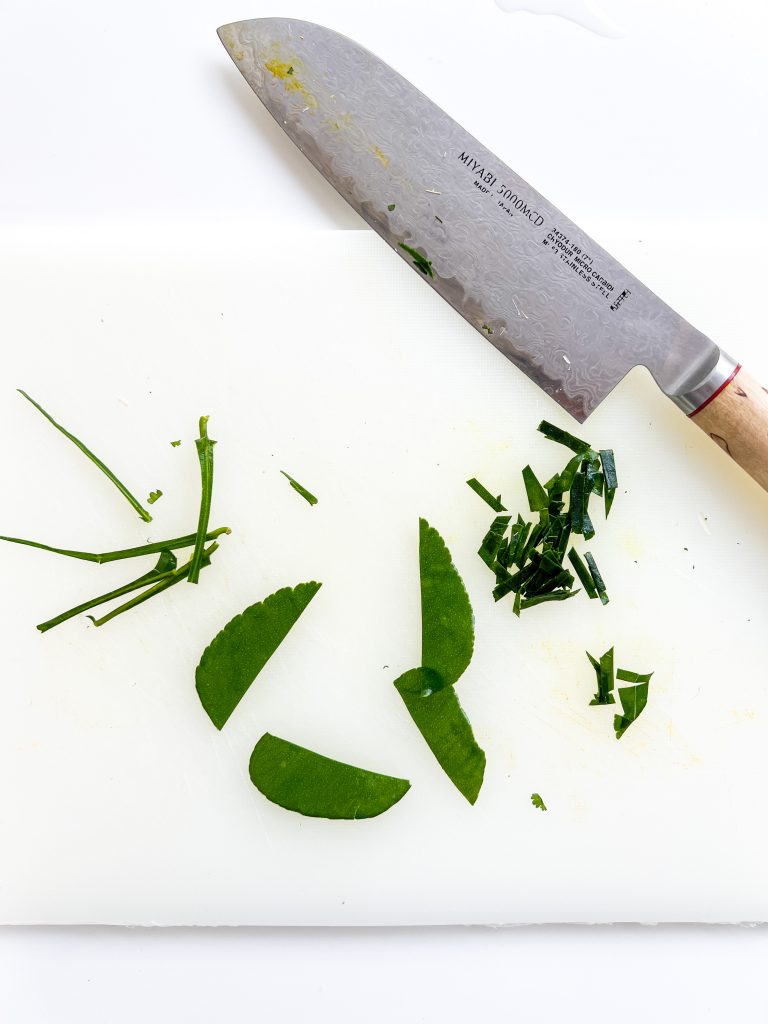
6 Kaffir lime leaves 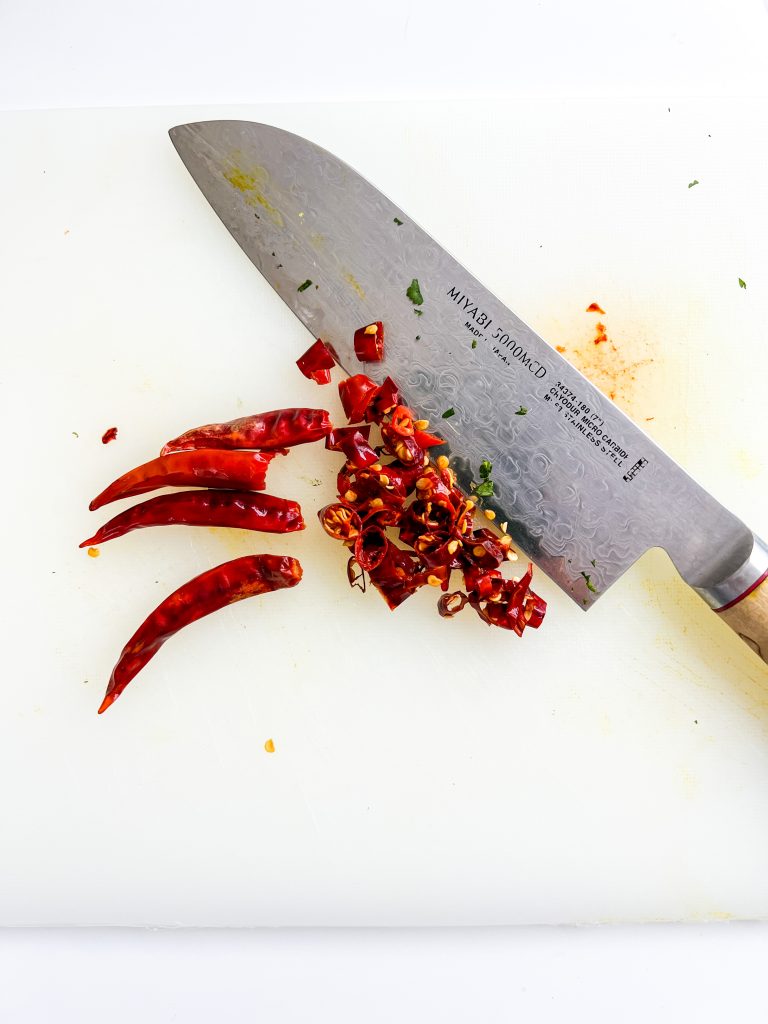
7 Red chillies 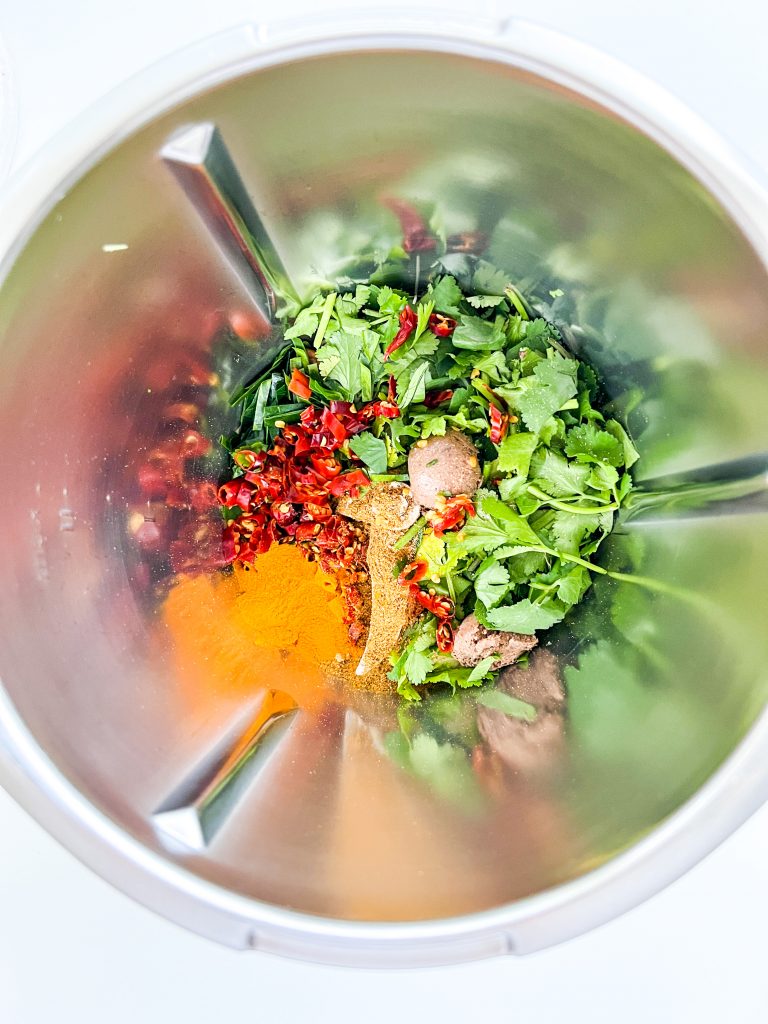
8 Food processor 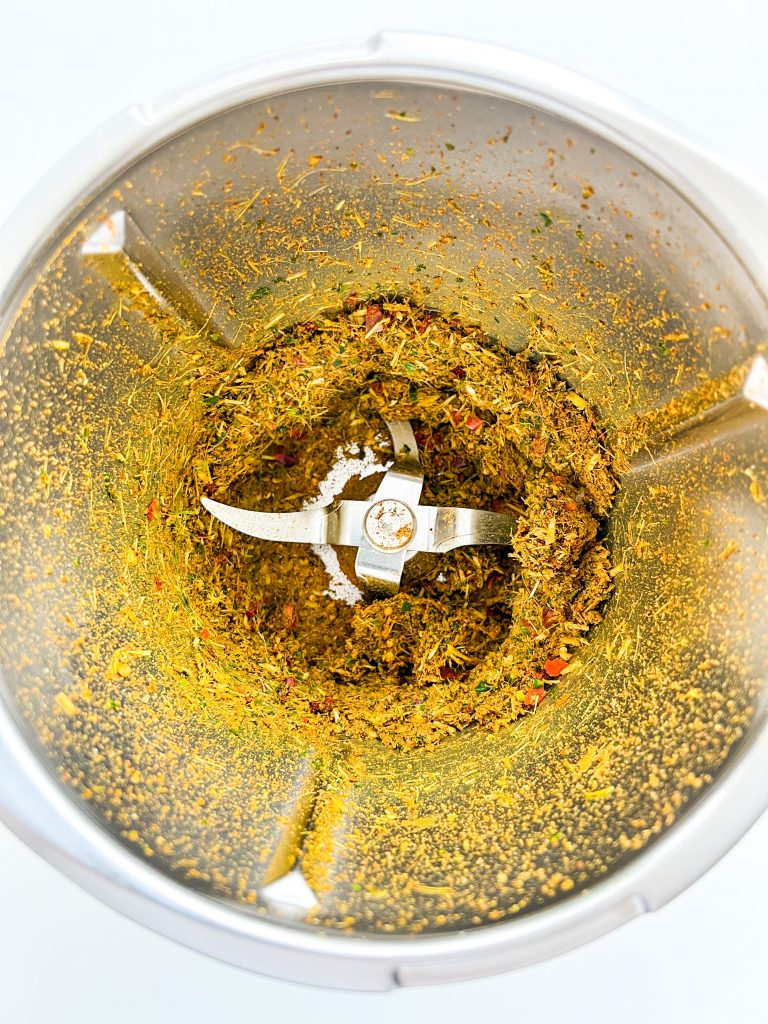
9 Blitz 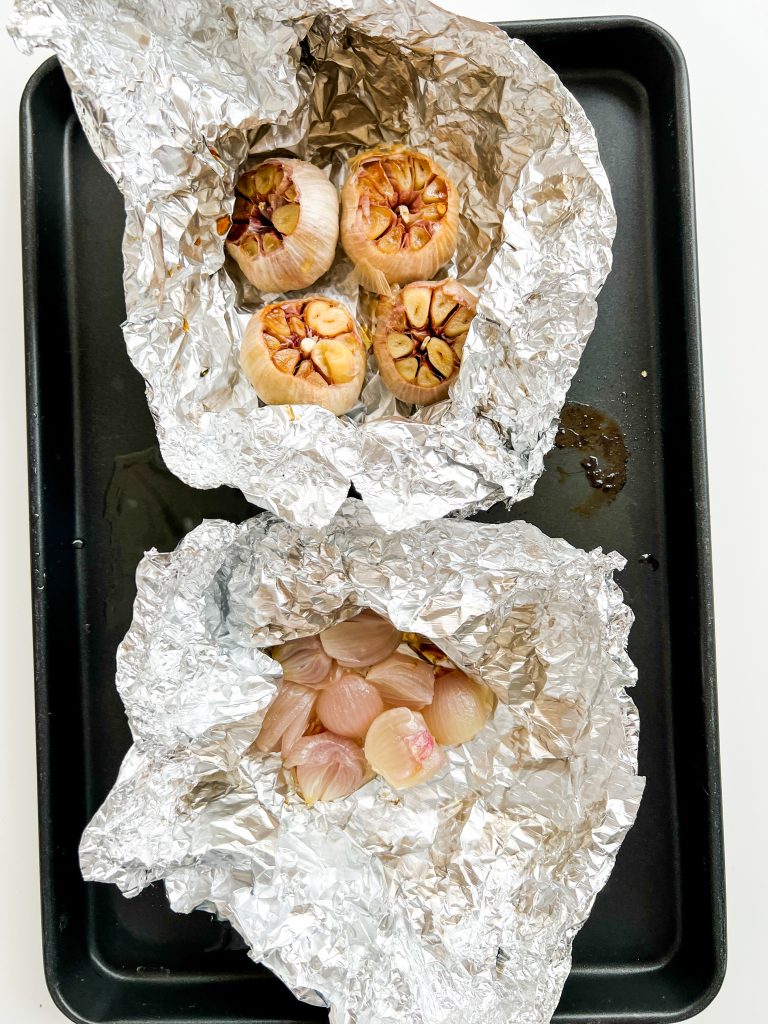
10 Cooked garlic, shallots 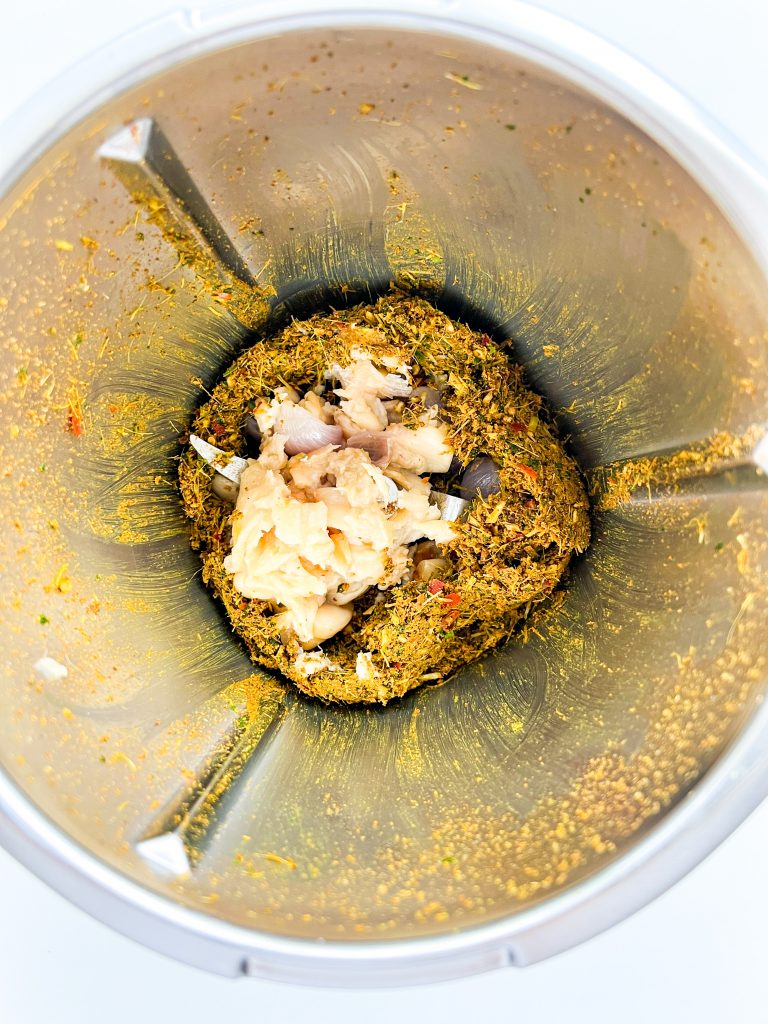
11 Add to processor 
Blitz again 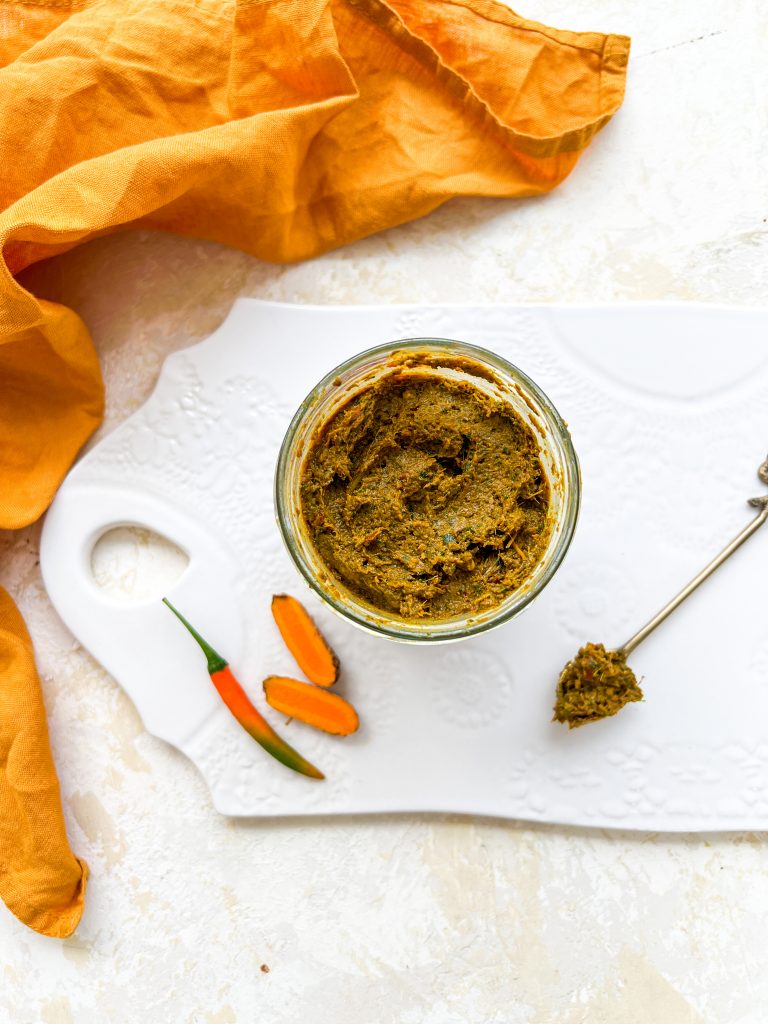
12 Transfer to jar
How to sterilise jam jars
- Wash the jam jars and lids in hot water, place on a baking tray and put in a cold oven.
- Turn the oven on to Fan Oven 140°C/160°C/325°F/Gas 3.
- Leave the jars in the oven for 20 minutes. They are now sterilised. Obviously they will be very hot, so be very careful.
- Cool the jars before adding the curry paste.
Made this recipe?
If you make this recipe, do please tag me on instagram @daffodil_kitchen. You could also leave a comment in the box directly below the recipe.
Thai Yellow Curry Paste
Thai Yellow Curry Paste is typically milder than the classic red and green curry pastes and uses more Indian inspired spices and flavours. As such it works particularly well with fish and for those who prefer milder flavours.
Makes 290g. A tablespoon weighs 18g – 20g.
Ingredients
- 4 teaspoons vegetable oil
- 4 whole bulbs of garlic
- 4 shallots, peeled (80g prepared weight)
- 10 dried red chillies (3 – 4g)
- 2 tablespoons curry powder
- 2 teaspoons ground coriander
- 1 teaspoon ground cumin
- 1 teaspoon turmeric powder
- ½ teaspoon cardamom powder
- 40g lemongrass, peeled and finely chopped (40g trimmed weight, 4-5 stalks)
- 15g galangal or ginger, chopped, no need to peel
- 10g fresh turmeric, chopped (skin on)
- 4 – 5 kaffir lime leaves, tough centre stalk of each leaf removed and leaves roughly shredded
- 10g coriander roots, chopped (4 – 6 roots)
- 10g coriander leaves and stems
- 2 teaspoons shrimp paste
- ½ teaspoon ground white pepper
- ½ teaspoon fine salt
Instructions
-
Collect together your equipment (see Recipe Notes below) and ingredients.
-
Preheat oven to Fan Oven 180°C/200°C/400°F/Gas 6
-
The garlic: slice the top quarters off the whole bulbs of garlic. Put the garlic in the centre of a piece of foil. Loosely gather the foil up at the sides of the the garlic and pour ½ teaspoon of vegetable oil over each bulb. Seal the foil around the top of the garlic bulbs, place on a baking tray in the pre-heated oven for 40 minutes, or until soft. Remove from the oven and allow to cool for around 5 -10 minutes.
-
The shallots: peel the shallots and place into the centre of a second piece of foil. Drizzle with the remaining 2 teaspoons oil, and seal the foil around the top of the shallots. Place in the oven, on the baking tray with the garlic, and cook for 30 – 35 minutes, or until soft. Remove from the oven and allow to cool for around 5 -10 minutes.
-
The dried chillis: put the dried chillies in a heatproof bowl and cover with boiling water. Leave for 30 minutes to soften.
-
Spices: Heat your frying pan to medium hot and add the curry, coriander, cumin, turmeric and coriander spices. Cook for 10 – 15 seconds, stirring, until fragrant. Transfer to your food processor.
-
Galangal/ginger, lemongrass and turmeric: remove the hard base from the lemon grass, peel the outer layers and roughly chop. Roughly chop the galangal/ginger and turmeric. There is no need to peel the galangal/ginger or turmeric. Add to the food processor.
-
Kaffir lime leaves: remove the tough centre stalk from each lime leaf and roughly shred. Add to the food processor.
-
Dried red chillies: remove the stems from the dried chillies, if necessary, and discard. Finely chop the chillies and add to the processor.
-
Remaining ingredients: roughly chop the coriander roots, stems, leaves and add to the food processor with the shrimp paste, white pepper and salt.
-
Blitz: blitz all these ingredients in a food processor until they are broken down and chopped as small as possible.
-
Garlic and shallots: unwrap the cooked and slightly cooled garlic and very carefully squeeze the cooked cloves into the food processor. Add any juices from the foil into the processor as well.
-
Also add the shallots and any juices to the food processor and blitz until thoroughly mixed and creamy.
-
Store in the fridge: transfer to a sterilised jar, seal with a lid and store in the fridge.
-
Store in the freezer: if you’d rather freeze the paste, measure into 1 tablespoon size portions and place onto a baking parchment lined baking tray or chopping board. Roughly cover with cling film and place in the freezer. When solid, transfer to an airtight container or freezer bag. They can be stored in the freezer for up to 6 months. Defrost before use.
Recipe Notes
Equipment:
- kitchen scales and measuring spoons
- chopping board and knife
- baking tray
- kitchen foil
- small bowl for the dried chillies
- small frying pan
- food processor
- 400g sterilised jam jar
How to sterilise jam jars:
- Wash the jam jars and lids in hot water, place on a baking tray and put in a cold oven.
- Turn the oven on to Fan Oven 140°C/160°C/325°F/Gas 3.
- Leave the jars in the oven for 20 minutes. They are now sterilised. Obviously they will be very hot, so be very careful.
- Cool the jars before adding the curry paste.
Where is this recipe from?
The recipes I use have developed and changed over the years but are based on recipes from my favourite Thai Cookery book called ‘Spirit House’. The Spirit House is a renowned and award winning contemporary Asian restaurant and cookery school in Noosa, Queensland, Australia.
Why roast the garlic and shallots?
The way I prepare the garlic and shallots is not classic to this recipe. Normally they are added uncooked. However, when you roast whole bulbs of garlic and shallots in the oven for 40 minutes they become soft and creamy and develop a rich, mellow, sweet flavour. This adds depth and complexity to the paste and helps to create the lovely soft and smooth texture you are seeking. If you choose not to roast the garlic and shallots, do not add the same quantity raw. The flavours would be overpowering. I recommend adding 3 peeled shallots, around 60g prepared weight, and around 12 – 15 peeled cloves of garlic, around 40 – 45g prepared weight.


Thai Red Curry Paste

You May Also Like

Chocolate Biscuit Cake
Spicy Cauliflower, Broccoli and Green Pea Stew with Spinach, Ginger, Black Beans and Coconut