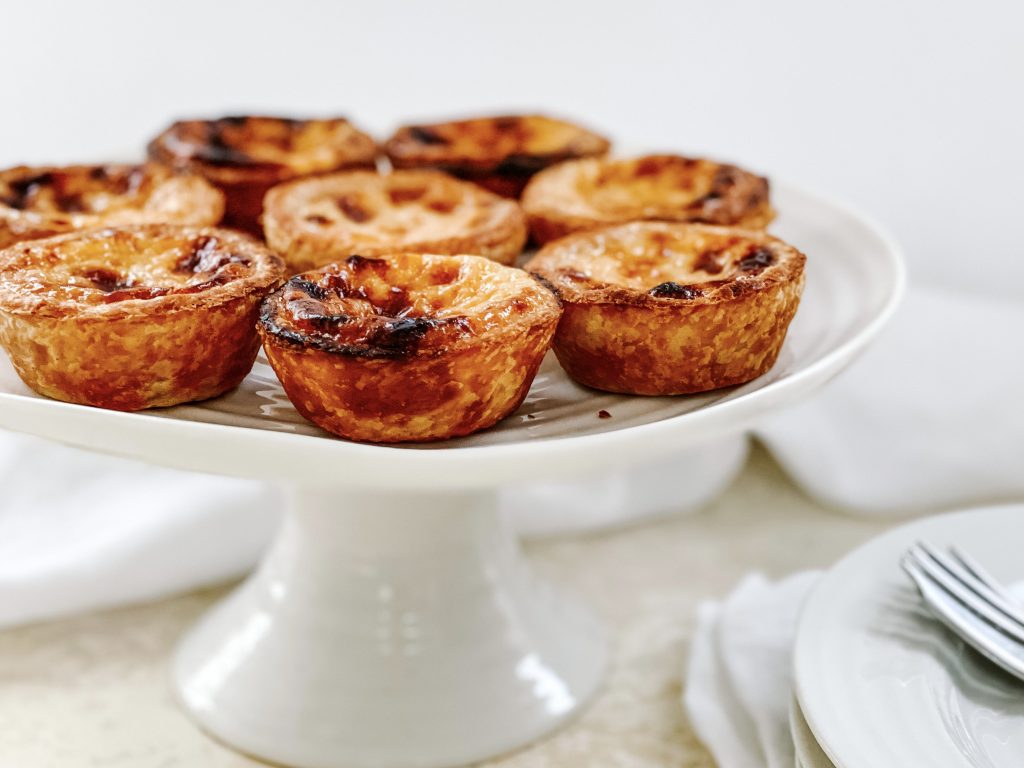
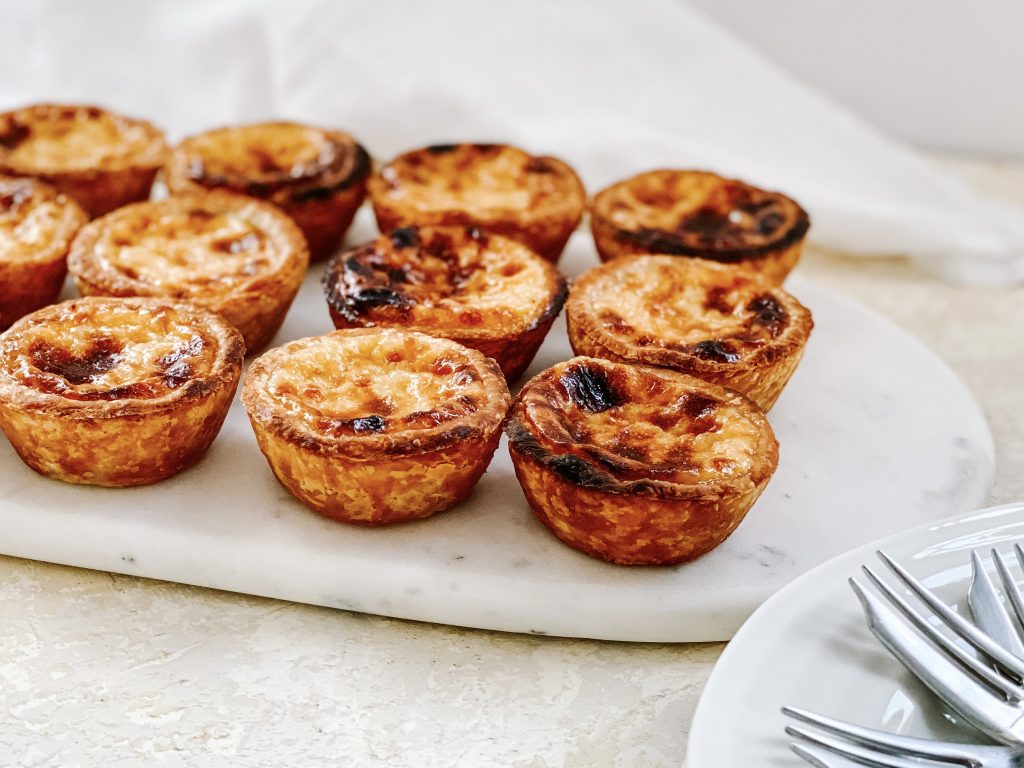
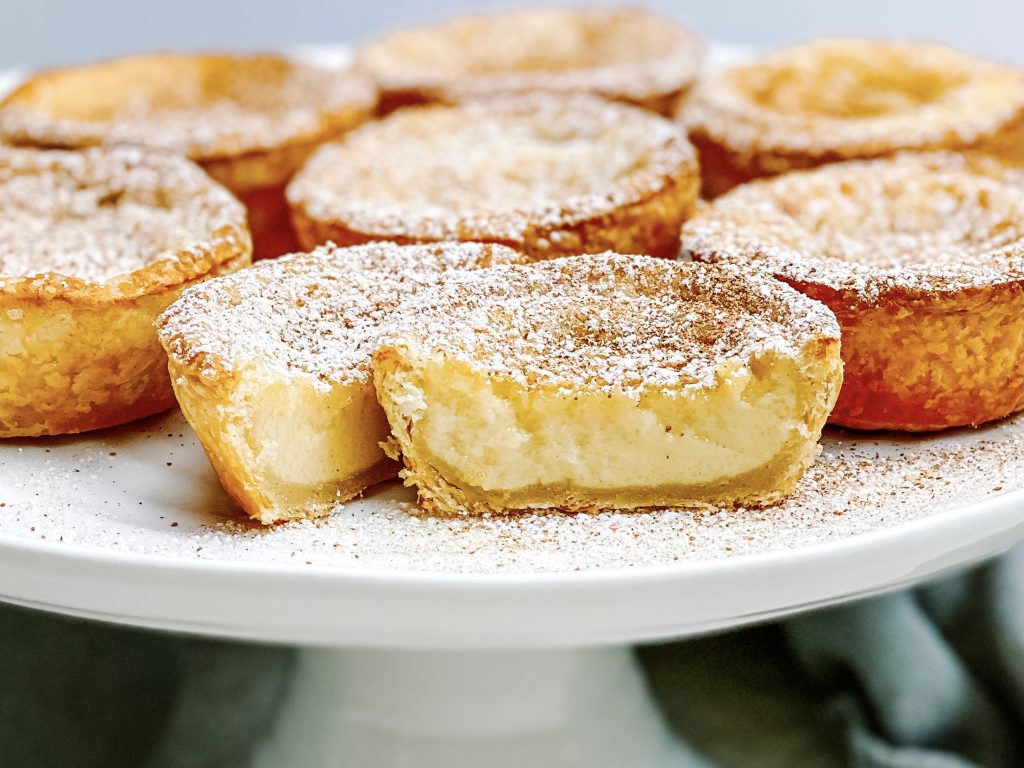
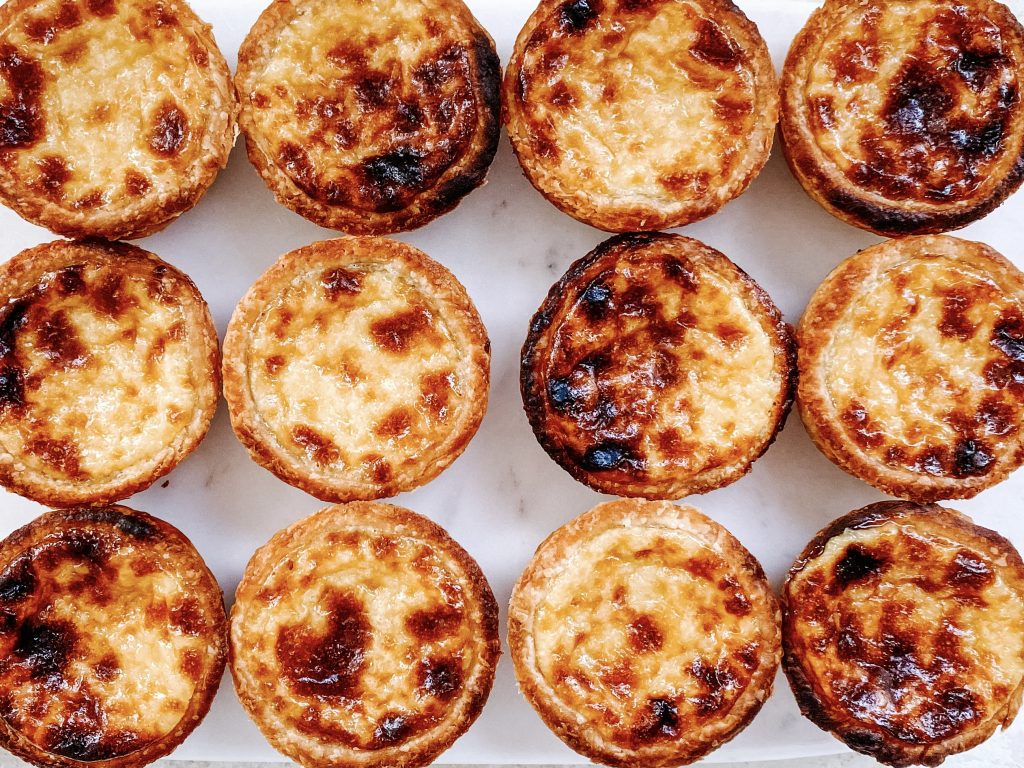
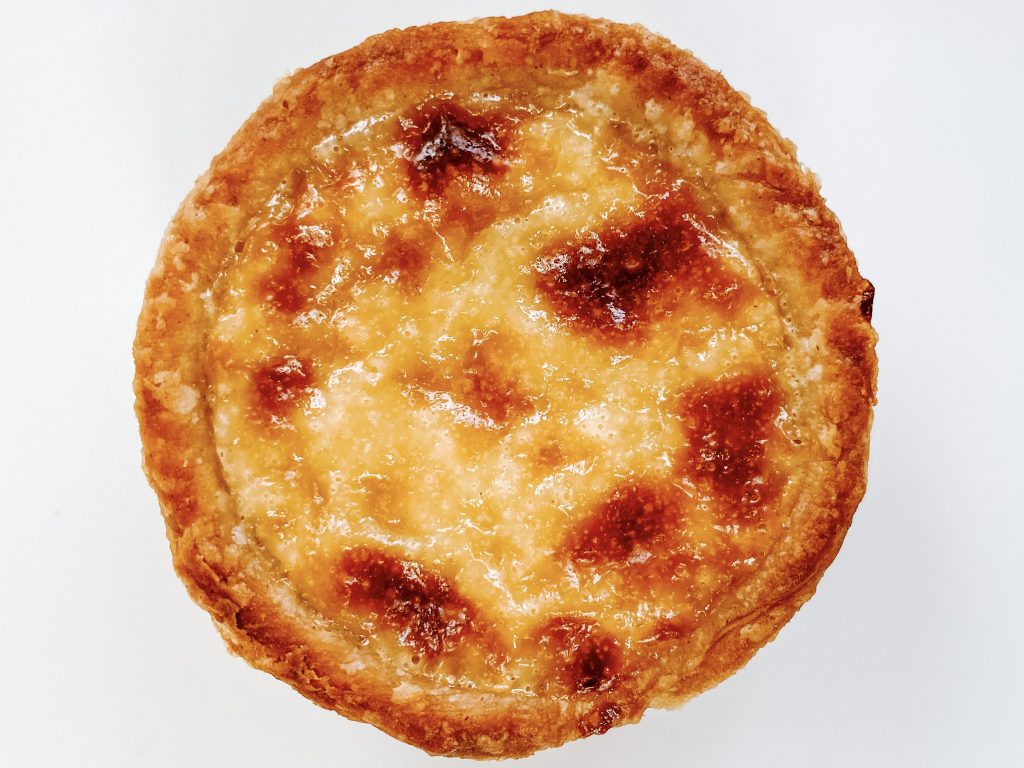
Pastéis de Nata – Portuguese Custard Tarts
Glorious, silky smooth, cinnamon and lemon scented custard in a light and crispy, buttery puff pastry. My idea of absolute heaven.
The best Pastéis de Nata I have ever eaten was a couple of years ago, when we went to Lisbon for Charlotte’s 21st birthday. We tried a few in different bakeries in the city, but, of course, we couldn’t possibly leave without going to the most famous bakery of them all, Fábrica de Pastéis de Belém. They have been selling Pastel de Nata using the same recipe here since 1837.
The recipe for Pastéis de Nata was originally created by monks at the Jerónimos Monastery, in the suburb of Belem in Lisbon, over 300 years ago. At that time, monks and nuns used egg whites to starch their clothes and, inevitably, they would end up with an over-abundance of egg yolks. More often than not, these were used to make sweet pastries which would be handed out within their local communities.
After the dissolution of religious orders in 1820 and the loss of state funding, many monasteries and convents started selling, rather than gifting, cakes and pastries, to raise funds. When the Jerónimos monastery was forced to shut in 1834, the monks sold the recipe to the local sugar factory, and in 1837, they opened the now incredibly famous bakery, Fábrica de Pastéis de Belém. The bakery is still run by the same family and the actual original recipe remains secret to this day. Whilst we enjoyed many tarts from different bakeries in Lisbon, (and indeed here in the UK) none compared to the fresh warm ones we queued for an hour to buy in Belem. They were simply outstanding.
When I started Daffodil Kitchen, I wanted, not only to document recipes for Charlotte and Emma, but also to learn new skills and improve my cooking. These heavenly tarts were at the top of the list of recipes I wanted to master. So I contacted Mariana from @one_bake_at_a_time. Mariana is Portuguese, but lives in London, and is an incredible baker. Under her guiding and watchful eye, more than one attempt, and lots of questions and answers flying back and forth, I think I have mastered Pastéis de Nata.
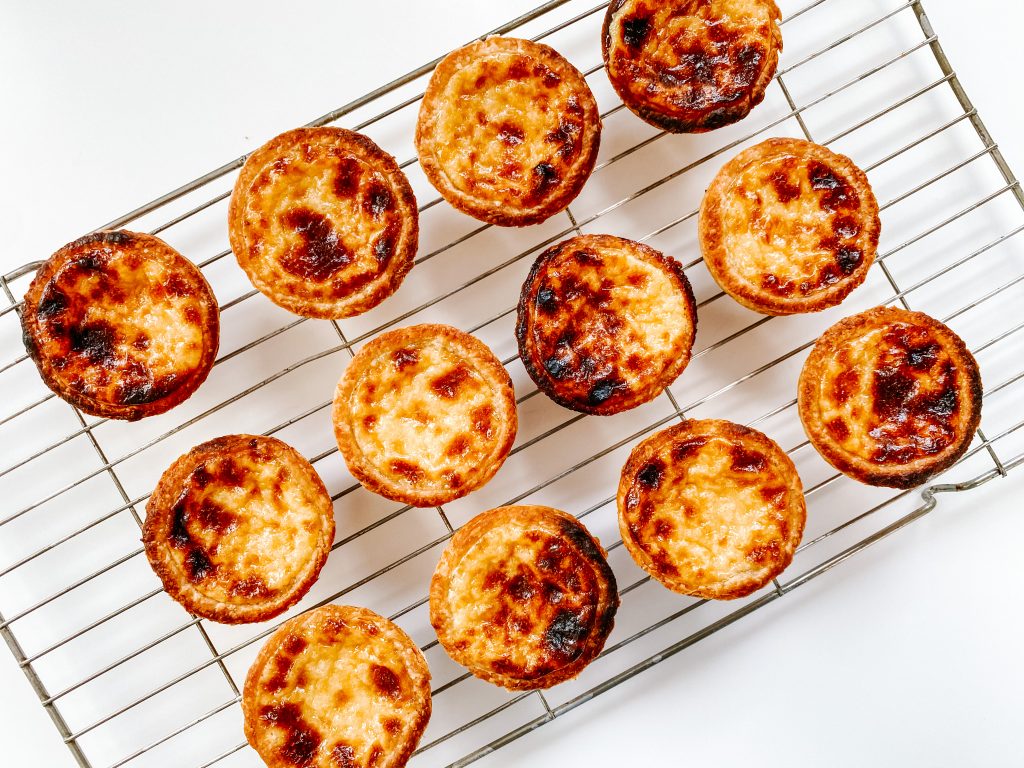
Ideally these tarts are cooked at a very high heat. My oven heats up to 290C and this really helps create that caramelised look we are striving for. If your oven doesn’t get that hot, they will still be incredibly delicious but not quite so caramelised and may take a little longer to cook. The tarts below were cooked at 240C and I have added some sieved icing sugar and cinnamon to the top. This is a classic topping, which I don’t add when I cook them in a really hot oven, but like to add if cooking in a cooler oven.
I have included VERY detailed instructions, because that is what I needed! Whilst not easy, they really are not too difficult either. However, if you are making your own puff pastry, they do take quite a long time. Consider them a labour of love and I guarantee you will love them!
How to make Pastéis de Nata
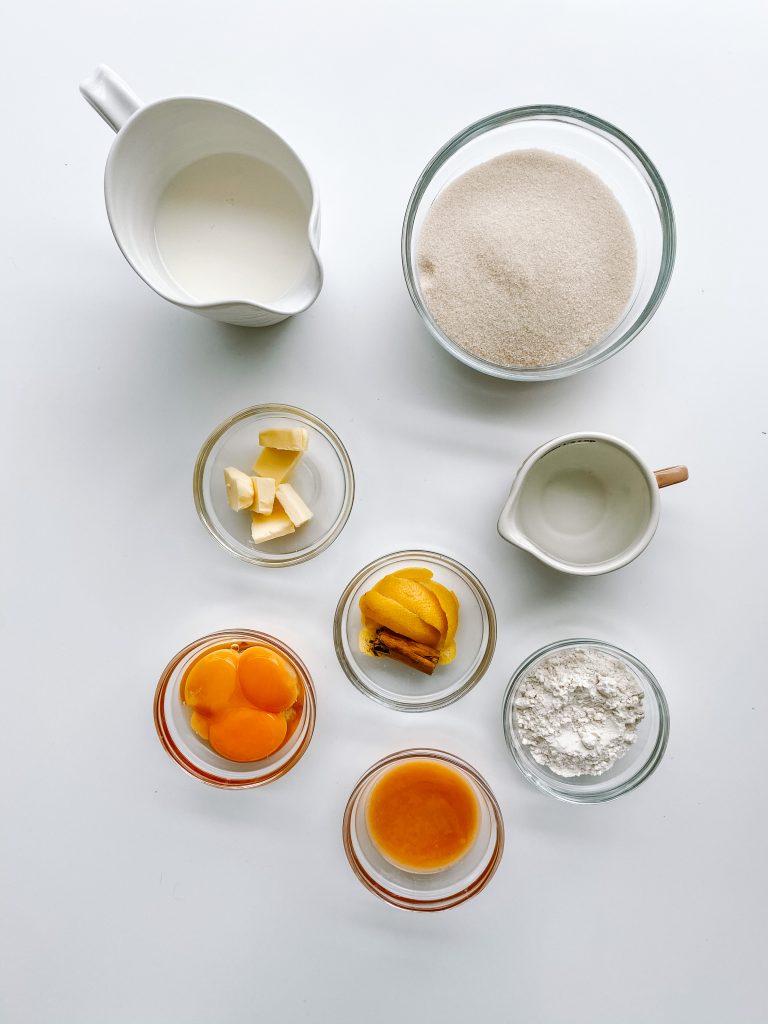
Collect all your ingredients together:
Puff pastry:
- puff pastry either homemade (see here) or shop bought
For the custard:
- caster sugar
- water
- lemon peel
- cinnamon stick
- full fat milk
- plain/all-purpose flour
- eggs yolks
- whole egg
- unsalted butter
- pinch of salt
Now make the Pastéis de Nata:
Puff pastry –
- First make the puff pastry – if you are making your own pastry, you need to make this first. You should start making it 5 – 5½ hours before you want to make the tarts.
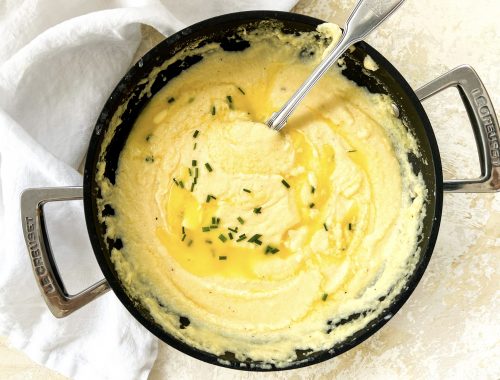
The custard –
- Secondly, make the custard, starting time time for it to cool down – heat the sugar, water, lemon peel and cinnamon over a moderate heat until the sugar has dissolved, and it reaches 106°C/223°F. It will turn into a thick syrup.
- Strain the syrup.
- Meanwhile, in a heatproof jug, mix the flour with 95ml milk to make a paste.
- Bring the remaining milk to a simmer and when steaming pour over the milk and flour paste and mix thoroughly with a balloon whisk.
- Wash the saucepan thoroughly – this is an important step. If you do not do this, your custard may stick to the base of the pan and burn.
- Pour the milk and flour back into the clean saucepan. Heat over a moderate temperature and cook, stirring for 3 minutes, until thickened.
- Slowly add the syrup to the flour and milk, whisking all the time.
- In a large bowl, beat the eggs – slowly add the custard, beating as you pour it in with a balloon whisk.
- As soon as it is all incorporated, add the butter and beat until it is incorporated.
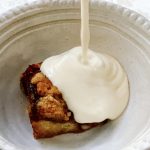
- Strain the custard into a jug or bowl.
- Cover with cling film and set on one side.
Custard ingredients 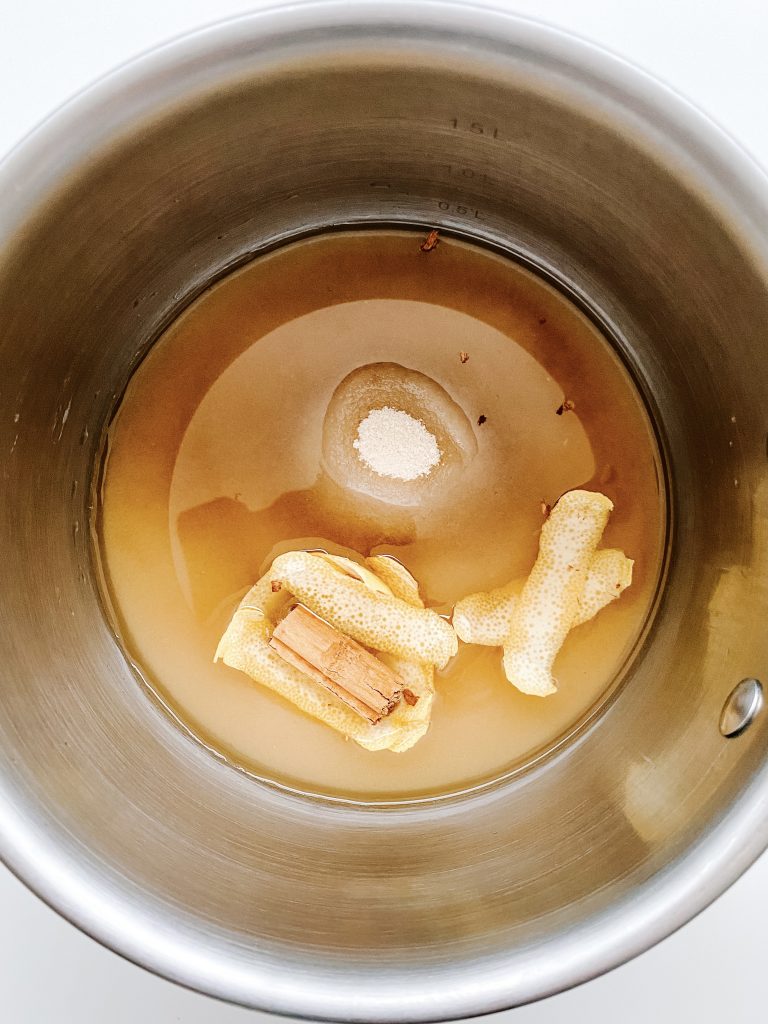
1 Heat sugar, water, lemon peel & cinnamon … 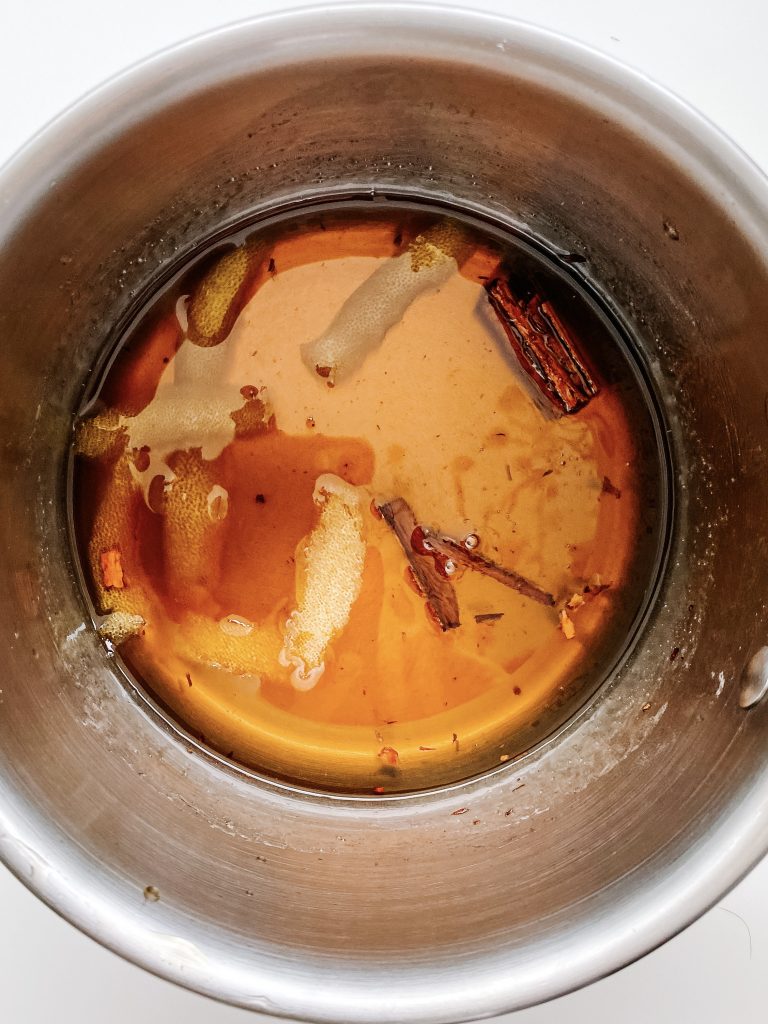
… until it reaches 106°C 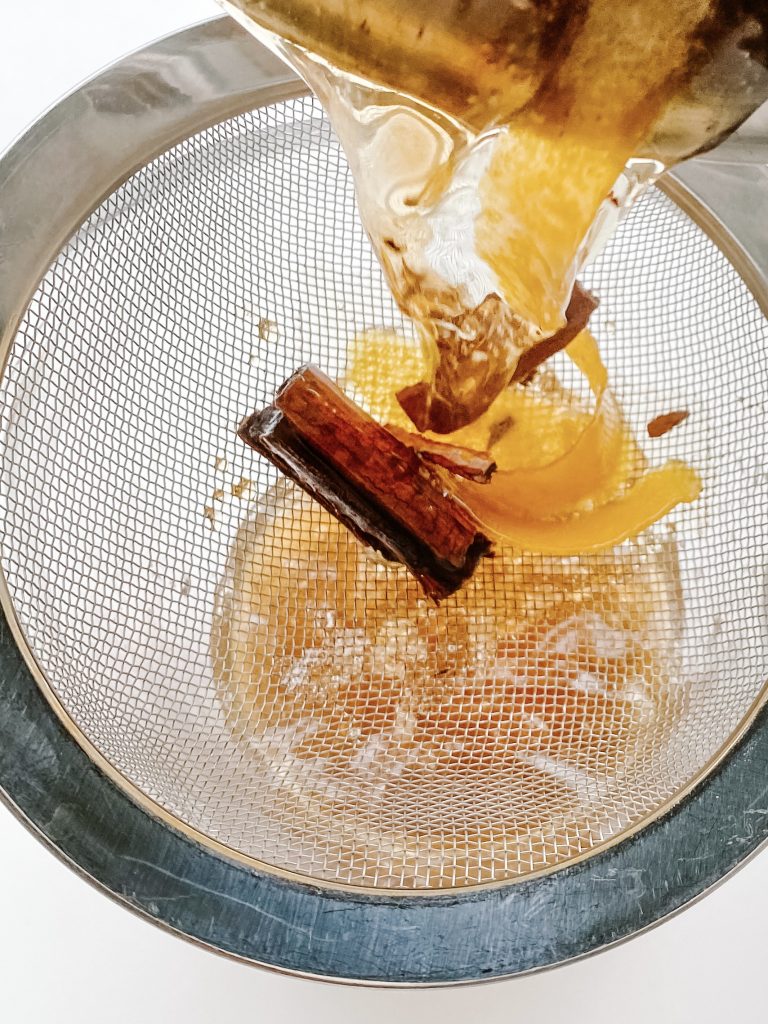
2 Strain 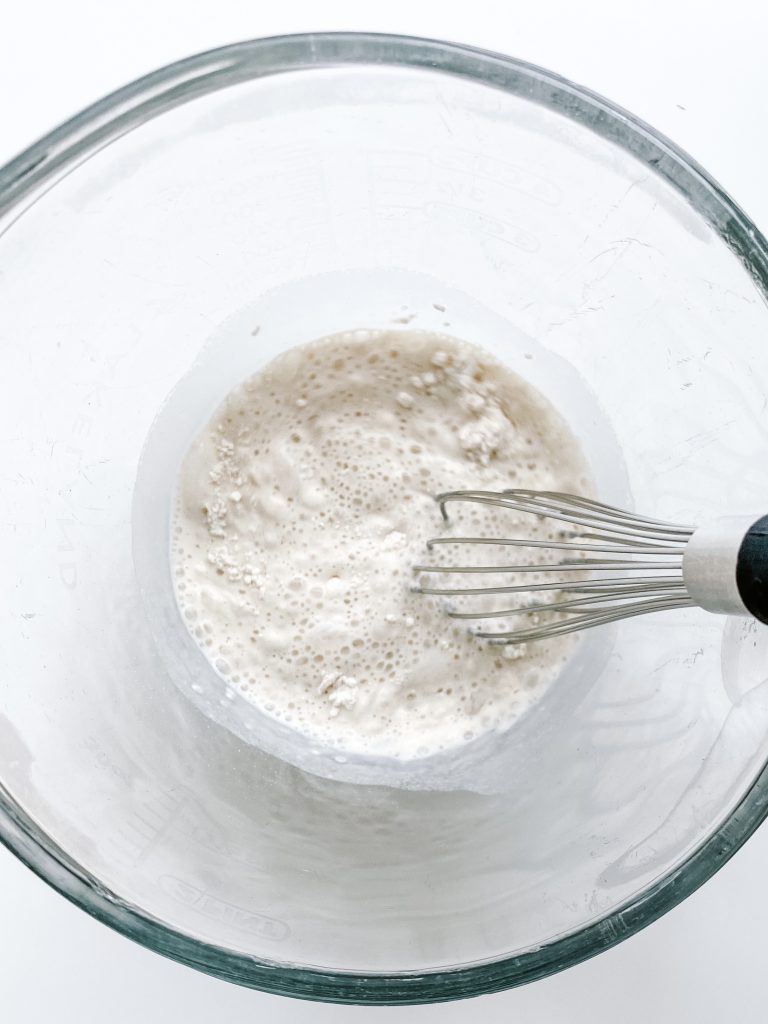
3 Mix flour with 95ml milk 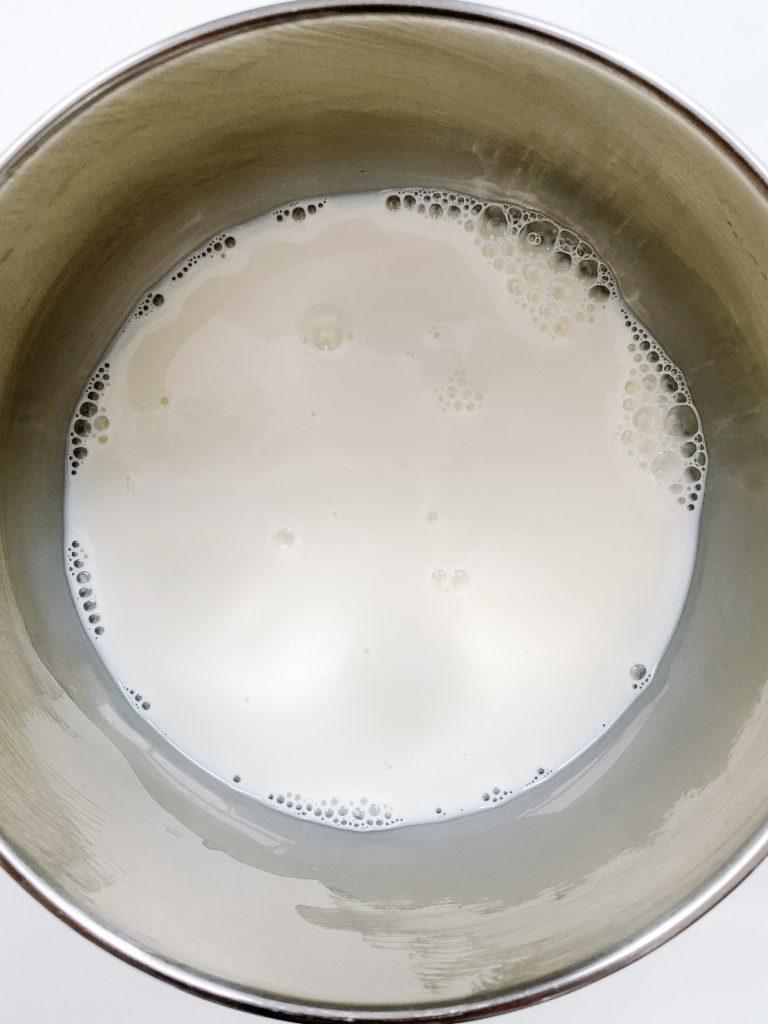
4 Heat remaining milk … 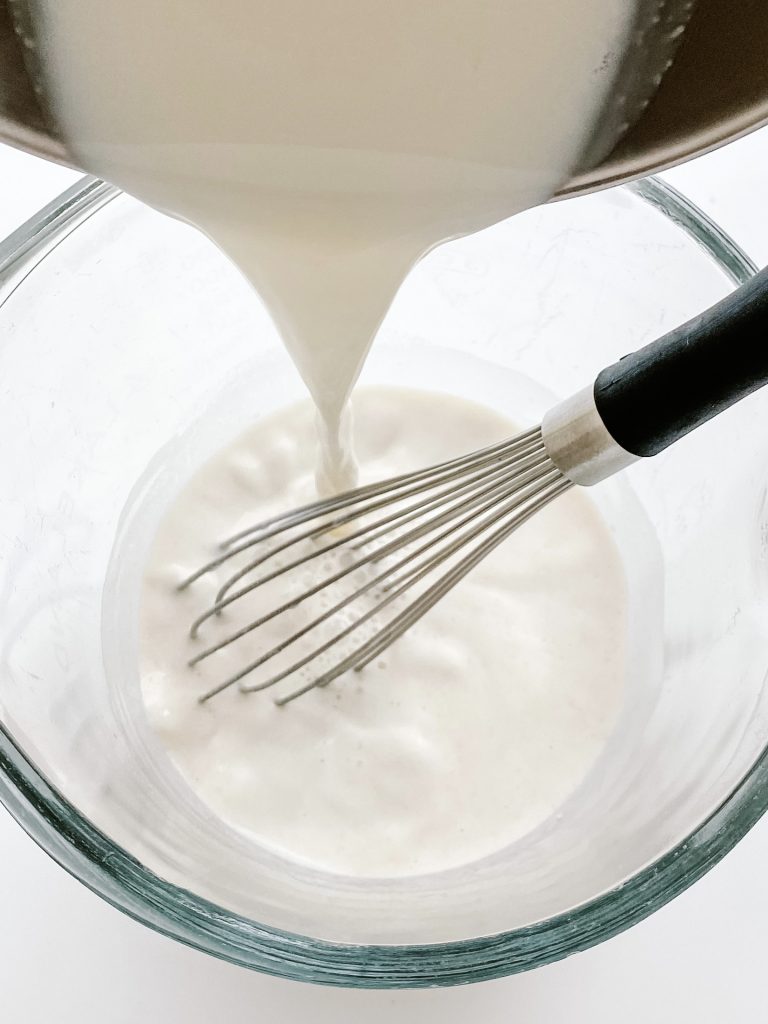
… mix thoroughly with flour and milk paste 
5 Clean saucepan 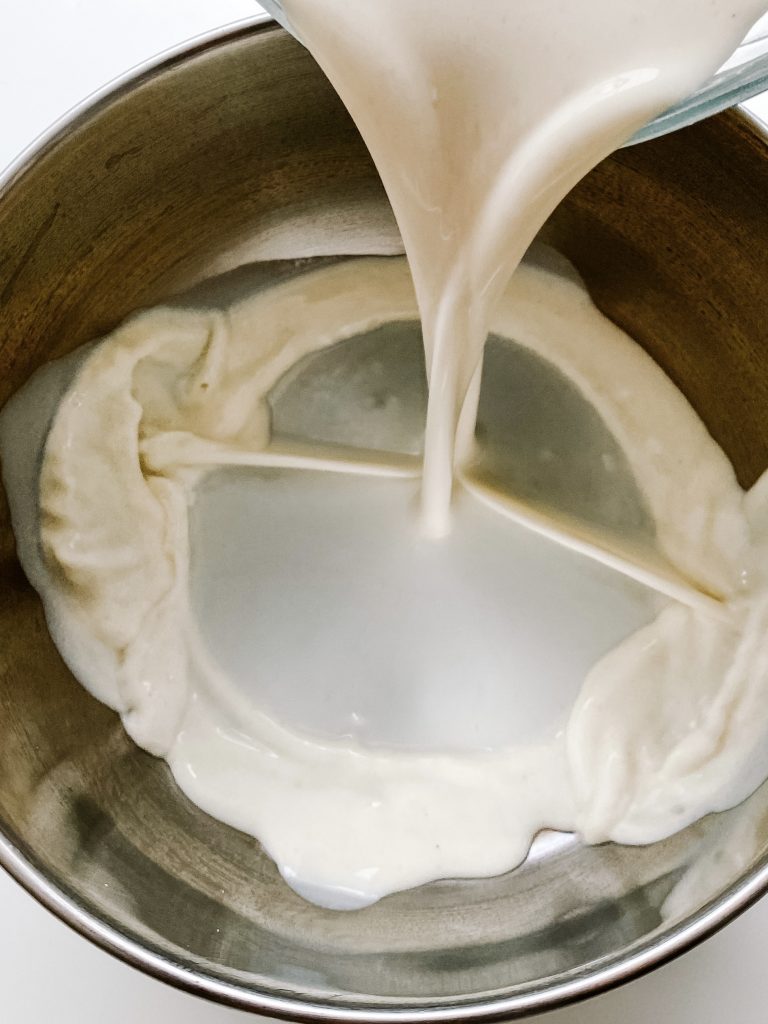
6 Pour milk and flour back into the saucepan. 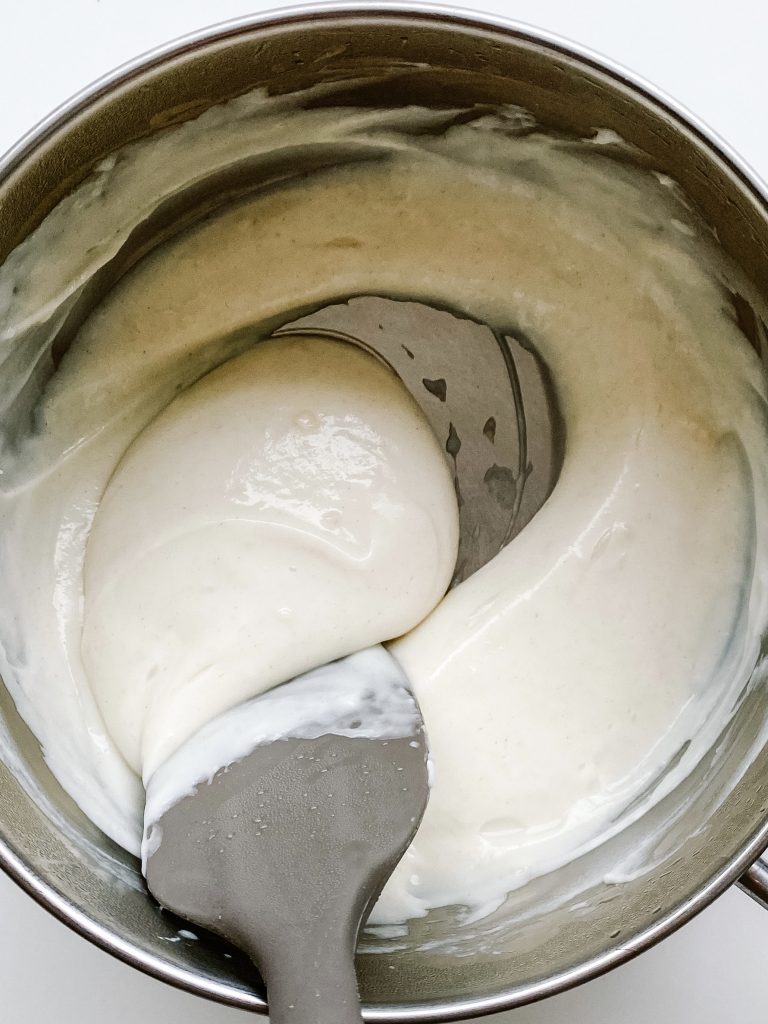
Cook, stirring, for 3 mins, until thickened. 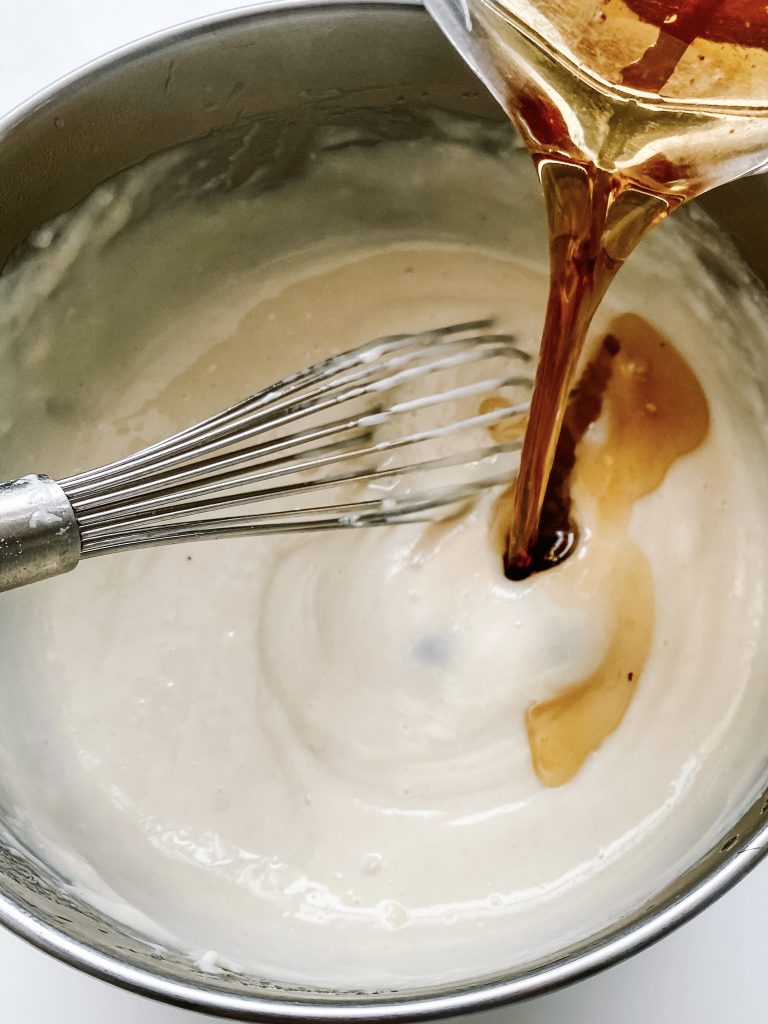
7 Slowly add syrup … 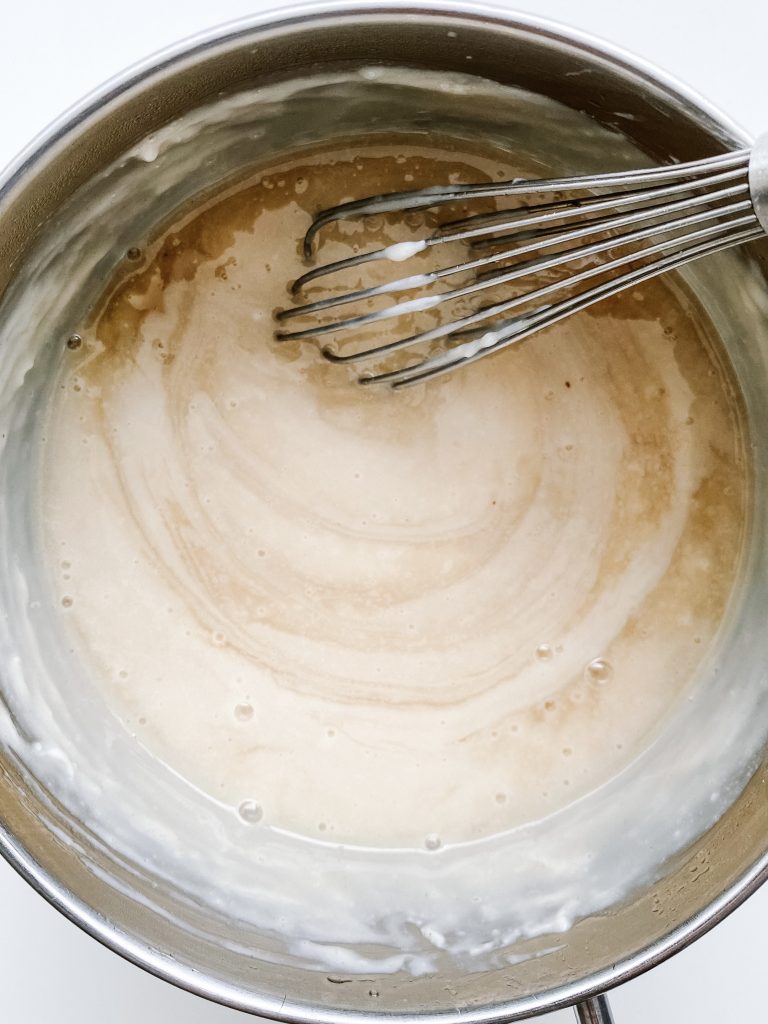
… whisking well. 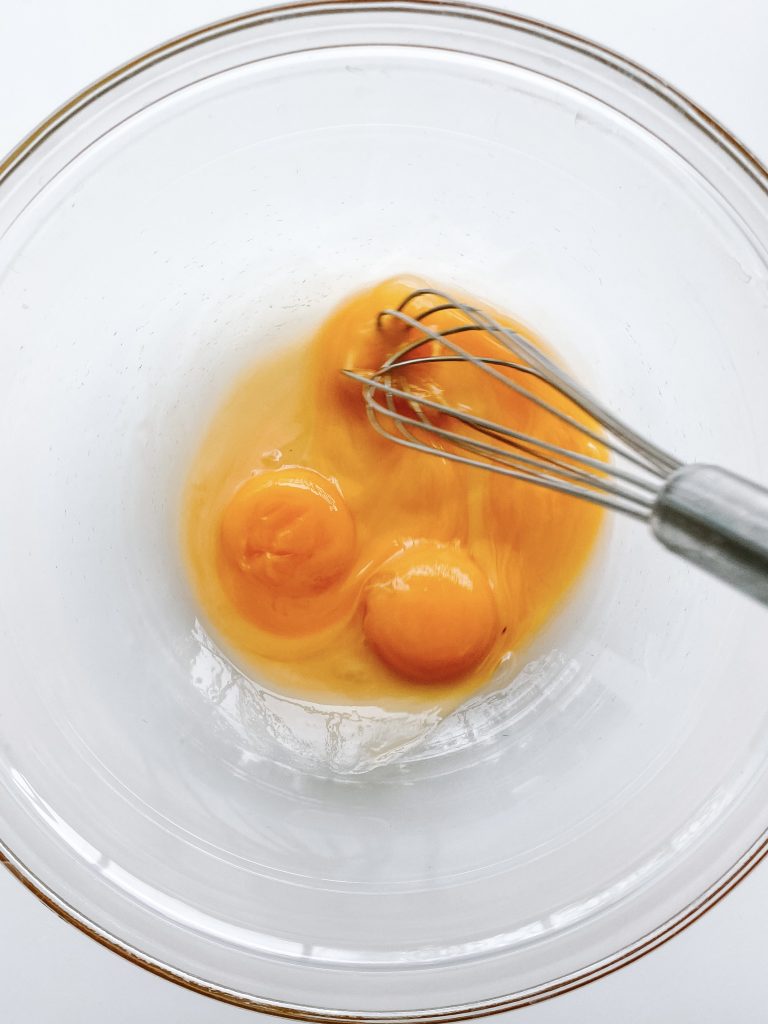
8 Beat eggs in large bowl.. 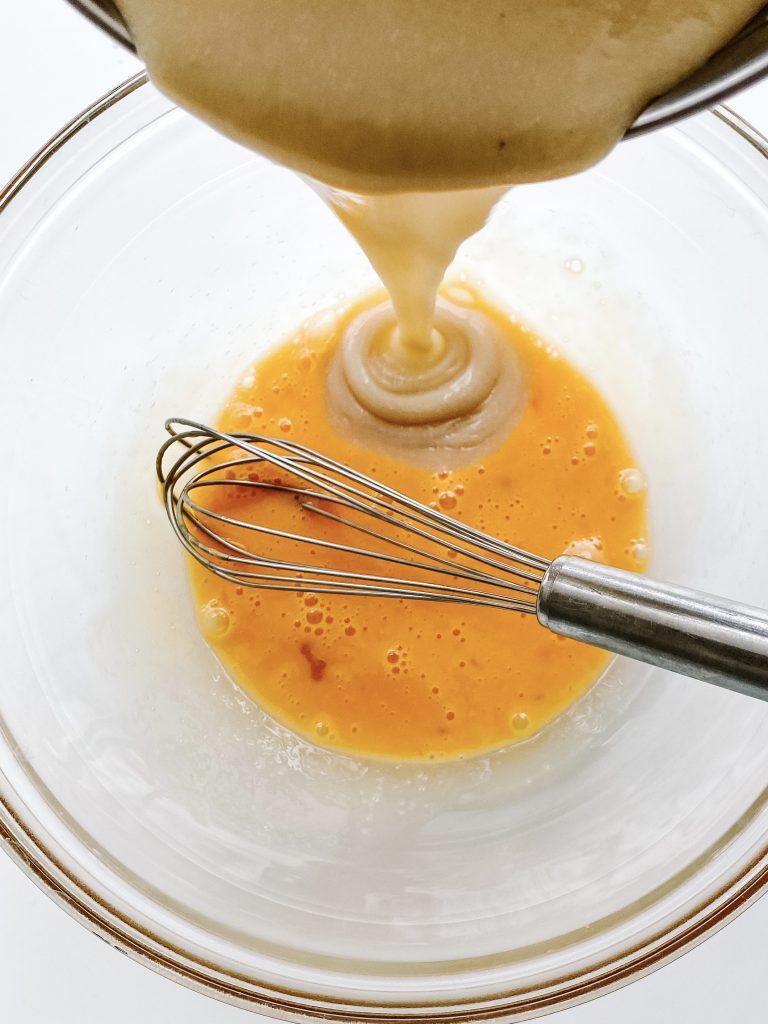
… very slowly add custard 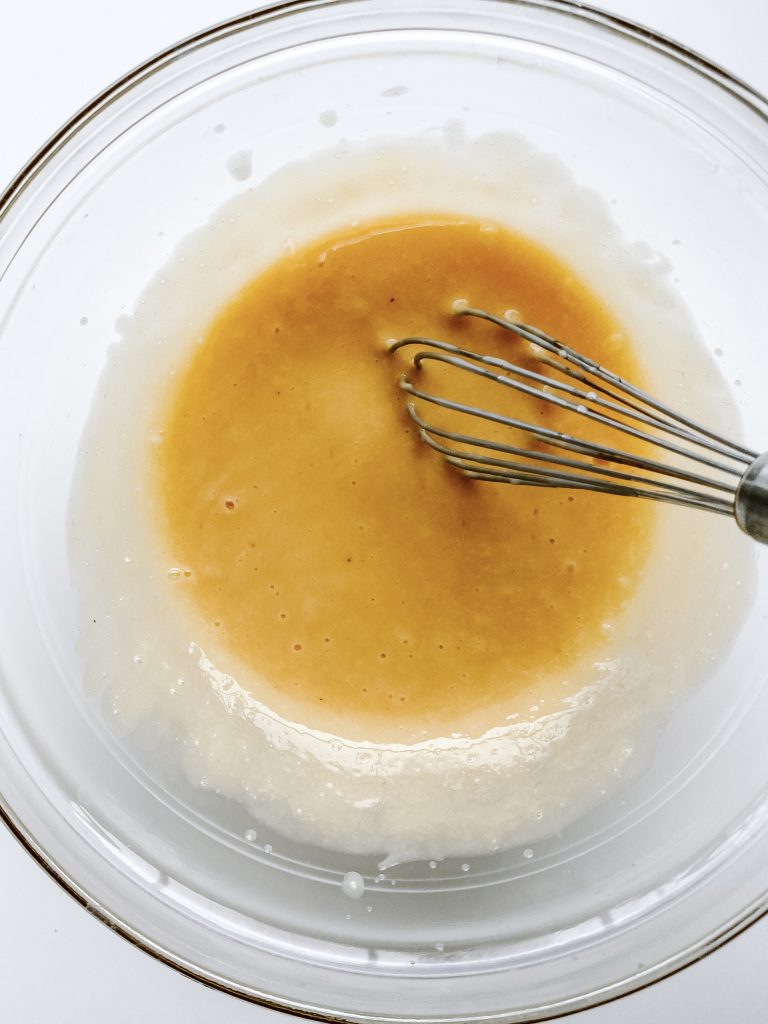
… beating with a balloon whisk. 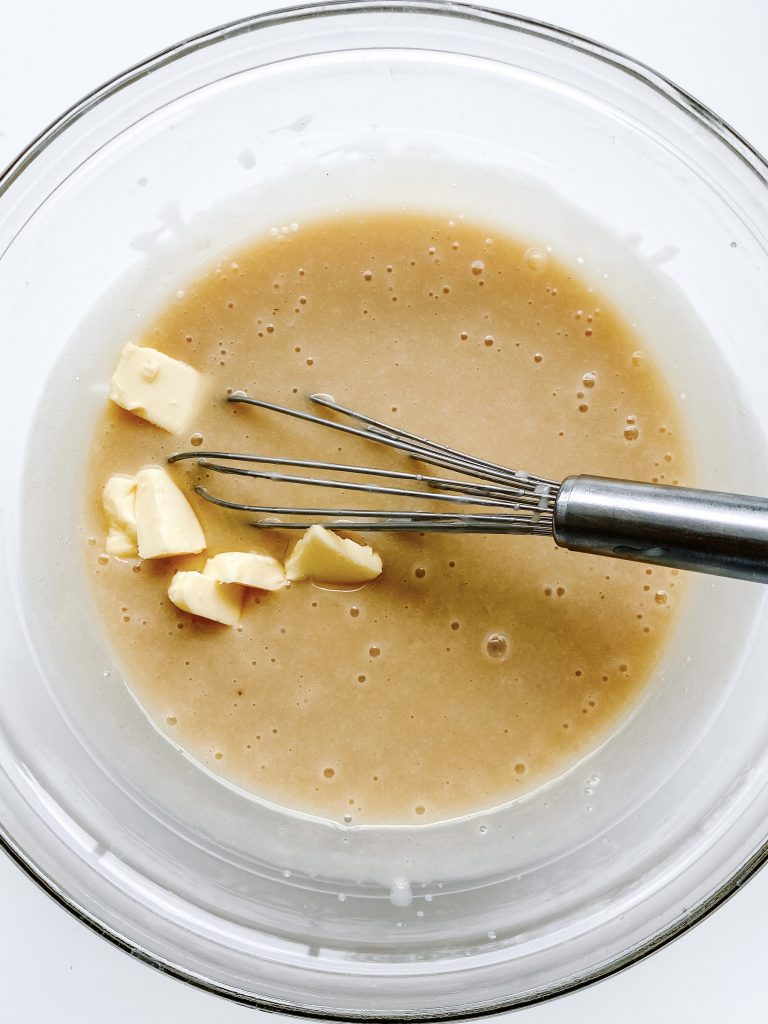
9 Beat in butter 
10 Strain 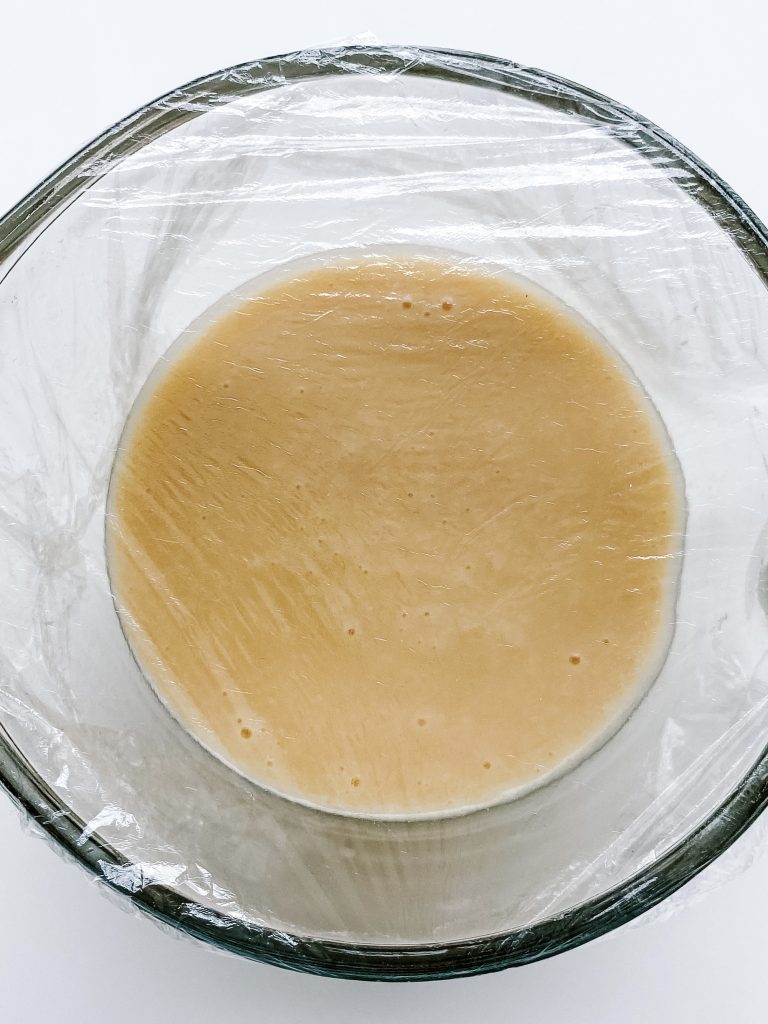
11 Cover with cling film
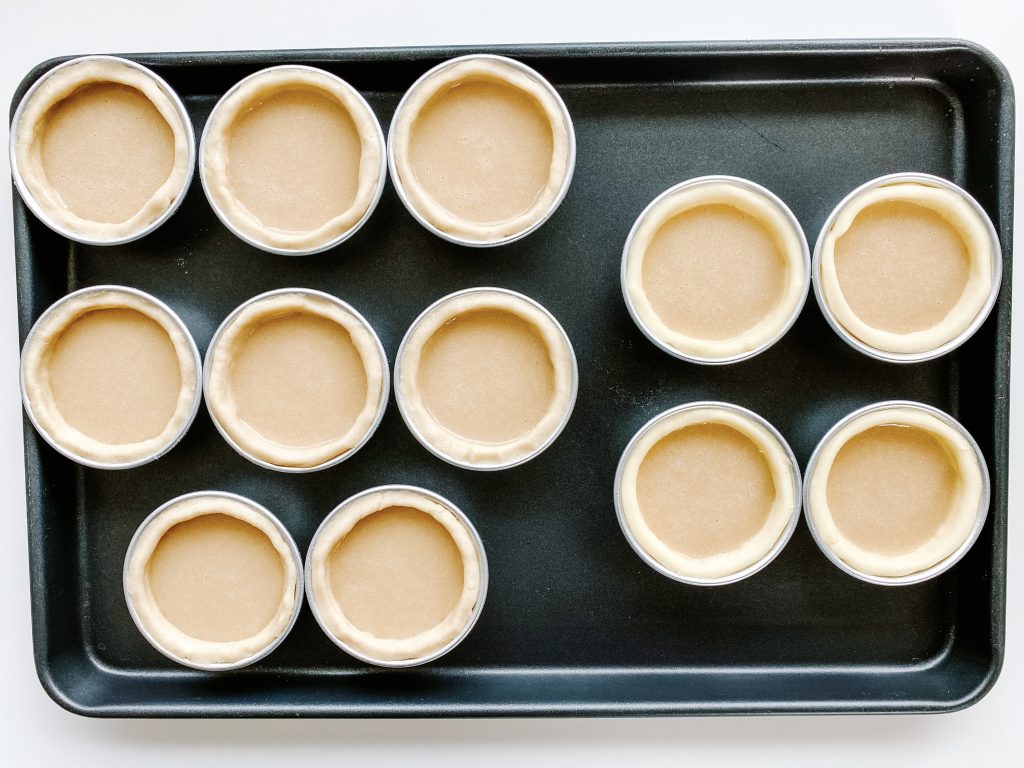
Line the Pastéis de Nata or muffin tins with pastry:
- On a lightly floured work surface and with the short side of the pastry in front of you, roll out the pastry roughly 35cm/14in – 40cms/16in long and 10cms/4in wide.
- Brush off excess flour.
- Start rolling the long side of the pastry, brushing off extra flour, with each small roll, until it is completely rolled.
- Trim the ends from each end of the pastry.
- Slice the pastry into rounds. If you are using Pastéis de Nata tins (as shown) each round of pastry should weigh 20g. If using a muffin tin, you will need 28g of pastry per muffin size tart. You will make between 10 – 15 tarts depending on the tin size. Place a pastry round into a greased tin.
- Use your thumb and press the centre of the pastry. Continue pressing the pastry encouraging it to come up the sides of the tin. It needs to extend a little higher than the tin.
- Now use your thumb to press down on top of the pastry so it comes to the same level as the tin and create a slightly thicker pastry crust at the top, around the edge.
- Place the tins on a baking tray.
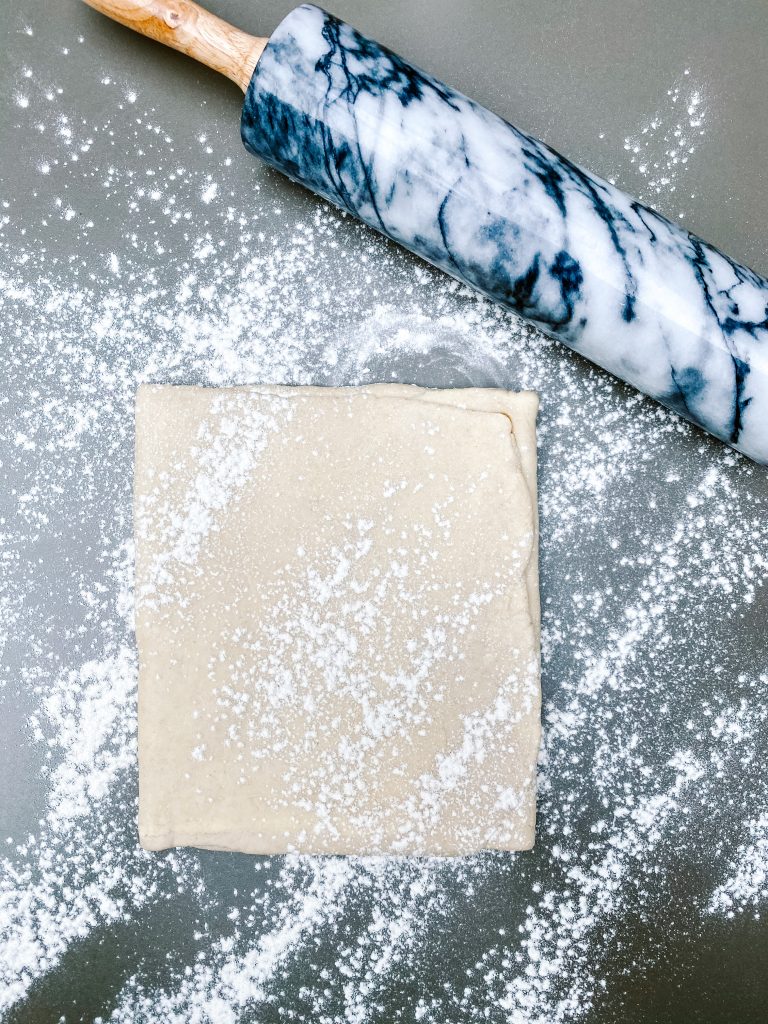
1 Lightly flour work surface and roll out … 
… pastry to 35cm/14in – 40cms/16in long and 10cms/4in wide. 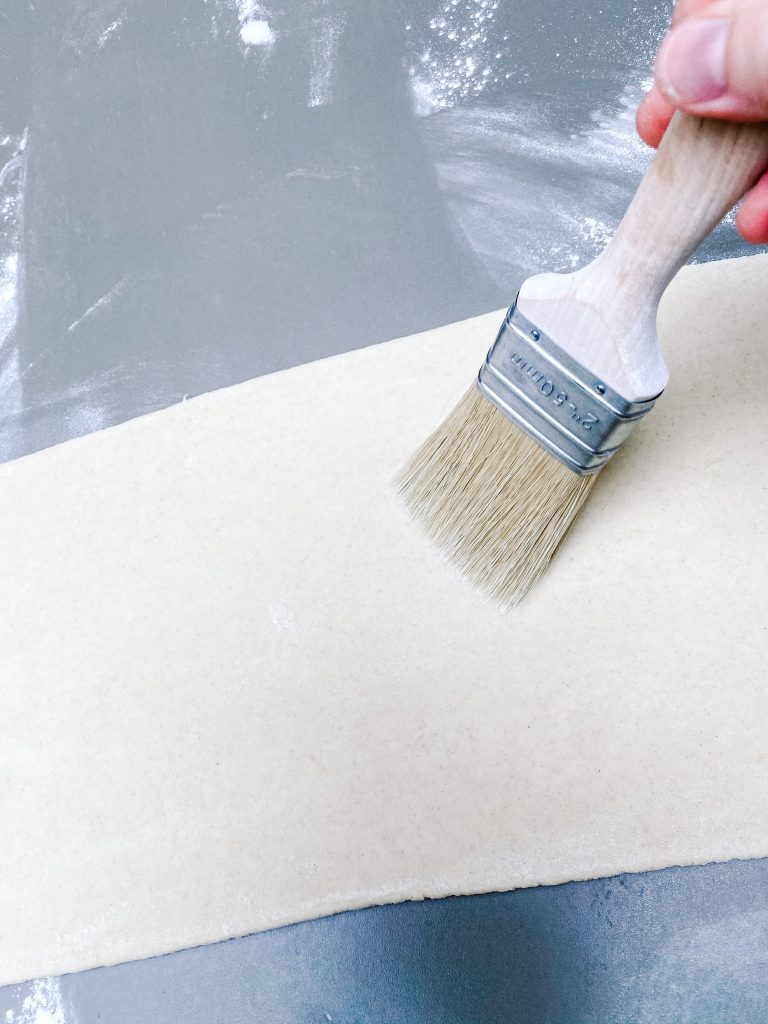
2 Brush off excess flour. 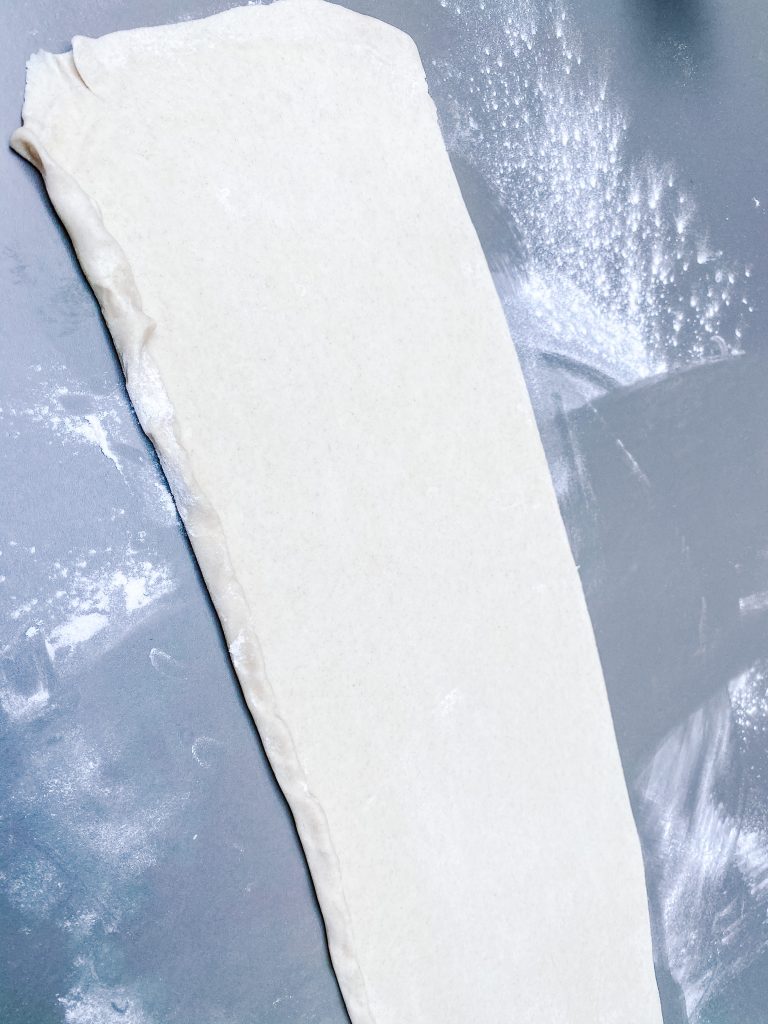
3 Start rolling the long side of the pastry … 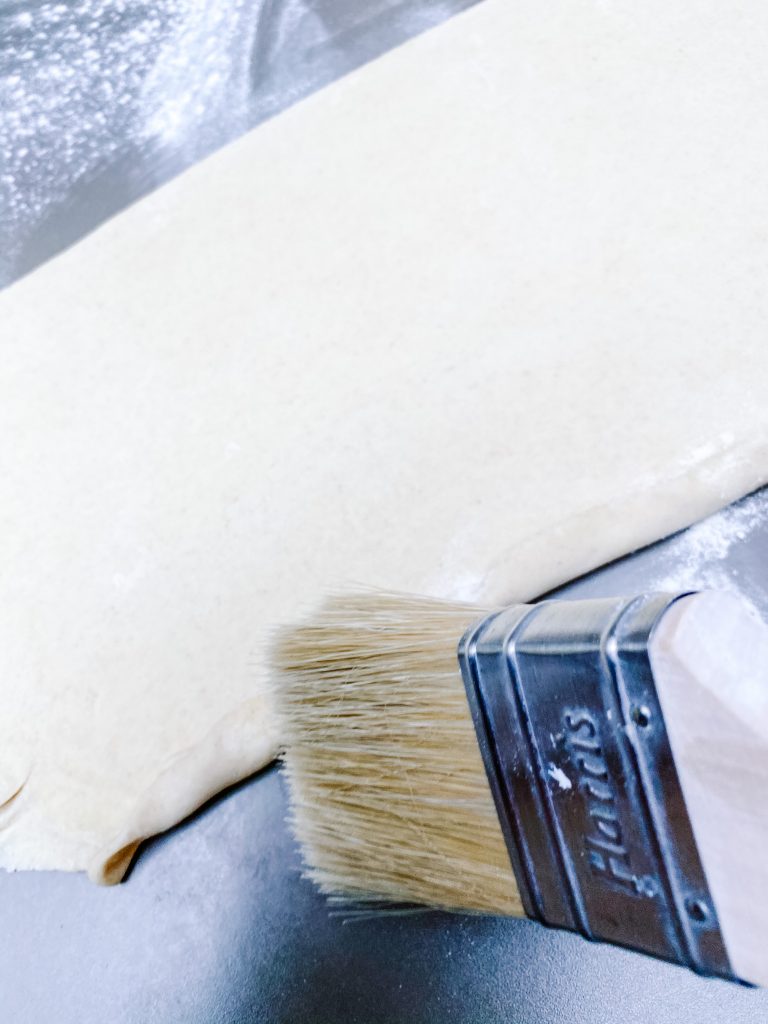
… brushing off extra flour, with each small roll … 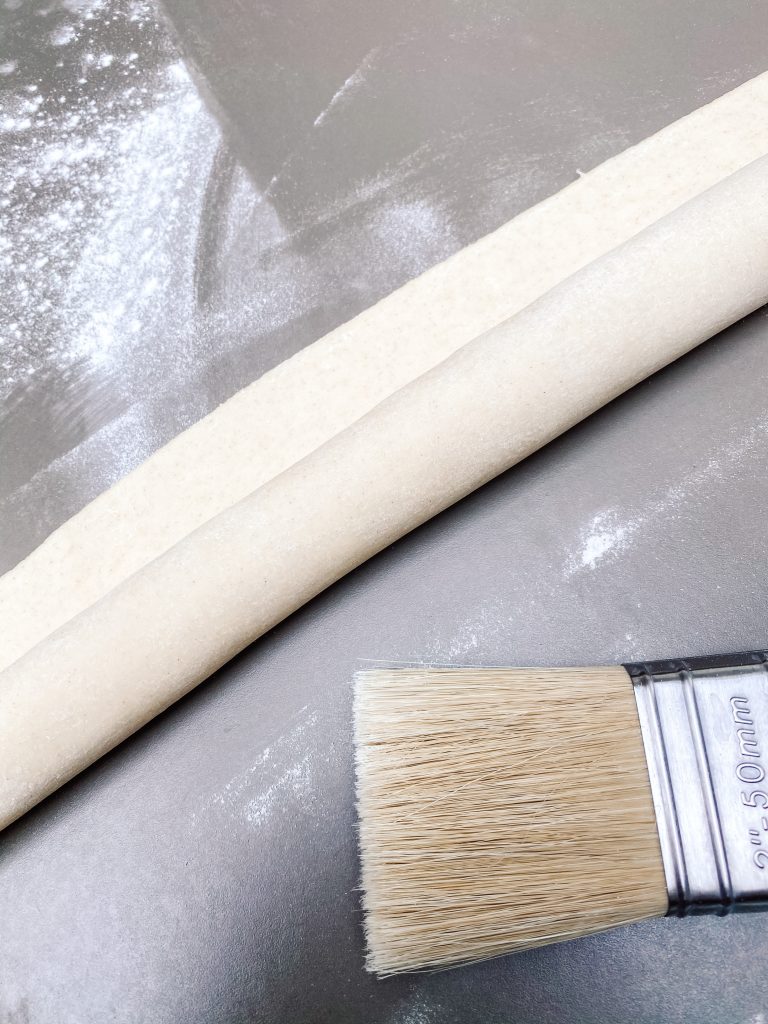
… until it is completely rolled. 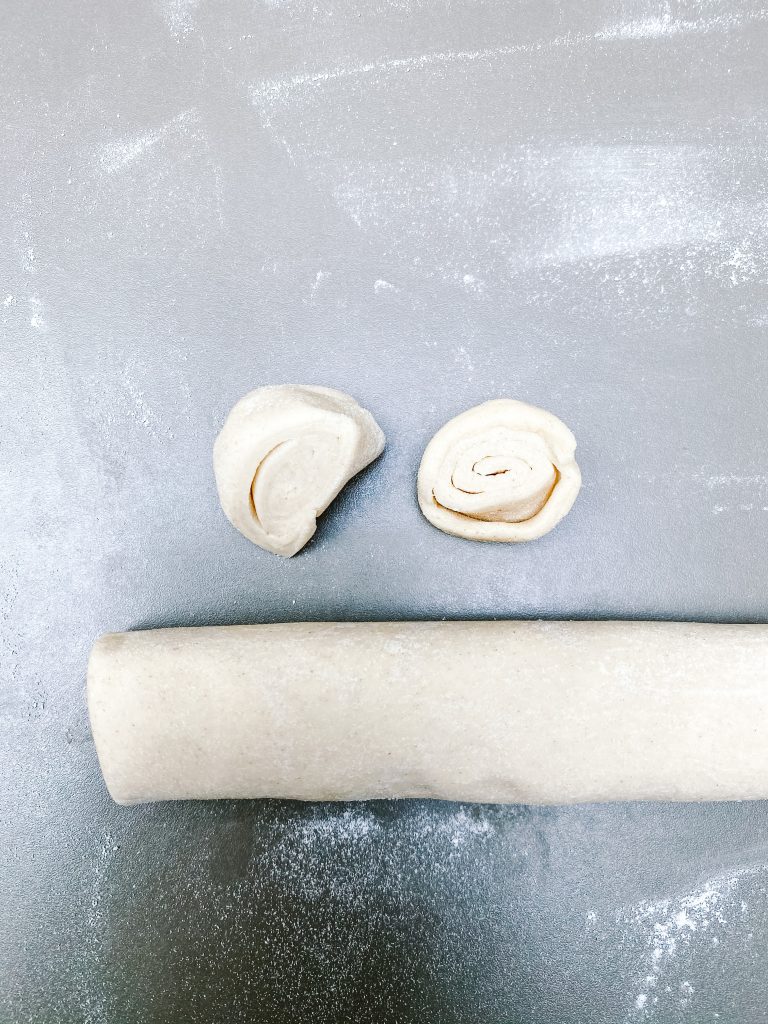
4 Trim ends 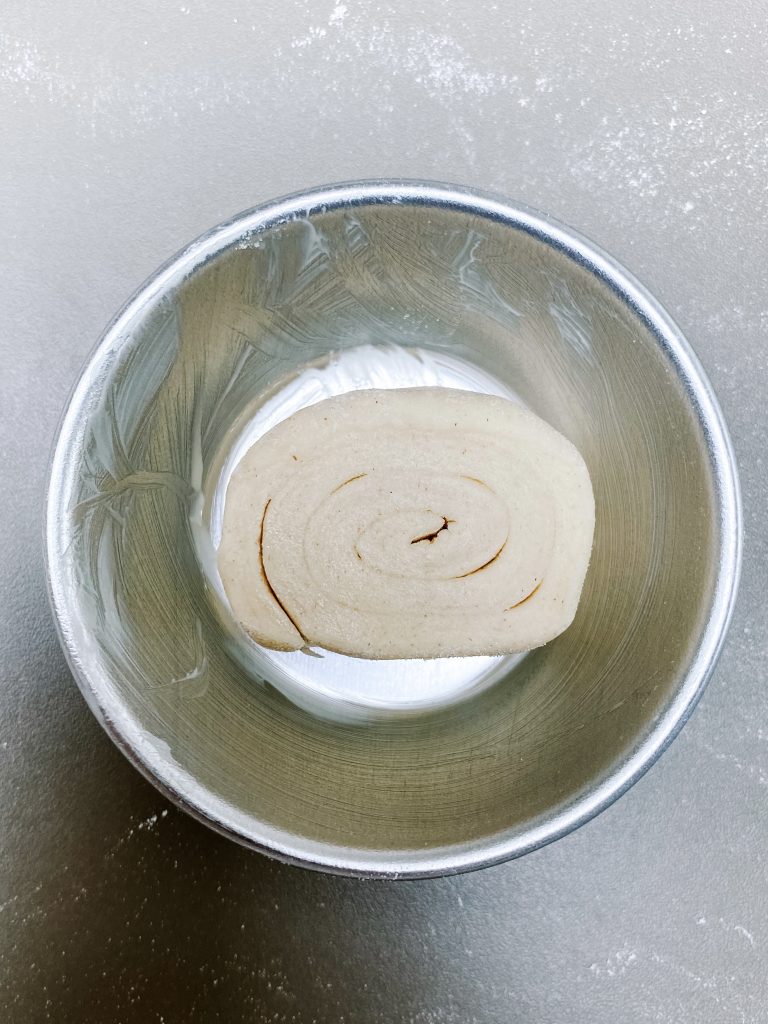
Place a pastry round into a greased tin. 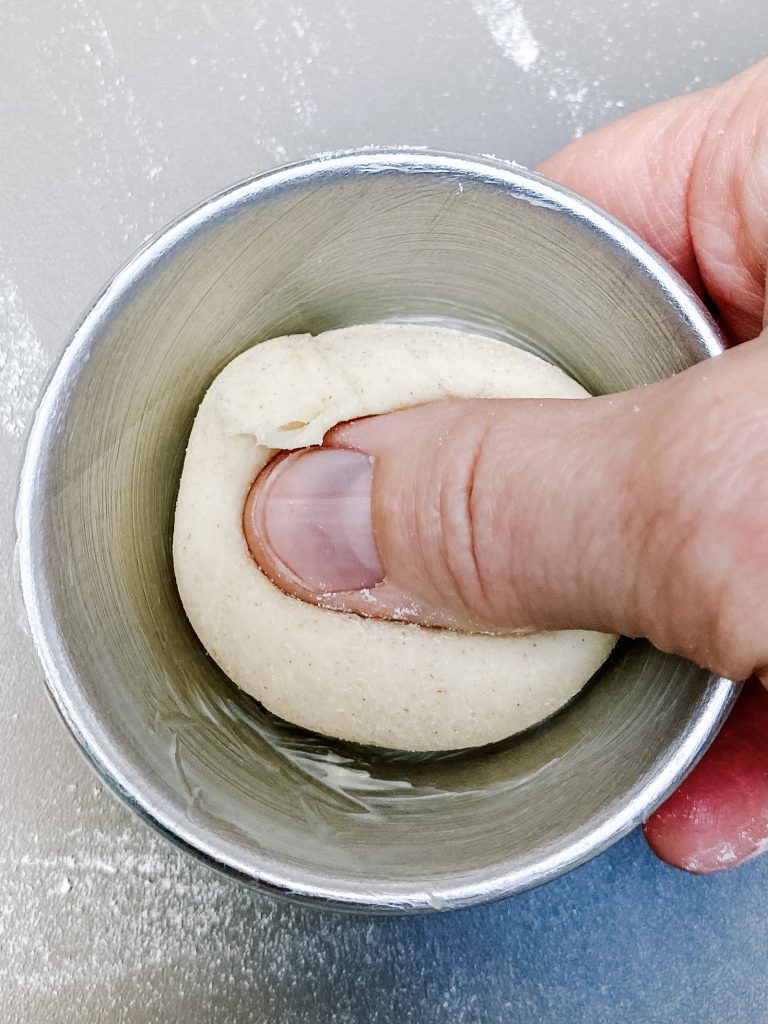
6 Use your thumb, press centre of pastry … 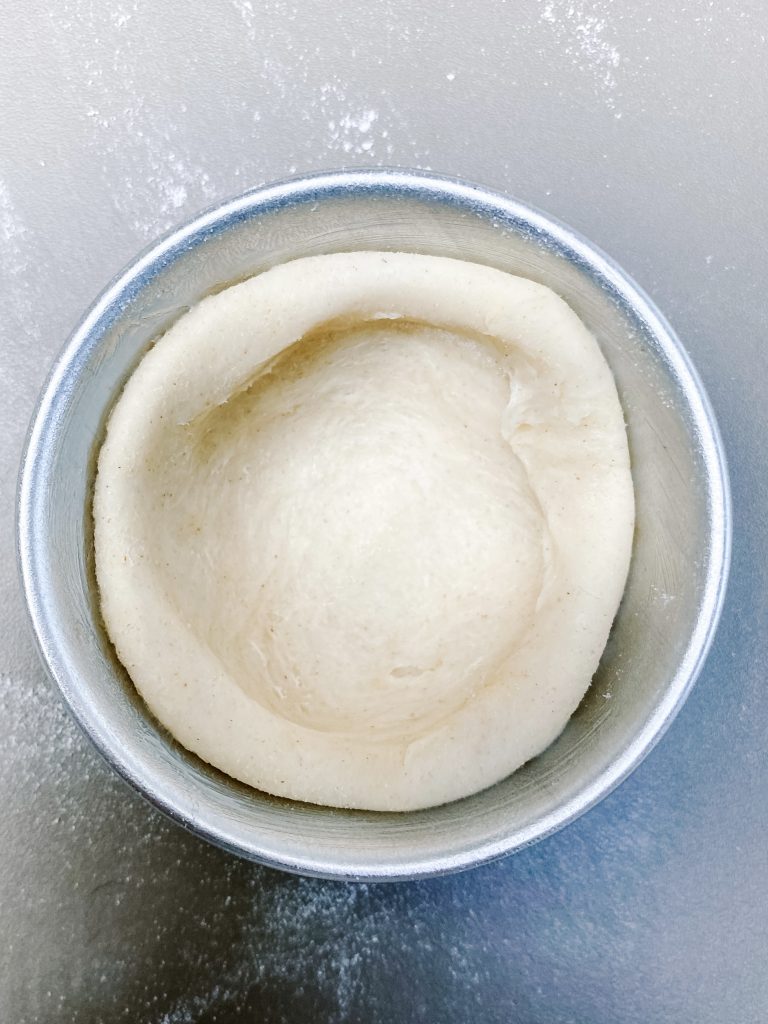
… Continue pressing pastry encouraging it to … 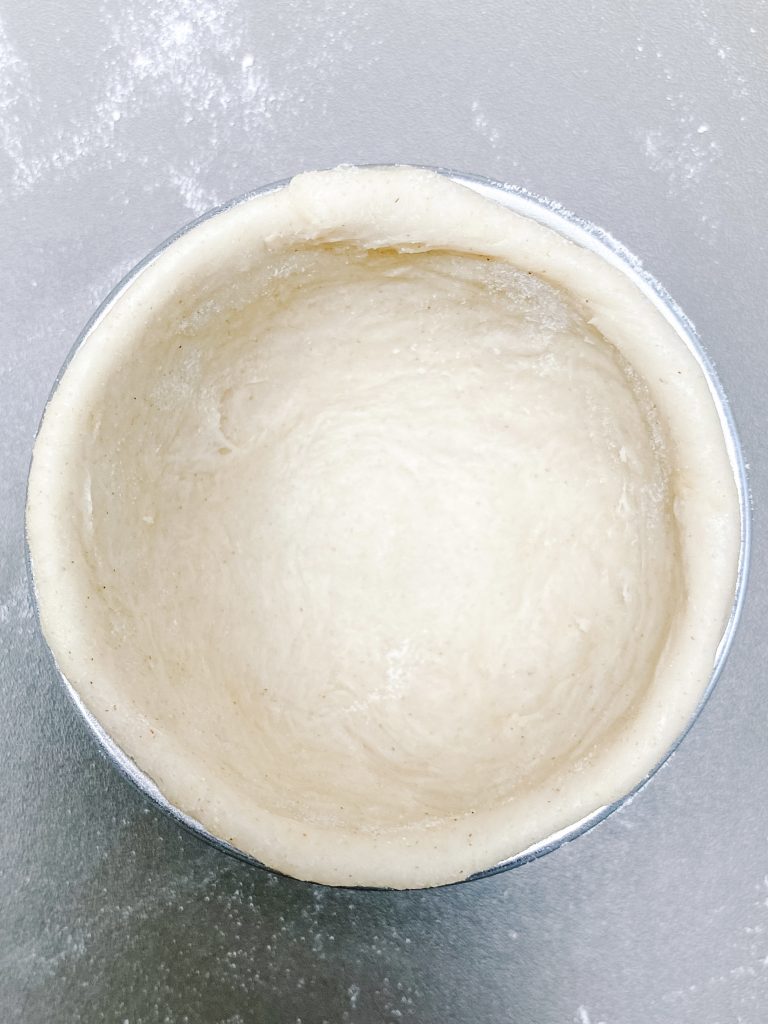
… come up sides of tin … 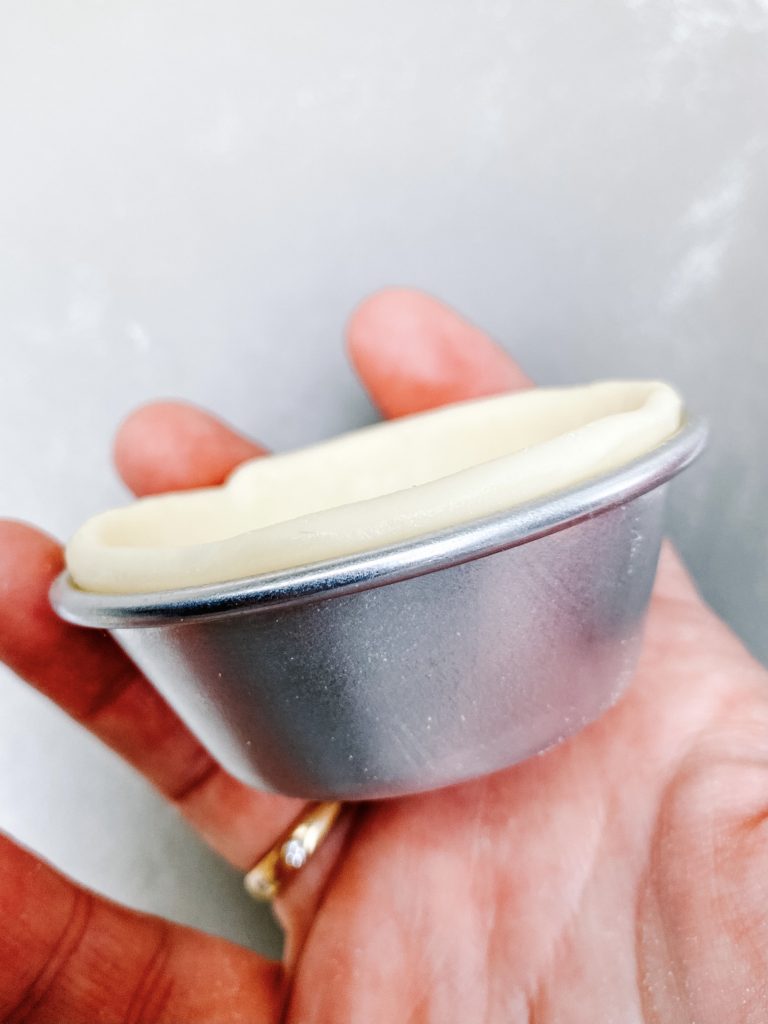
… It needs to extend a little higher than tin. 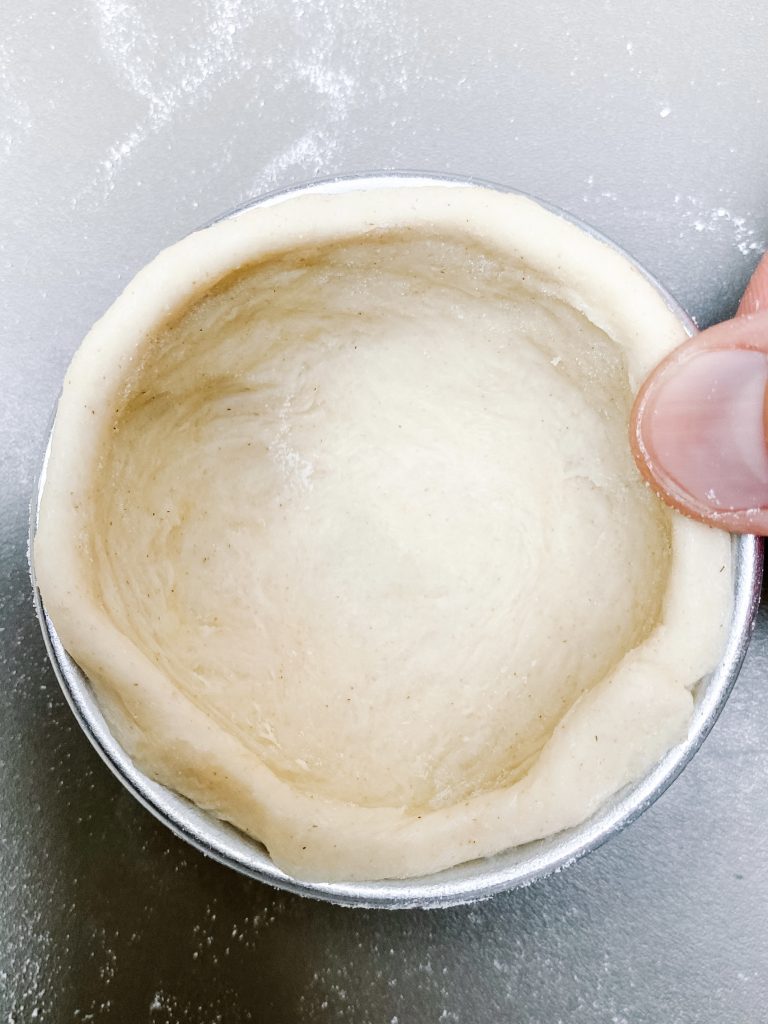
7 Press down on top of the pastry … 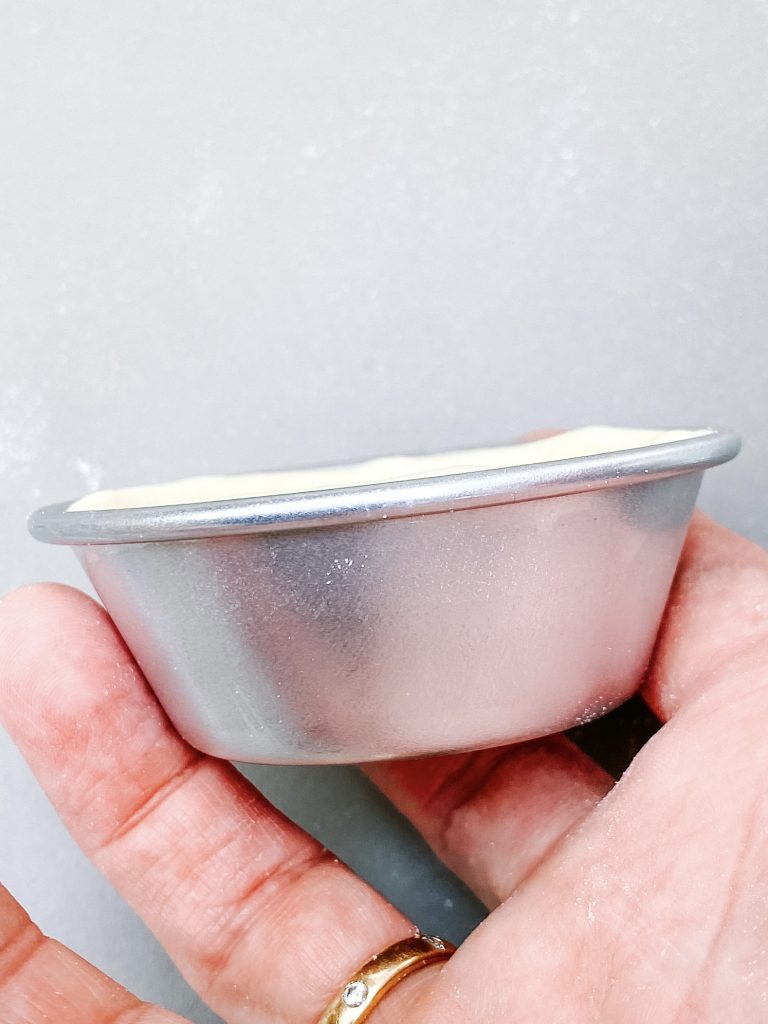
… so it comes to same level as the tin. 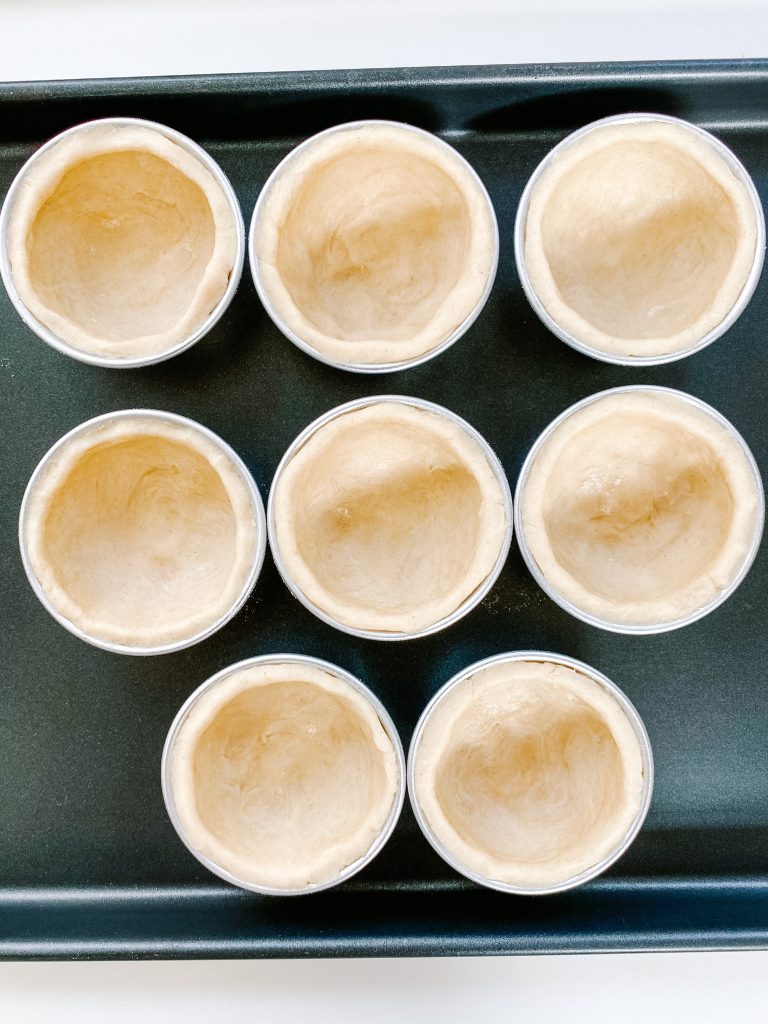
8 Place tins on a baking tray.
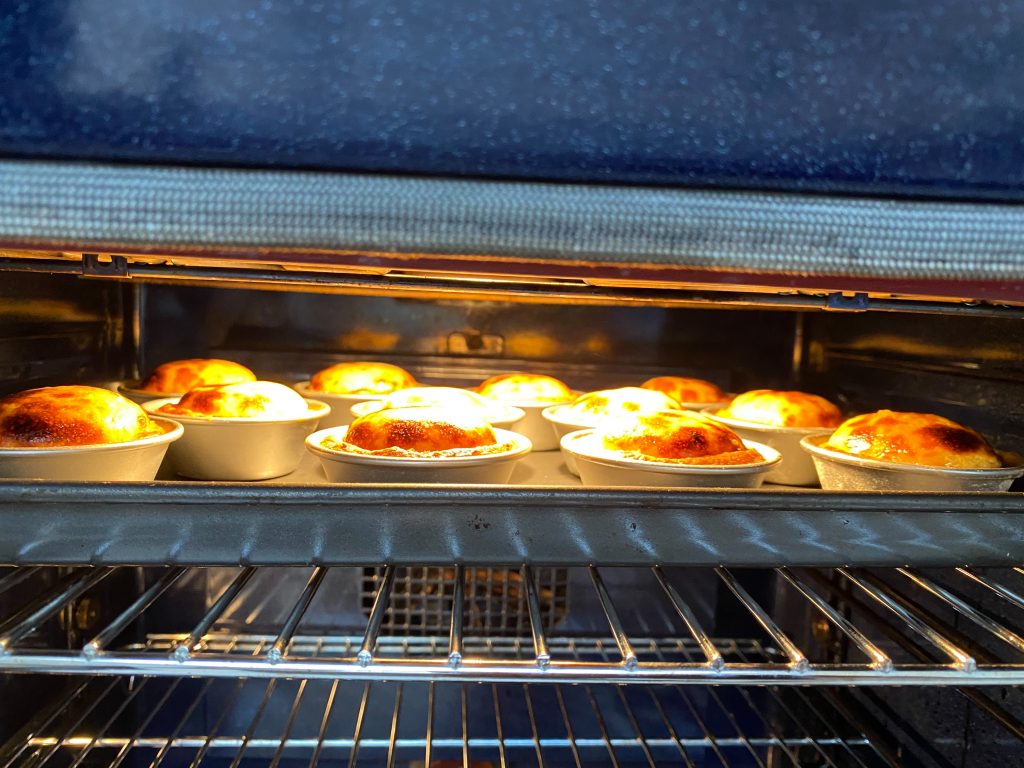
Fill the tins and bake the tarts:
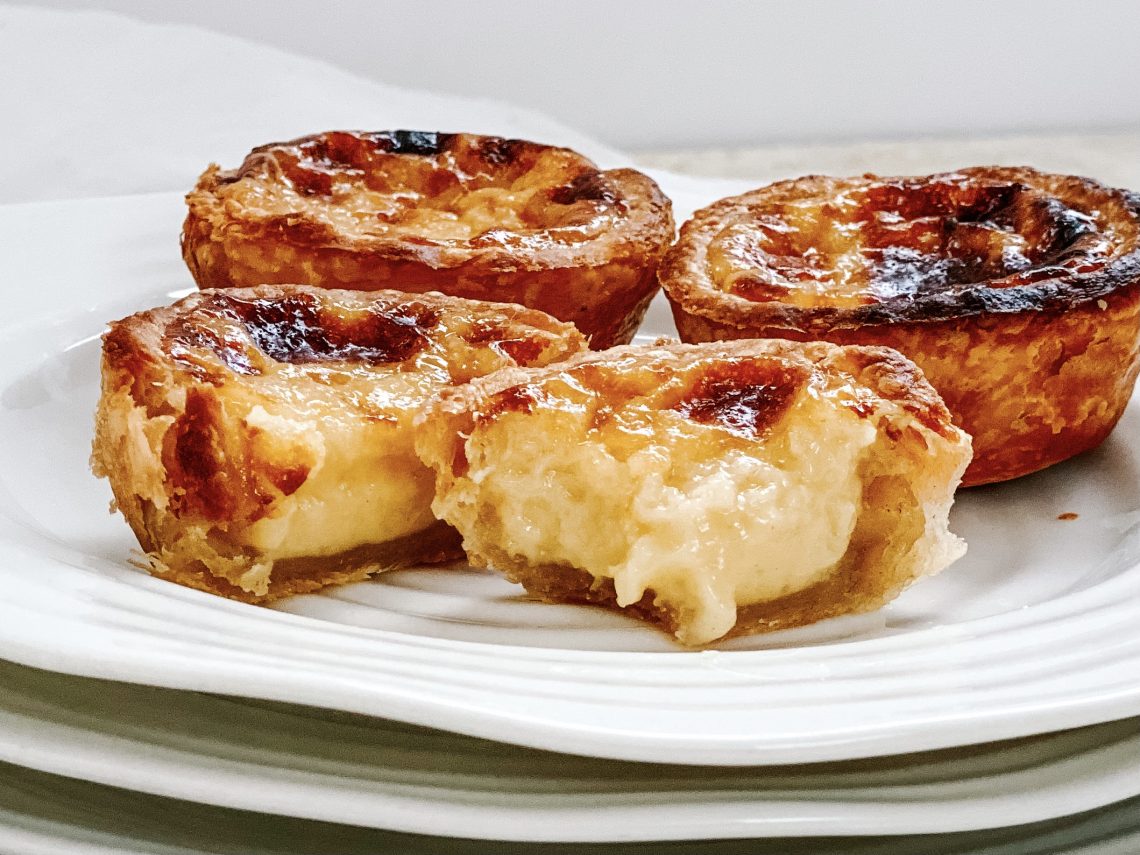
- Pour custard into the pasty cases, to just below the thickened area of pastry. They should be around four fifths full.
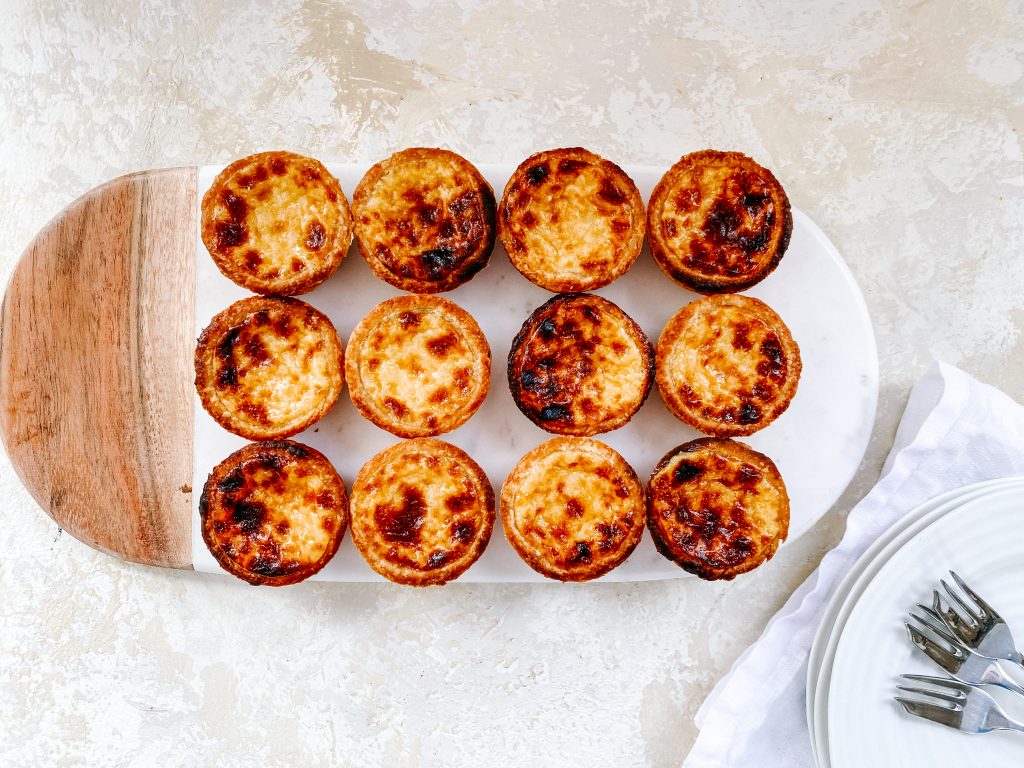
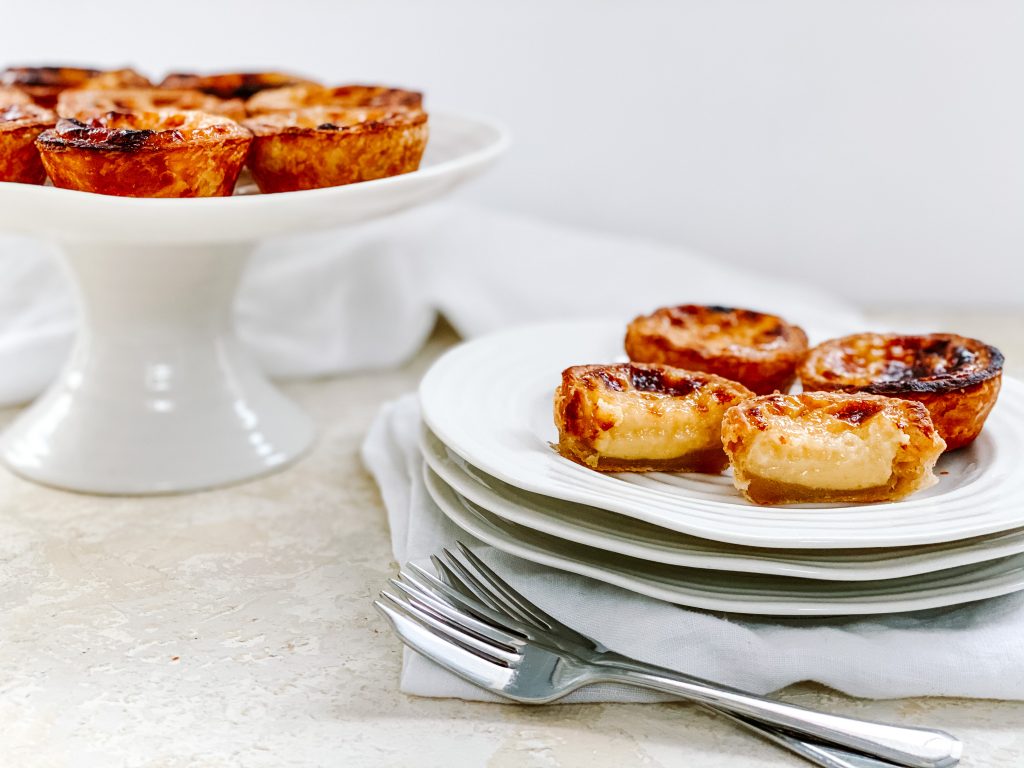
- Bake at the top of a pre-heated very hot oven for 8 – 9 minutes until the custard has risen and is in a dome shape. The custard should be set but still be wobbly – it will continue to cook when you take it out of the oven – and the top of the tarts should be dark and caramelised. As the custards cool, the dome shape will settle and flatten

Made this recipe?
If you make this recipe, do please tag me on instagram @daffodil_kitchen. You could also leave a comment in the box directly below the recipe.

Pastéis de Nata – Portuguese Custard Tarts
Glorious, silky smooth, cinnamon and lemon scented custard in a light and crispy, buttery puff pastry. My idea of absolute heaven.
Ingredients
Puff pastry:
- 285g – 300g puff pastry either homemade (see here) or shop bought
For the custard:
- 200g caster sugar
- 125g water
- 6g lemon peel
- ½ cinnamon stick
- 250ml full fat milk
- 38g plain/all-purpose flour
- 3 eggs yolks
- ½ large egg (beat the egg, weigh and remove half)
- 20g unsalted butter
- pinch of fine salt
Instructions
-
Collect together your equipment (see Recipe Notes below) and ingredients.
-
First make the puff pastry – if you are making your own pastry, you need to make this first. You should start making it 5 – 5½ hours before you want to make the tarts.
-
Preheat oven to Fan Oven 290°C /310°C/550°F/Gas 10 or as hot as your oven will heat.
-
Secondly, make the custard, starting time time for it to cool down – heat the sugar, water, lemon peel and cinnamon over a moderate heat until the sugar has dissolved, and it reaches 106°C/223°F. It will turn into a thick syrup.
-
Strain the syrup.
-
Meanwhile, in a heatproof jug, mix the flour with 95ml milk to make a paste.
-
Bring the remaining milk to a simmer and, when steaming, pour over the milk and flour paste and mix thoroughly with a balloon whisk.
-
Wash the saucepan thoroughly – this is an important step. If you do not do this, your custard may stick to the base of the pan and burn.
-
Pour the milk and flour back into the clean saucepan. Heat over a moderate temperature and cook, stirring for 3 minutes, until thickened.
-
Slowly add the syrup to the flour and milk, whisking all the time.
-
In a large bowl, beat the eggs – slowly add the custard, beating as you pour it in with a balloon whisk.
-
As soon as it is all incorporated, add the butter and beat until it is incorporated.
-
Strain the custard into a jug or bowl.
-
Cover with cling film and set on one side.
-
Line the Pastéis de Nata or muffin tins with pastry: on a lightly floured work surface and with the short side of the pastry in front of you, roll out the pastry roughly 35cm/14in – 40cms/16in long and 10cms/4in wide.
-
Brush off excess flour.
-
Start rolling the long side of the pastry, brushing off extra flour, with each small roll, until it is completely rolled.
-
Trim the ends from each end of the pastry.
-
Slice the pastry into rounds. If you are using Pastéis de Nata tins (as shown) each round of pastry should weigh 20g. If using a muffin tin, you will need 28g of pastry per muffin size tart. You will make between 10 – 15 tarts depending on the tin size. Place a pastry round into a greased tin.
-
Use your thumb and press the centre of the pastry. Continue pressing the pastry encouraging it to come up the sides of the tin. It needs to extend a little higher than the tin.
-
Now use your thumb to press down on top of the pastry so it comes to the same level as the tin and create a slightly thicker pastry crust at the top, around the edge.
-
Place the tins on a baking tray.
-
Fill the tins and bake the tarts: pour custard into the pasty cases, to just below the thickened area of pastry. They should be around four fifths full.
-
Bake at the top of a pre-heated very hot oven for 8 – 9 minutes until the custard has risen and is in a dome shape. The custard should be set but still be wobbly – it will continue to cook when you take it out of the oven – and the top of the tarts should be dark and caramelised. As the custards cool, the dome shape will settle and flatten.
Recipe Notes
Equipment:
- kitchen scales and measuring spoons
- Saucepan
- jug
- sieve
- mixing bowl
- Pastéis de Nata or muffin tins, well greased


Raspberry Friands

Croque Monsieur
You May Also Like

Raclette Served with Baked Potatoes, Bundnerfleish, Gherkins, Pickled Onions, Apple and Tomatoes

Gado Gado