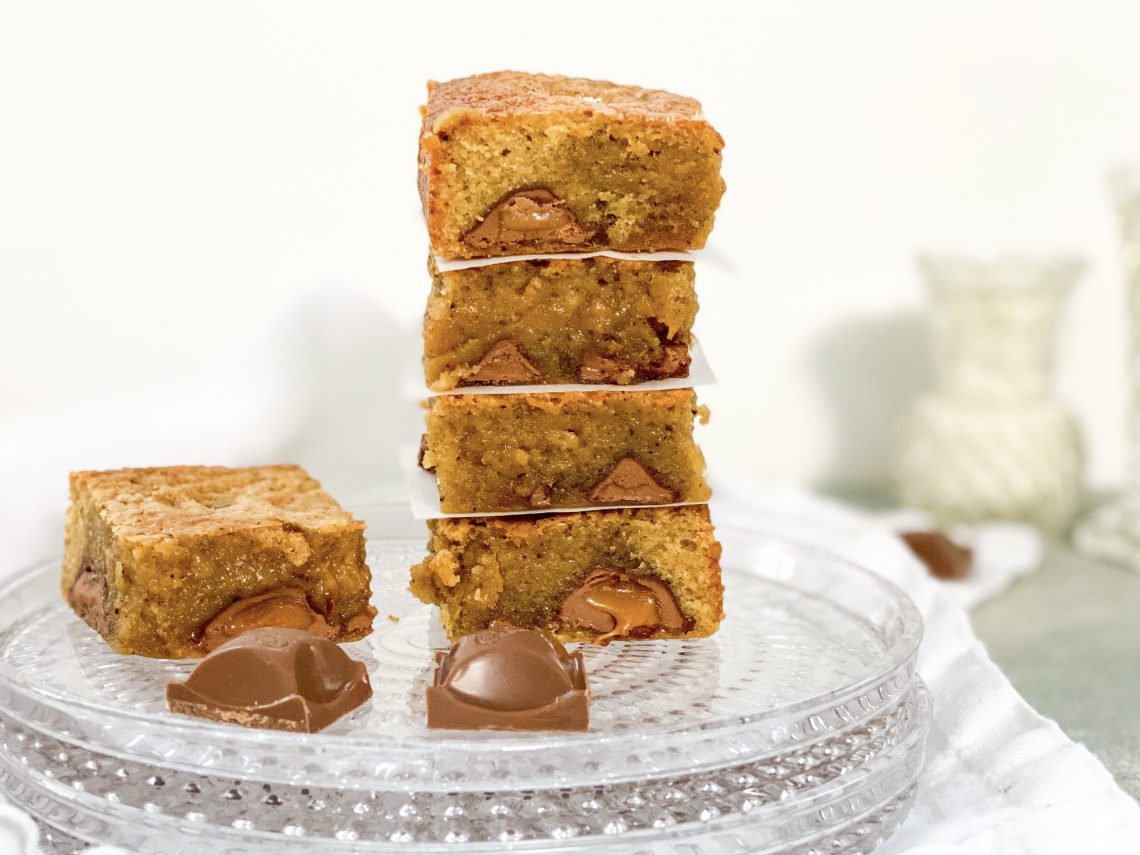
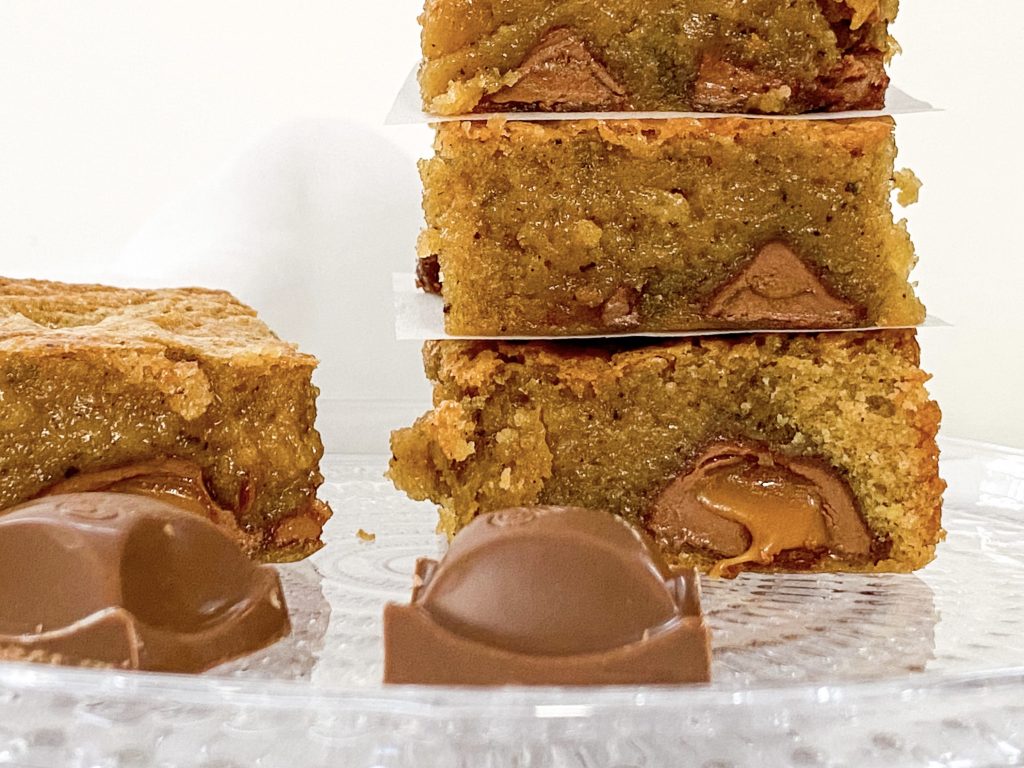
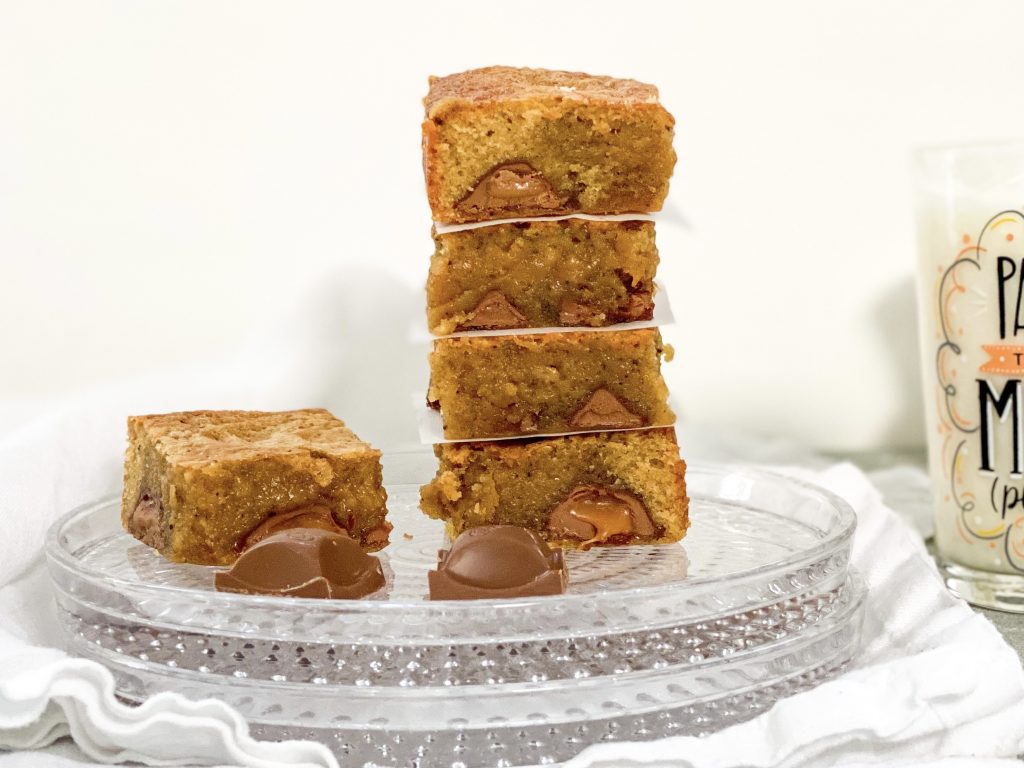
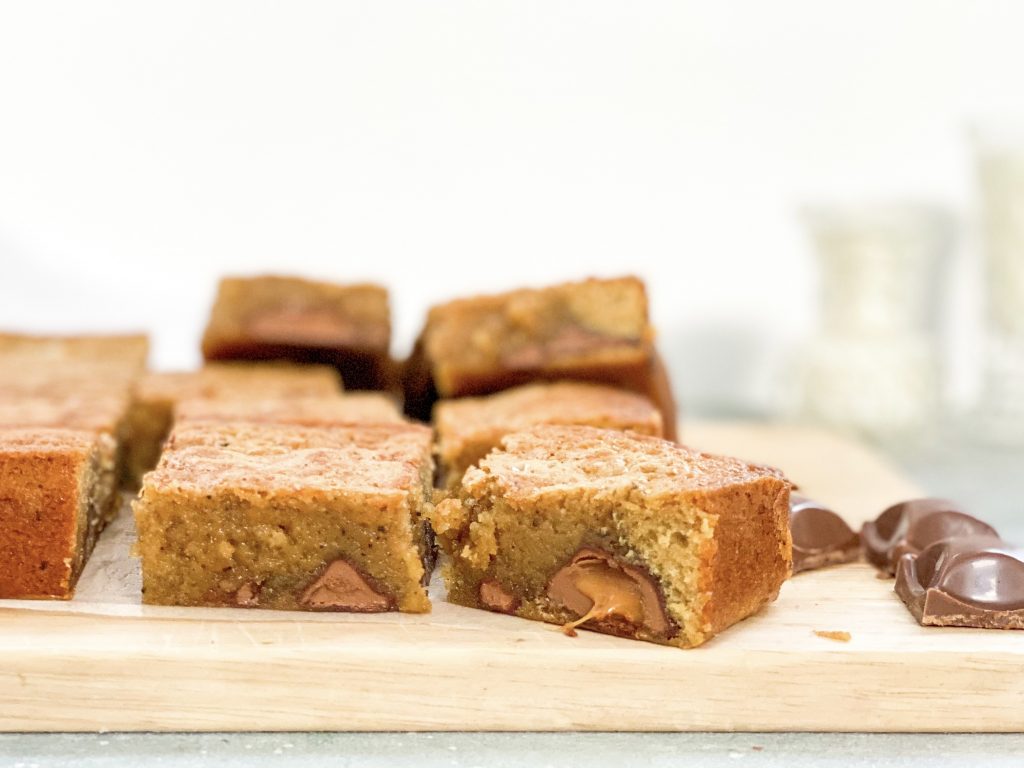
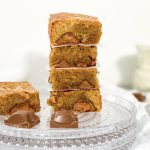
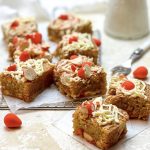
Salted Caramel Brown Butter Blondies
Melt in the mouth, light, yet rich and a little gooey on the inside, these Salted Caramel Brown Butter Blondies are studded with squares of Cadburys Caramel chocolate and topped with an extra sprinkling of sea salt. Using bars of chocolate caramel means these bars are exceedingly quick and easy to make with guaranteed nuggets of caramel joy in each mouthful!
Browning the butter adds a rich, caramelised, nutty unami to these blondies; heavenly served warm with ice cream for dessert but equally, utterly moreish served simply with a cup of tea or coffee.
They make wonderful gifts and travel well. They are easy to wrap in a gift box or transported in a cake tin for a picnic or handed around to share with a group of friends or colleagues as a thank you or perhaps for a birthday celebration. I have even boxed them up and posted them to my girls for a surprise whilst away at university! In turn they have made many batches and gifted them as a thank you or treats to share at their various jobs and hospitals wards they have worked in. When skiing or out for a long walk, we often pack blondies individually in foil and throw them in our back pack for a little ‘pick me up’ (sometimes literally!) treat!
How to make Salted Caramel Brown Butter Blondies
Collect all your ingredients together and line the baking tin:
In order to guarantee soft and fudgy blondies, it is important to use the correct size tin – in this case it is a 20cm/8inch square tin. If your tin is larger the depth of your cake batter will be less and the blondies will cook more quickly. Equally if the tin is smaller, your cake batter will be deeper and the blondies will cook more slowly.
- Sit the tin on greaseproof paper making sure the paper is large enough to line the tin, come up the sides and have a little overhang.
- Cut out the corners of the paper so it will fit easily into the tin
- Fold the paper from corner to corner so the size of the centre of the paper matches the base of the tin. Slot inside the tin.
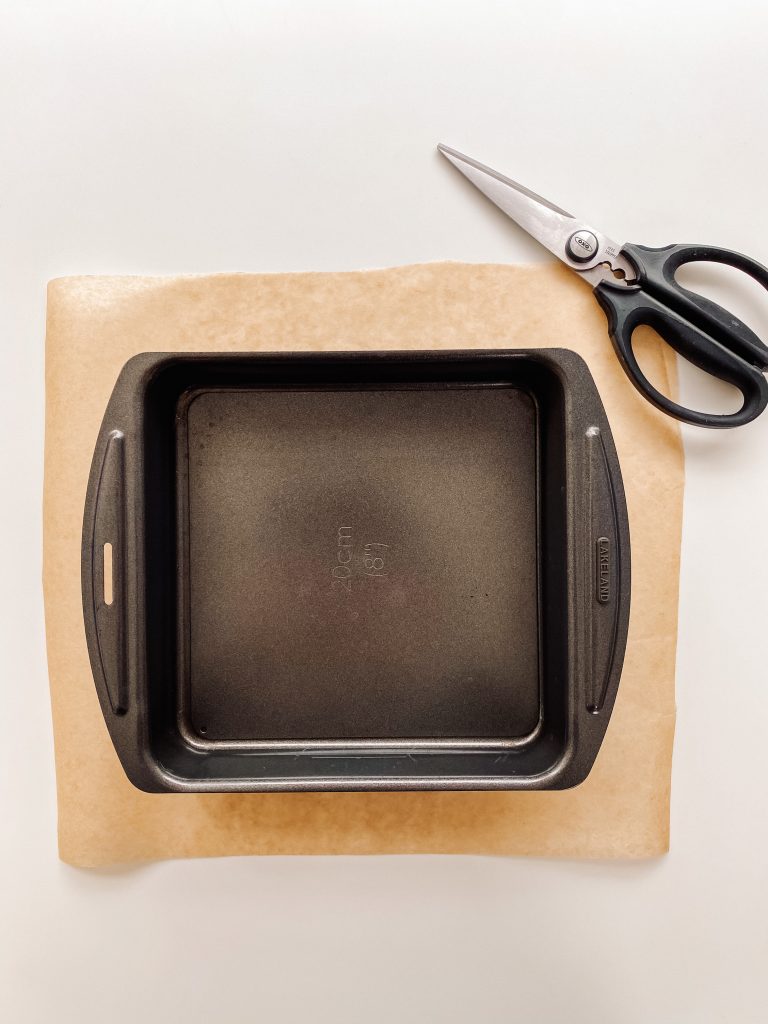
1 Tin and greaseproof paper 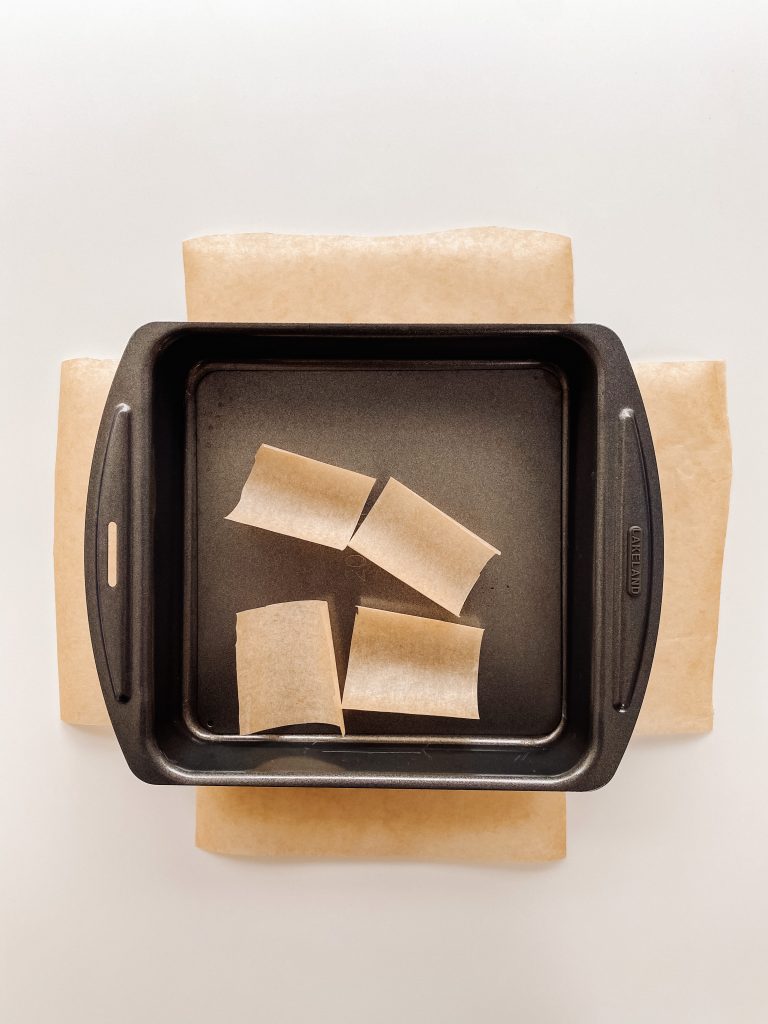
2 Cut out the corners 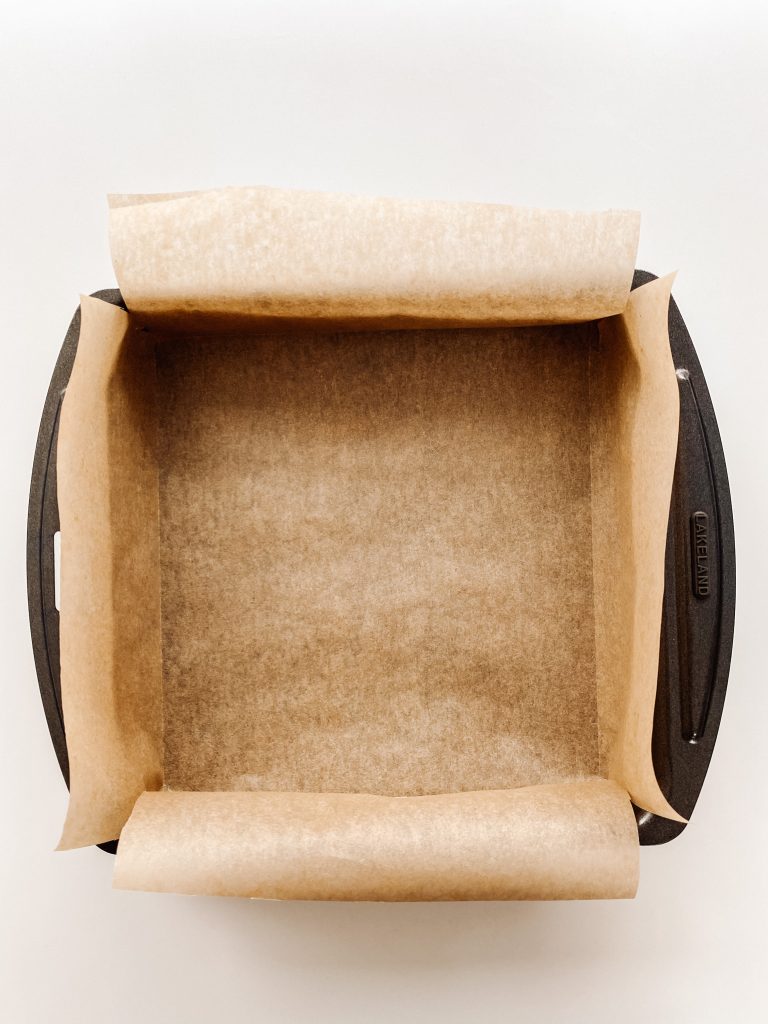
3 Fold, corner to corner, and slot inside the tin
Ingredients:
- unsalted butter, in cubes
- soft brown sugar
- caster sugar
- fine salt
- eggs, lightly beaten
- vanilla paste or extract
- plain/all-purpose flour
- Cadbury Dairy Milk Caramel Bars
- sea salt
How to make these incredible blondies:
- First, brown the butter: chop the butter into squares and place in a saucepan. Heat over a moderate heat, stirring from time to time, until the butter turns brown. To read more about browning butter, please see here.
- Pour into a jug so it stops cooking, cools and is ready to pour into the batter
- Make the blondie batter: meanwhile, put the sugars, eggs and salt into a mixing bowl and whisk with an electric whisk until thick and creamy. This will take around 3 minutes.
- When the eggs and sugar are ready, add the vanilla paste and slowly pour in the melted butter, at the side of the dish, and beat until completely incorporated.
- Put a sieve over the bowl and add the flour and sift directly over the cake batter.
- Fold in but be careful not to over-mix at this stage.
- Transfer half of the batter to your lined baking tin and level the surface, making sure the cake batter goes all the way into the corners.
- Set 16 squares of Chocolate Caramel aside and evenly divide the rest over the surface of the blondie batter.
- Top with the remaining cake batter, again levelling the surface and making sure the cake batter goes all the way into the corners.
- Top the cake batter with the 16 Chocolate Caramel squares – I place a square roughly in the centre of each blondie.
- Sprinkle a little sea salt over the top of each chocolate square. These will more than likely sink as you cook the blondies but you will find them again when you sink your teeth into the centre of each delicious slice!
- Bake in the centre of a pre-heated oven for 28 – 32 minutes, depending on how squidgy you like the centre to be. (I cook mine for 30 minutes in London.) This gives me a slightly crispy top but a gorgeous gooey centre. The cake will be slightly risen but the centre will feel quite soft. Remember the cake will continue to cook after you have taken it out of the oven. Ovens do vary so make a note of how long it takes to cook your favourite consistency in your oven. Remember the less you cook it, the more gooey it will be and the more you cook it, the more cake like it will be.
- Leave to cool in the tin for around 30 minutes and then transfer, in the baking parchment, to a cooling rack.
- When the blondies are cold, lay on a chopping board and cut into 9, 12 or 16 slices.
- If I have time and/or if I want my blondies to look really smart, I put my blondies in the fridge to harden before I cut them. You will get much better lines and edges – definitely do this if trying to impress or gifting/selling them! However, they are best eaten at room temperature and can be stored at room temperature, in a sealed container, for up to 5 days. I doubt, however, they will last that long!
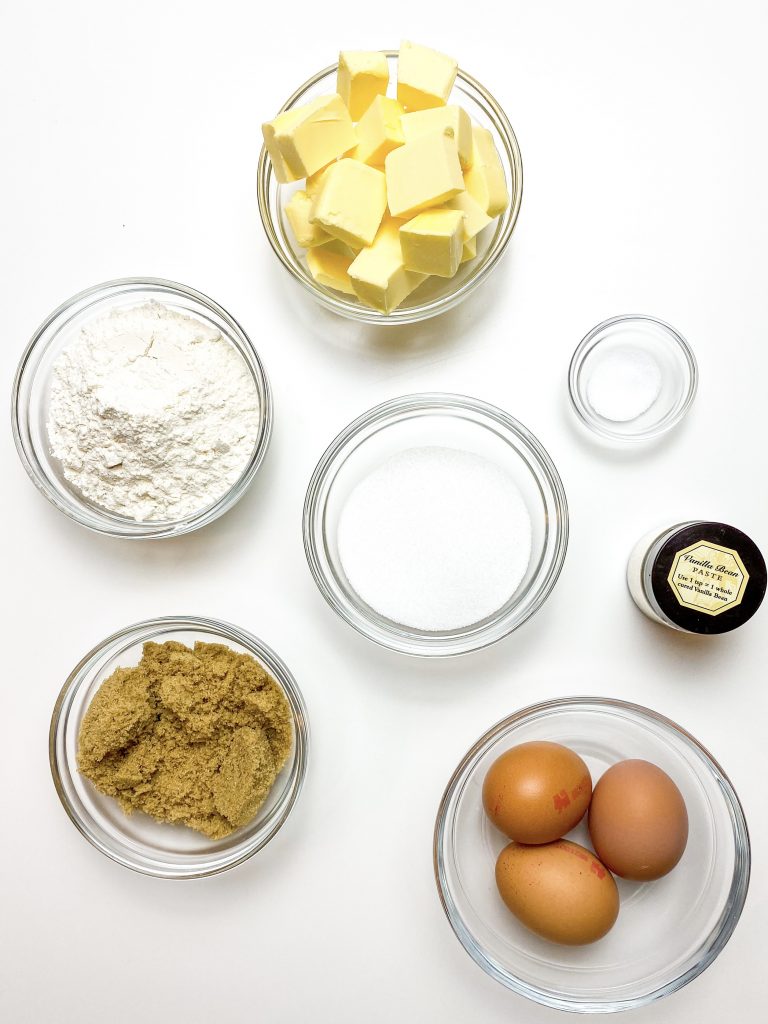
Core ingredients 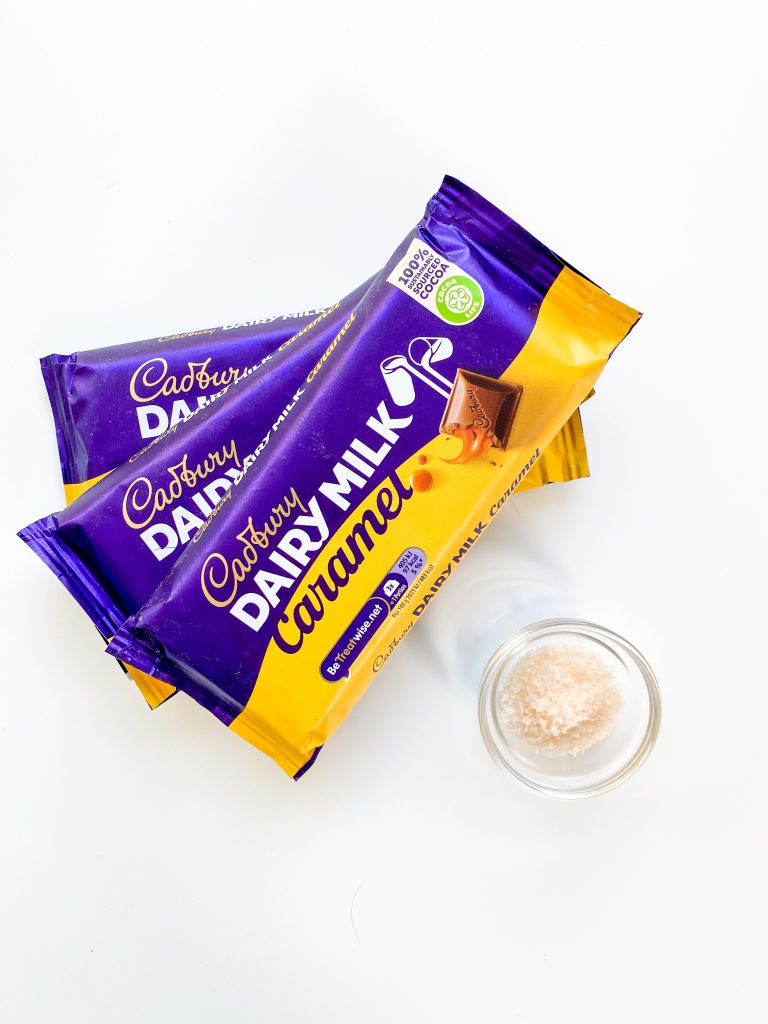
Additional ingredients 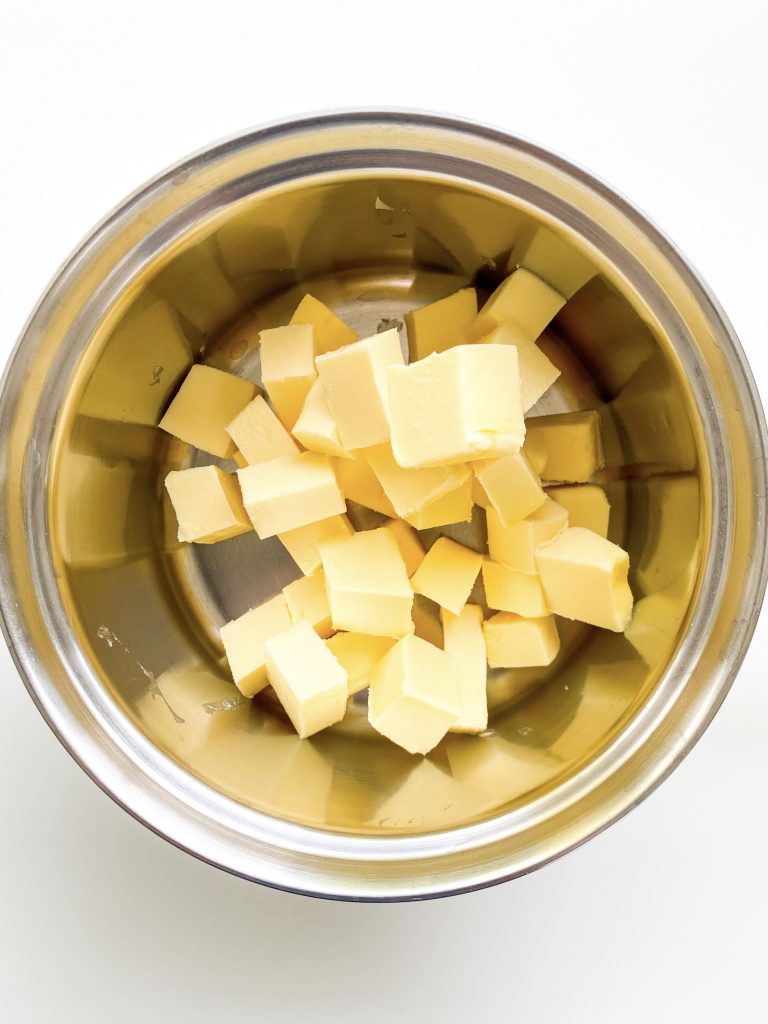
1 Cut butter into squares 
… and brown. 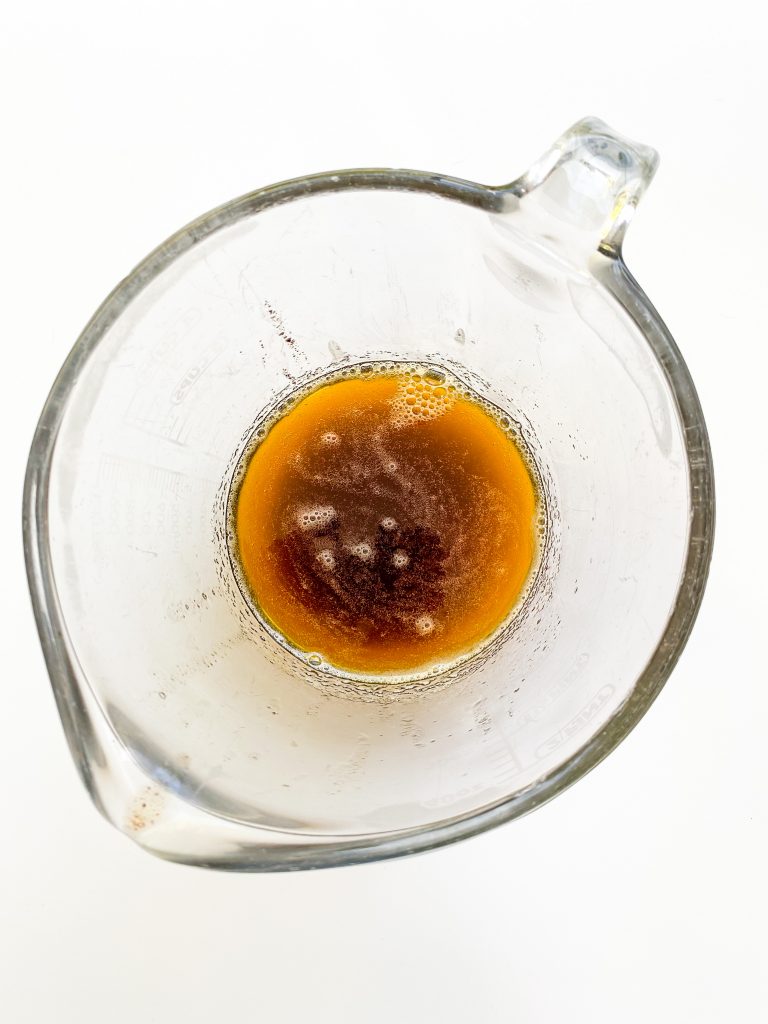
2 Transfer to jug to cool slightly 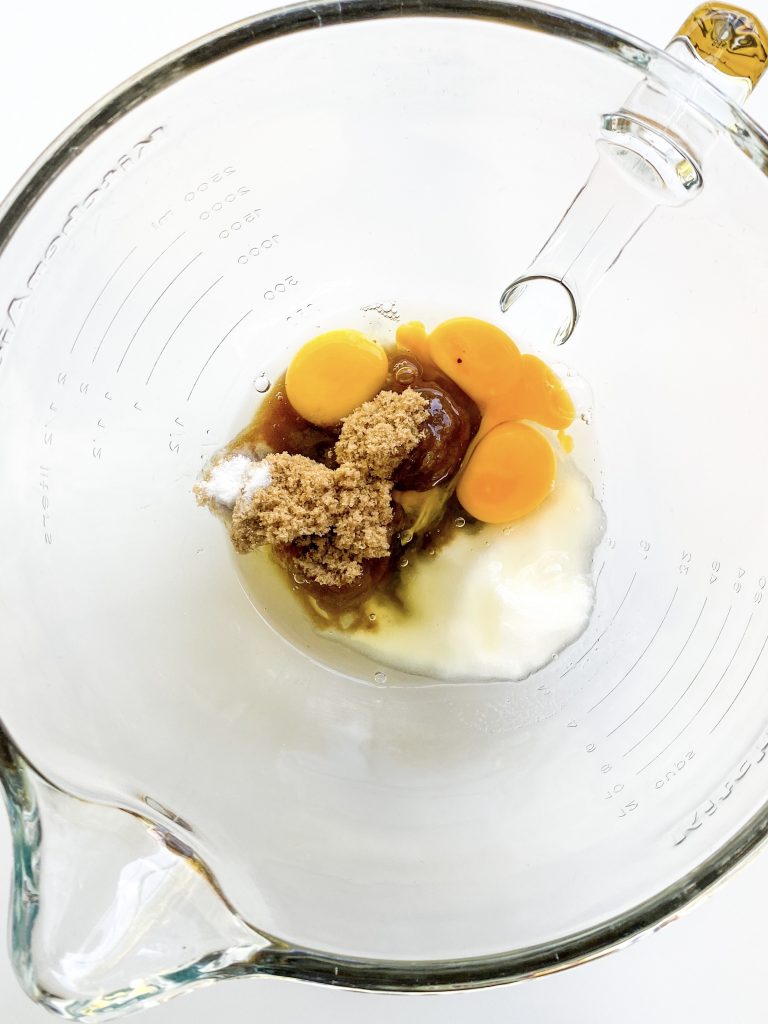
3 Whisk sugars, eggs and salt until thick & creamy. 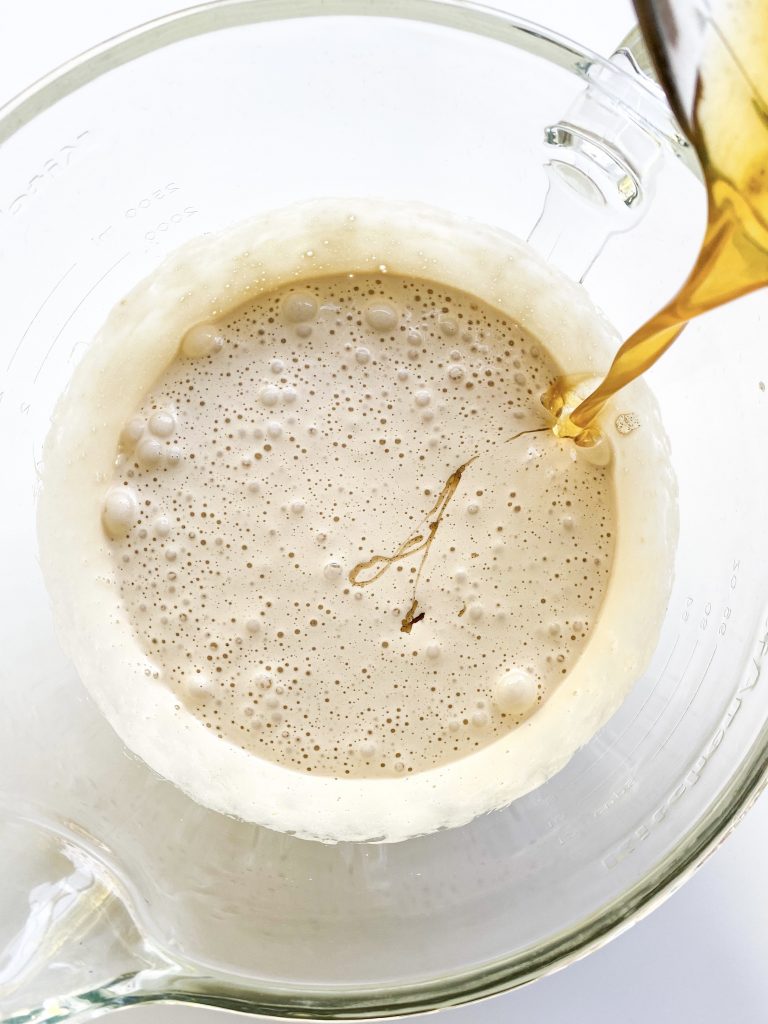
4 Add vanilla and butter. Beat to mix. 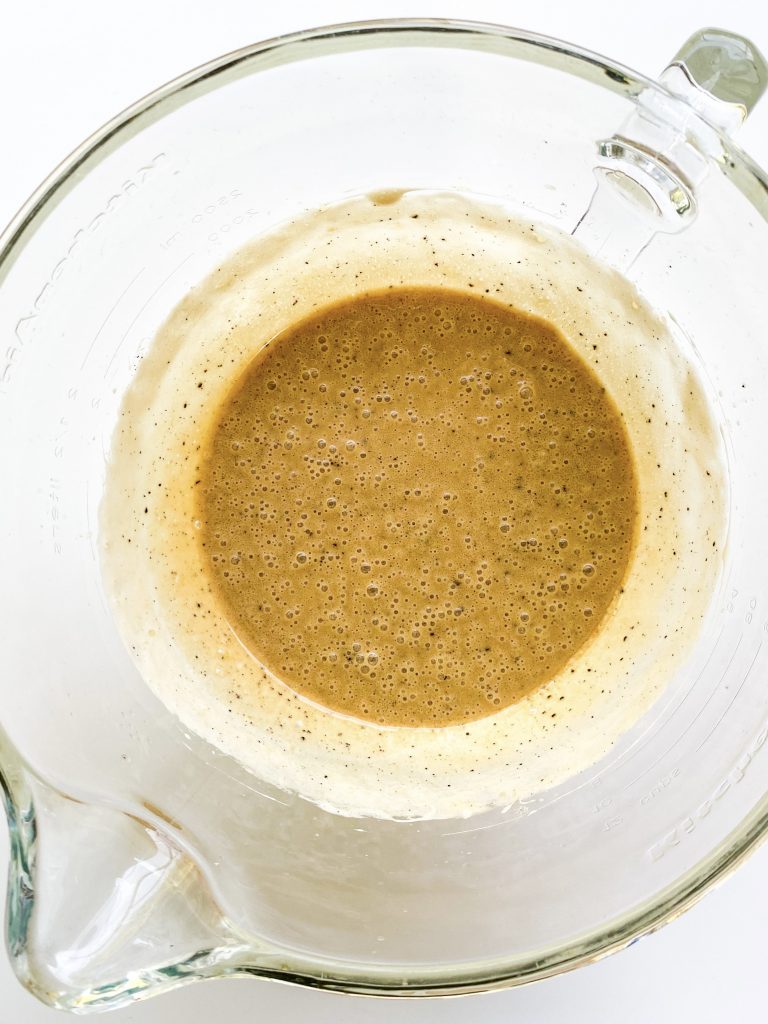
Beat to mix 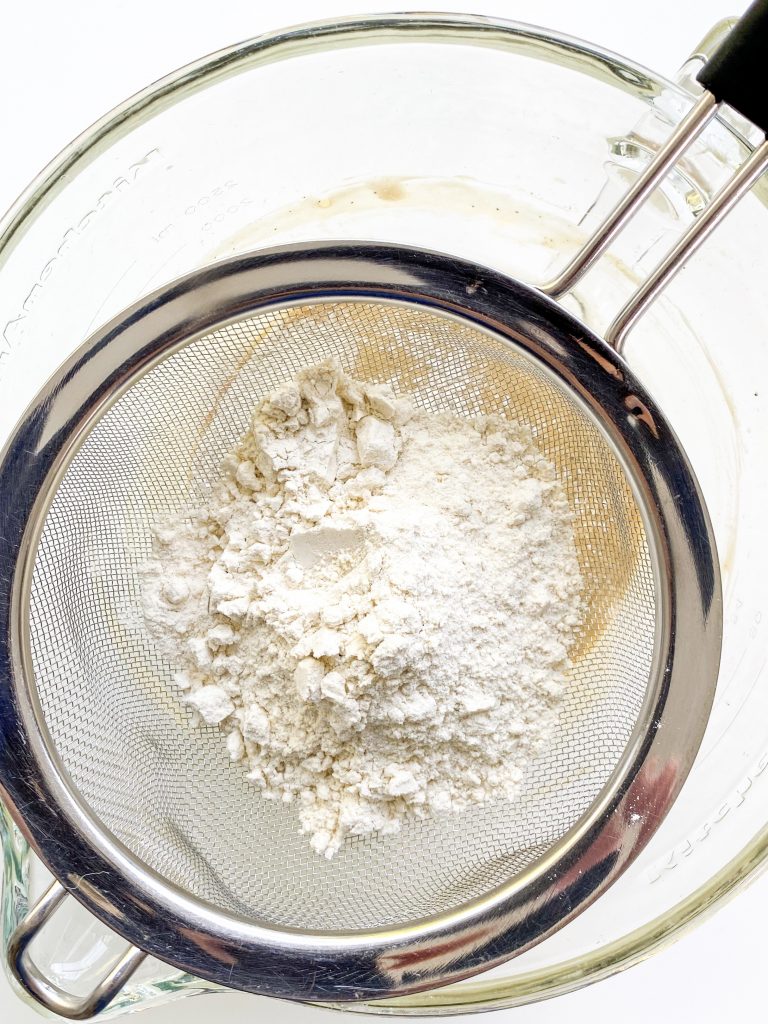
5 Add flour to sieve over bowl and sift 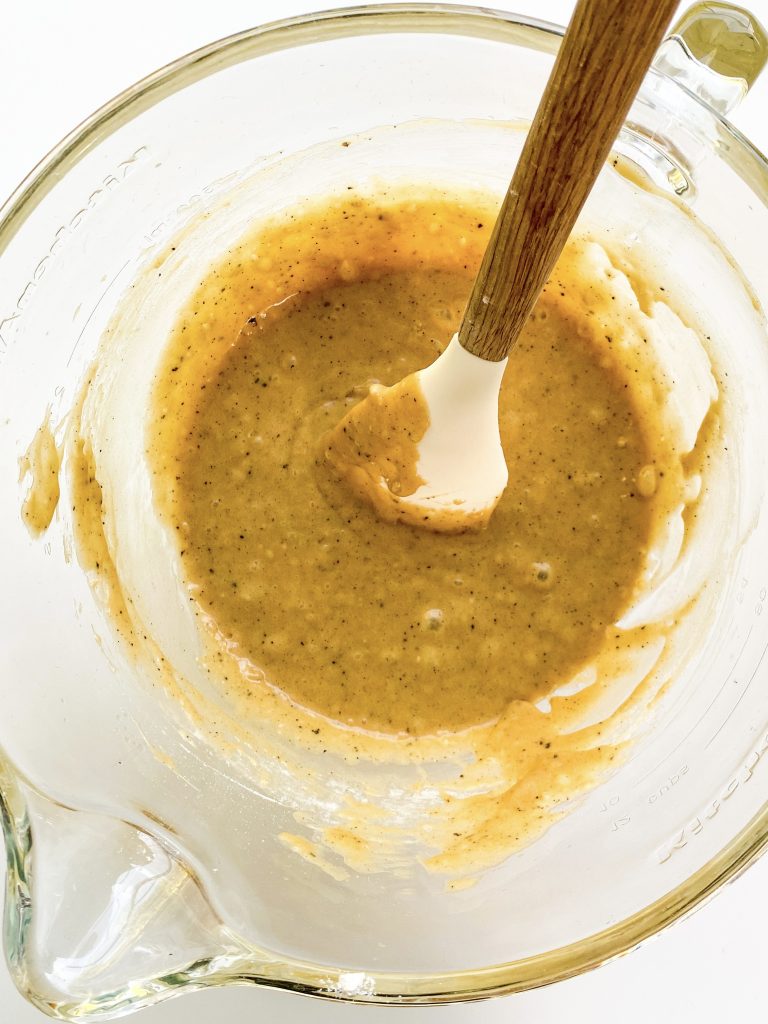
6 Fold in flour 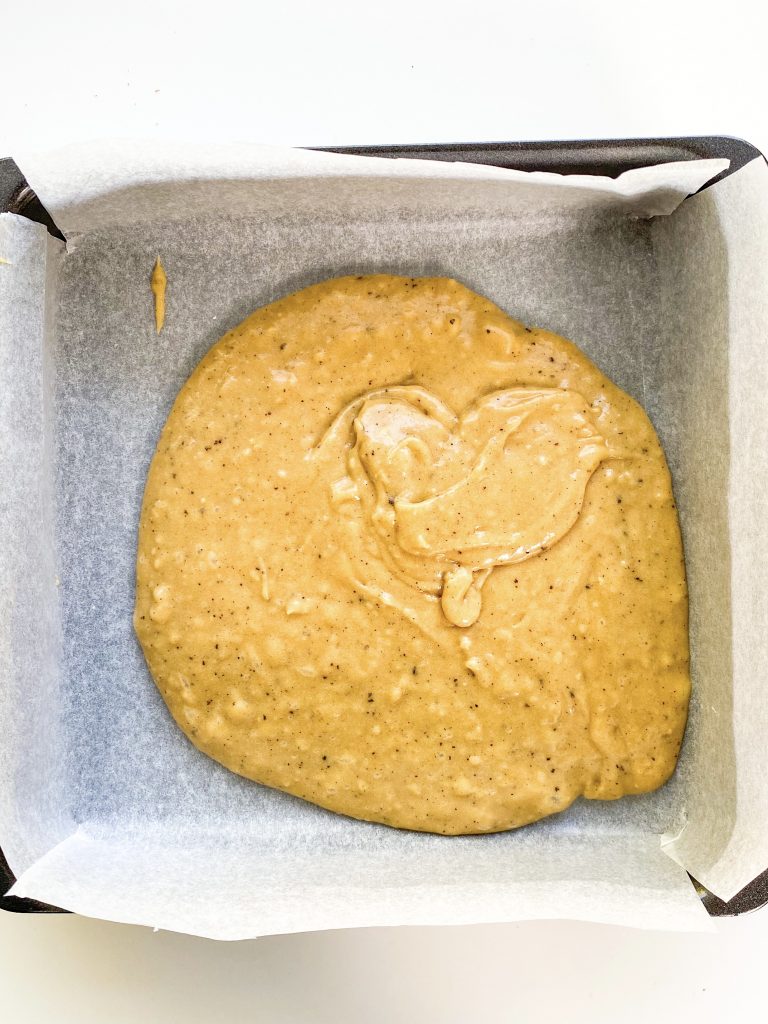
7 Half batter in cake tin 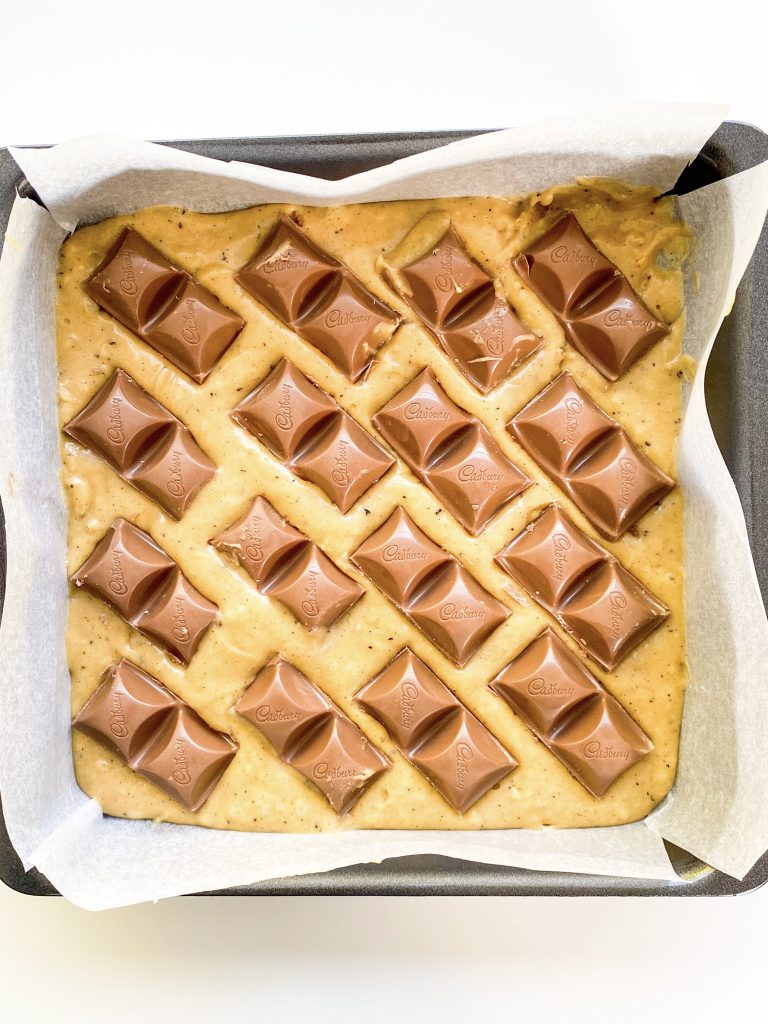
8 Add chocolate caramel 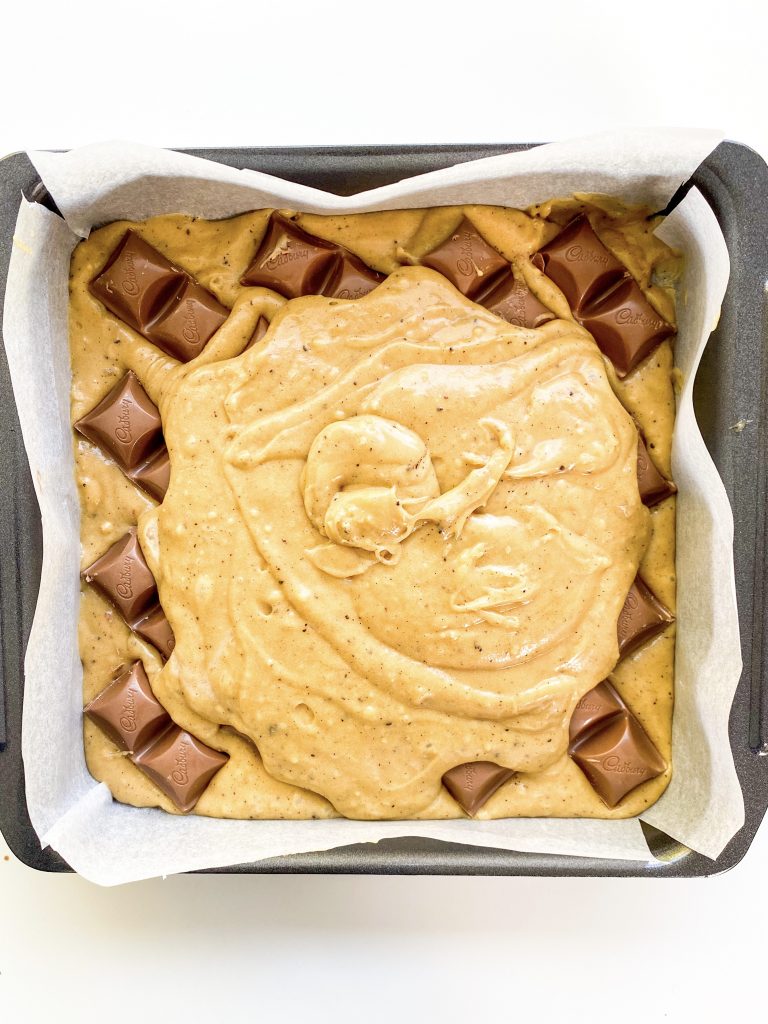
9 Add remaining batter. Level surface 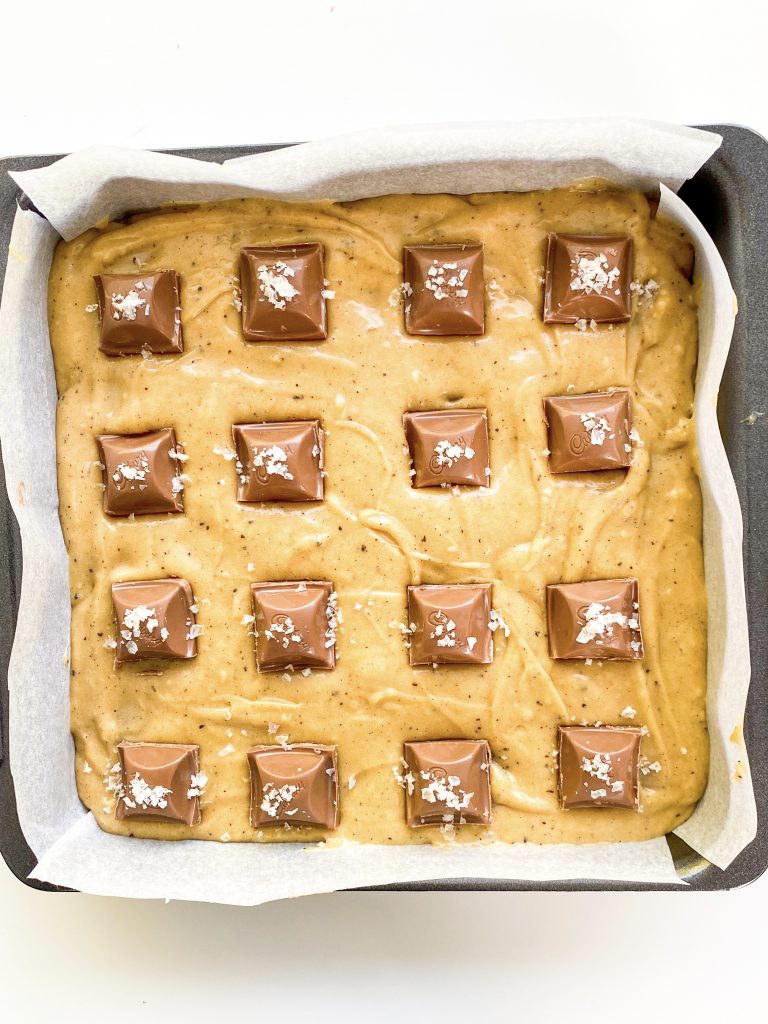
10, 11 Add remaining chocolate and salt 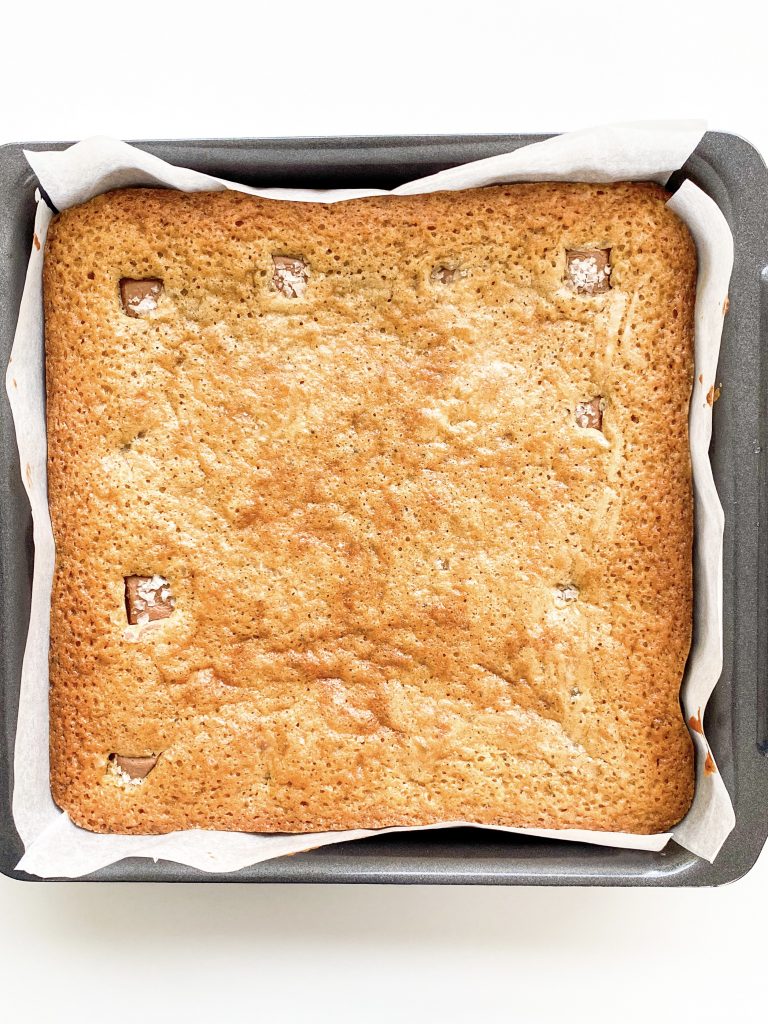
12 Bake 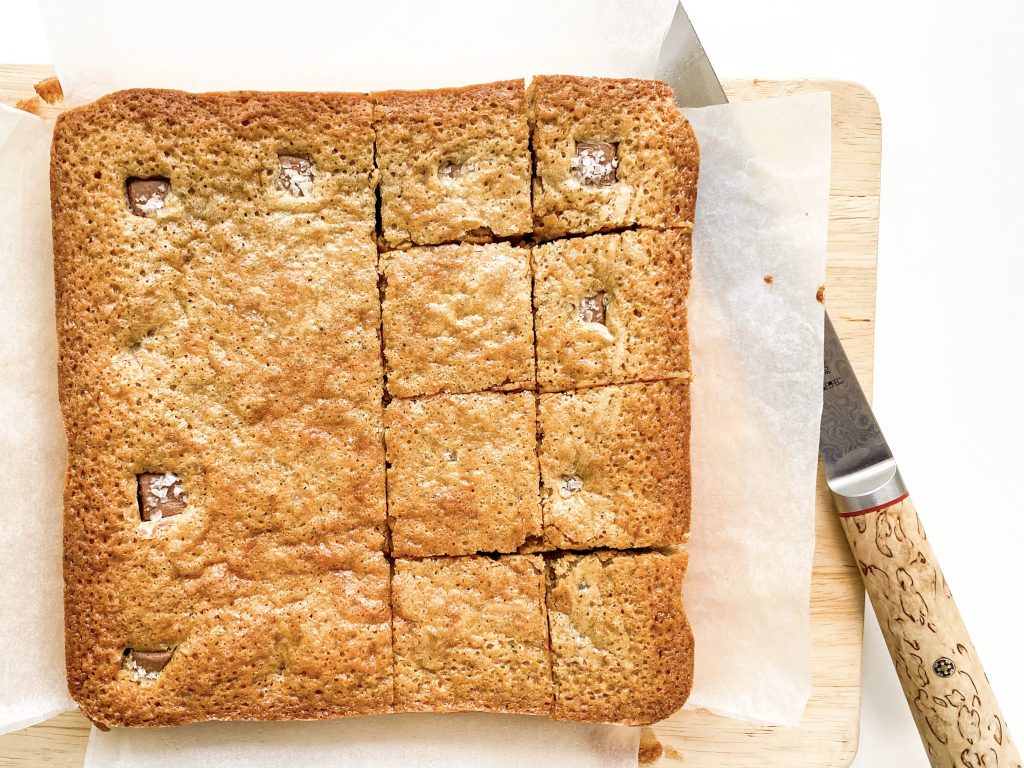
What is the best way to store blondies?
When you store blondies, it is important to cover them. They keep well for up to 3 days at room temperature or up to 5 days in the fridge. However, if you are storing them in the fridge, remember to take them out to warm up to room temperature before you serve them.
What is the best way to warm blondies?
I adore warm blondies for dessert, served with ice cream. If you have made the blondies in advance and want to warm them up, simply zap them in the microwave for 10 – 20 seconds. The time it takes will depend on the temperature of the blondies to start with (ie have they been in the fridge or not?), the power of the microwave and how hot you actually want them. I like mine warm, but not too hot. I recommend heating them in 10 second bursts, until you are happy with the heat.
If you do not have a microwave, you could warm them in the oven. Cover with foil and place them in an oven preheated to Fan Oven 150°C/170°C/325°F/Gas 3 for 1 – 3 minutes. (Depending on how many you are heating and how hot you want them.) Check them after 1 minute and be careful not to overheat, as you may over cook them.
Can I freeze these blondies?
Yes you can! These blondies freeze well, covered, for up to 3 months.
Made this recipe?
If you make this recipe, do please tag me on instagram @daffodil_kitchen. You could also leave a comment in the box directly below the recipe.

Salted Caramel Brown Butter Blondies
Melt in the mouth, light, yet rich and a little gooey on the inside, these Salted Caramel Brown Butter Blondies are studded with squares of Cadburys Caramel chocolate and topped with an extra sprinkling of sea salt. Using bars of chocolate caramel means these bars are exceedingly quick and easy to make with guaranteed nuggets of caramel joy in each mouthful!
Serves 9 – 16
Ingredients
- 200g unsalted butter, in cubes
- 150g soft brown sugar
- 50g caster sugar
- ¼ teaspoon fine salt
- 3 eggs
- 3 teaspoons vanilla paste or extract
- 140g plain/all-purpose flour
- 360g/3 bars Cadbury Dairy Milk Caramel Bars
- sea salt for sprinkling on the top
Instructions
-
Collect together your equipment (see Recipe Notes below) and ingredients.
-
Preheat oven to fan oven 160°C /180°C/350°F/Gas 4
-
First, brown the butter: chop the butter into squares and place in a saucepan. Heat over a moderate heat, stirring from time to time, until the butter turns brown. To read more about browning butter, please see here.
-
Pour into a jug so it stops cooking, cools and is ready to pour into the batter.
-
Make the blondie batter: meanwhile, put the sugars, eggs and salt into a mixing bowl and beat with an electric whisk until thick and creamy. This will take around 3 minutes.
-
When the eggs and sugar are ready, add the vanilla paste and slowly pour in the melted butter, at the side of the dish, and beat until completely incorporated.
-
Put a sieve over the bowl and add the flour and sift directly over the cake batter. Fold in but be careful not to over-mix at this stage.
-
Transfer half of the batter to your lined baking tin and level the surface, making sure the cake batter goes all the way into the corners.
-
Set 16 squares of Chocolate Caramel aside and evenly divide the rest over the surface of the blondie batter.
-
Top with the remaining cake batter, again levelling the surface and making sure the cake batter goes all the way into the corners.
-
Top the cake batter with the 16 Chocolate Caramel squares – I place a square roughly in the centre of each blondie.
-
Sprinkle a little sea salt over the top of each chocolate square. These will more than likely sink as you cook the blondies but you will find them again when you sink your teeth into the centre of each delicious slice!
-
Bake in the centre of a pre-heated oven for 28 – 32 minutes, depending on how squidgy you like the centre to be. (I cook mine for 30 minutes in London.) This gives me a slightly crispy top but a gorgeous gooey centre. The cake will be slightly risen but the centre will feel quite soft.
-
Leave to cool in the tin for around 30 minutes and then transfer, in the baking parchment, to a cooling rack.
-
When the blondies are cold, lay on a chopping board and cut into 16 slices.
Recipe Notes
Equipment:
- Microwave safe jug or heatproof bowl
- Electric whisk and mixing bowl
- Kitchen scales and measuring spoons
- Sieve
- chopping board and knife, if necessary
- 20cm/8inch square baking tin lined with baking parchment
Cooking times:
Bake in the centre of a pre-heated oven for 28 – 32 minutes, depending on how squidgy you like the centre to be. (I cook mine for 30 minutes in London.) This gives me a slightly crispy top but a gorgeous gooey centre. The cake will be slightly risen but the centre will feel quite soft. Remember the cake will continue to cook after you have taken it out of the oven. Ovens do vary so make a note of how long it takes to cook your favourite consistency in your oven. Remember the less you cook it, the more gooey it will be and the more you cook it, the more cake like it will be.
Slicing blondies:
If I have time and/or if I want my blondies to look really smart, I put my blondies in the fridge to harden before I cut them. You will get much better lines and edges – definitely do this if trying to impress or gifting/selling them! However, they are best eaten at room temperature and can be stored at room temperature, in a sealed container, for up to 5 days. I doubt, however, they will last that long!


Blackberry Cobbler

Almond Cake
You May Also Like
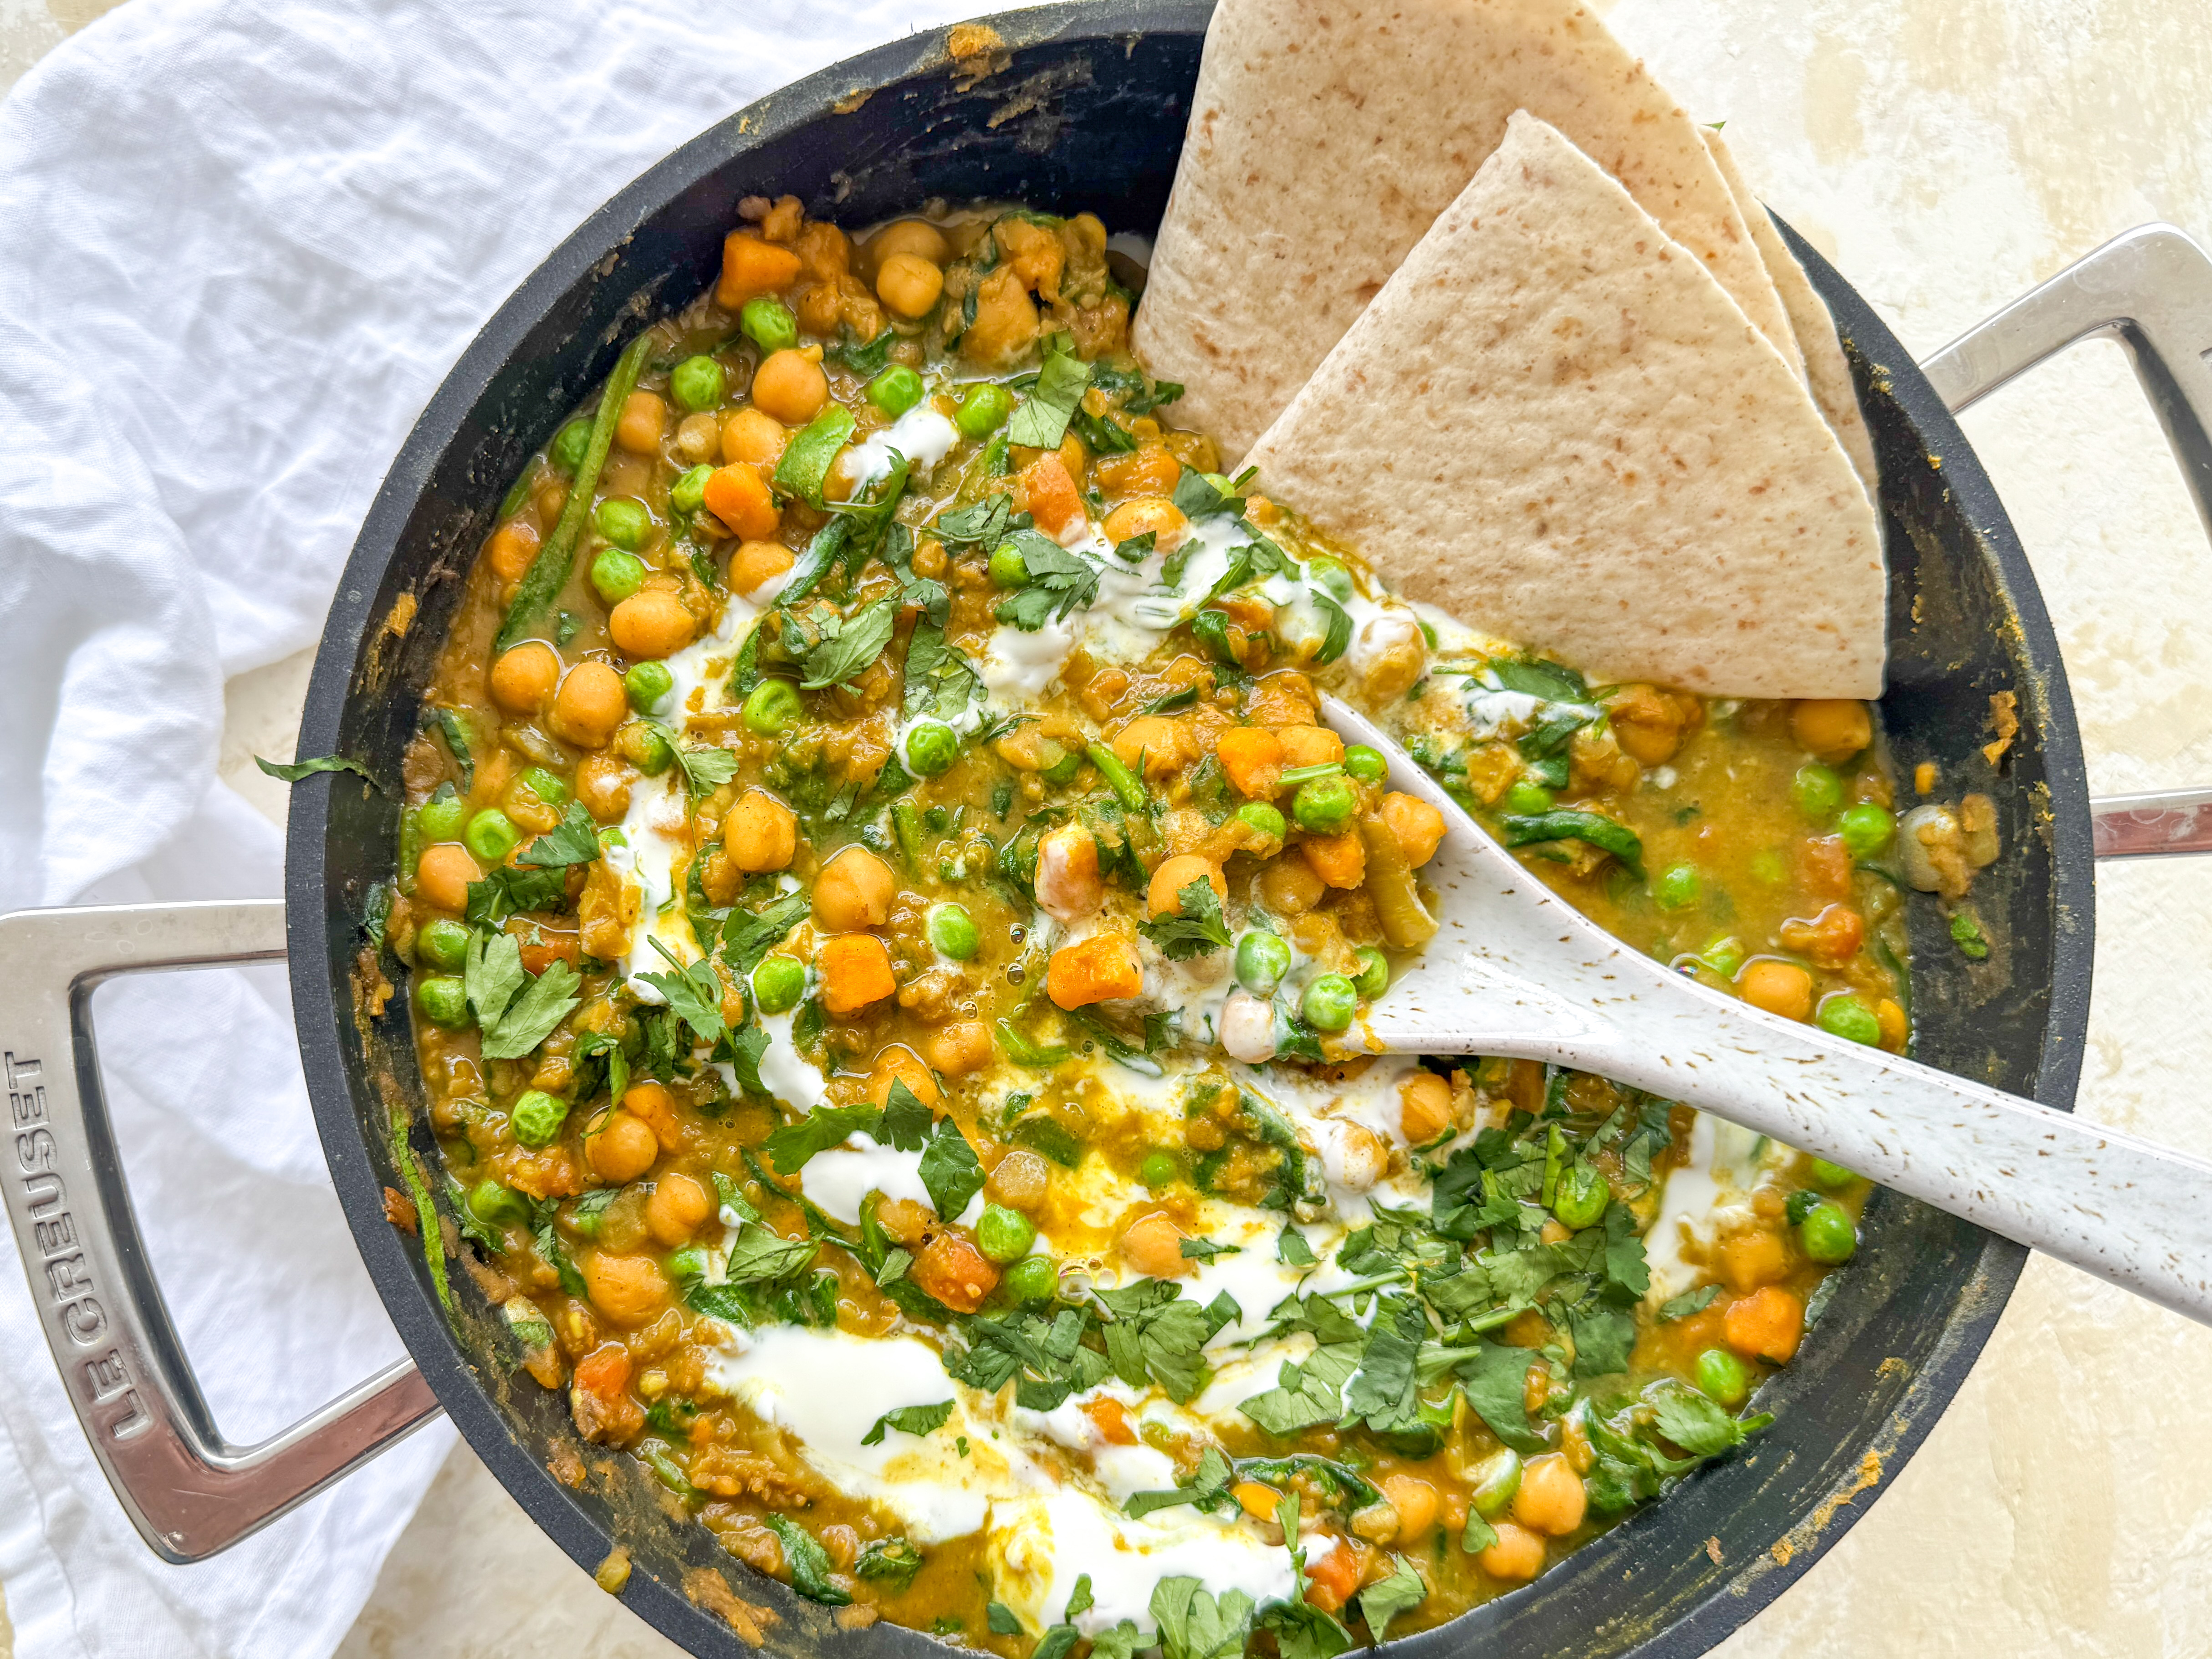
Afghan Chickpea Curry with Sweet Potato, Spinach and Peas
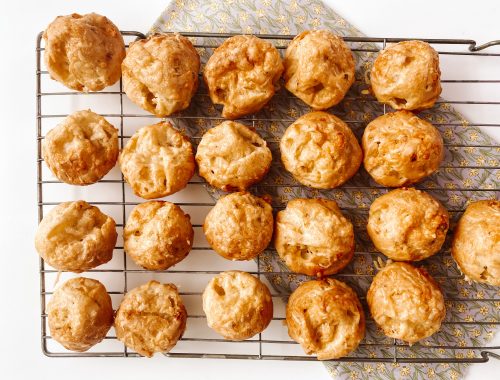
Gougères

