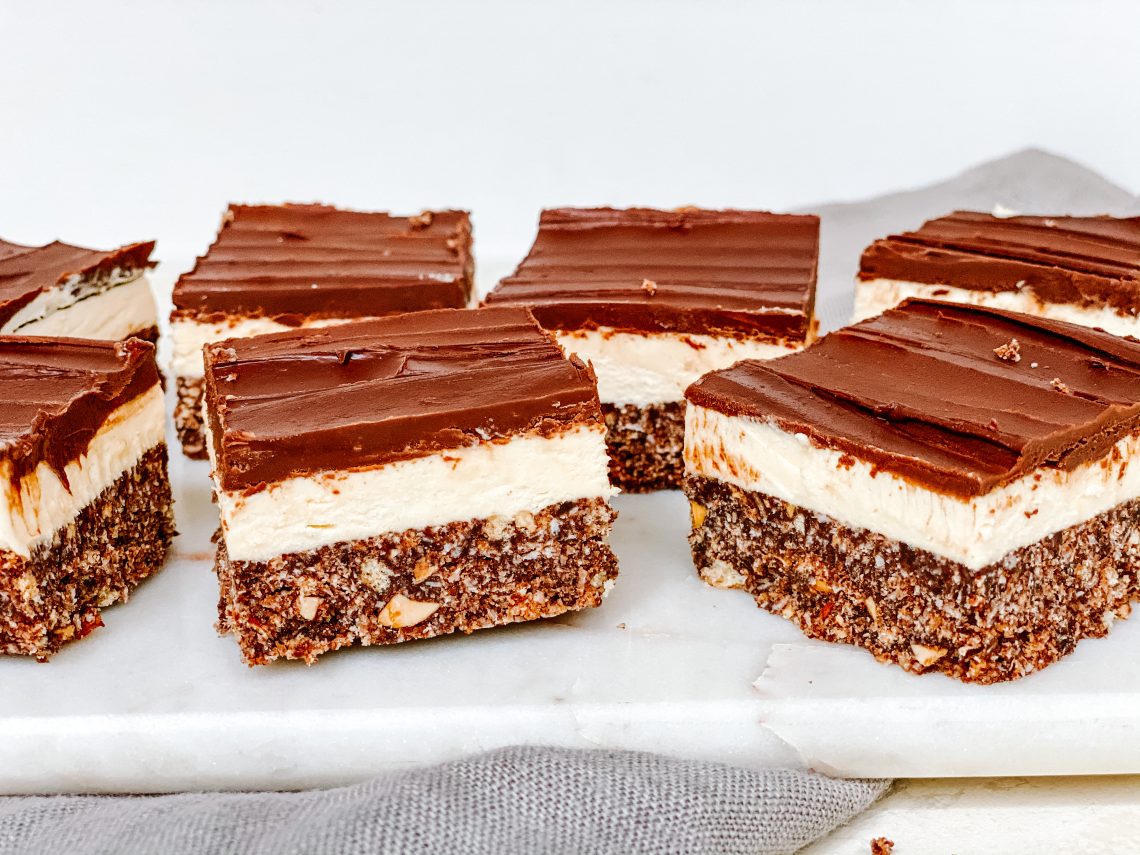
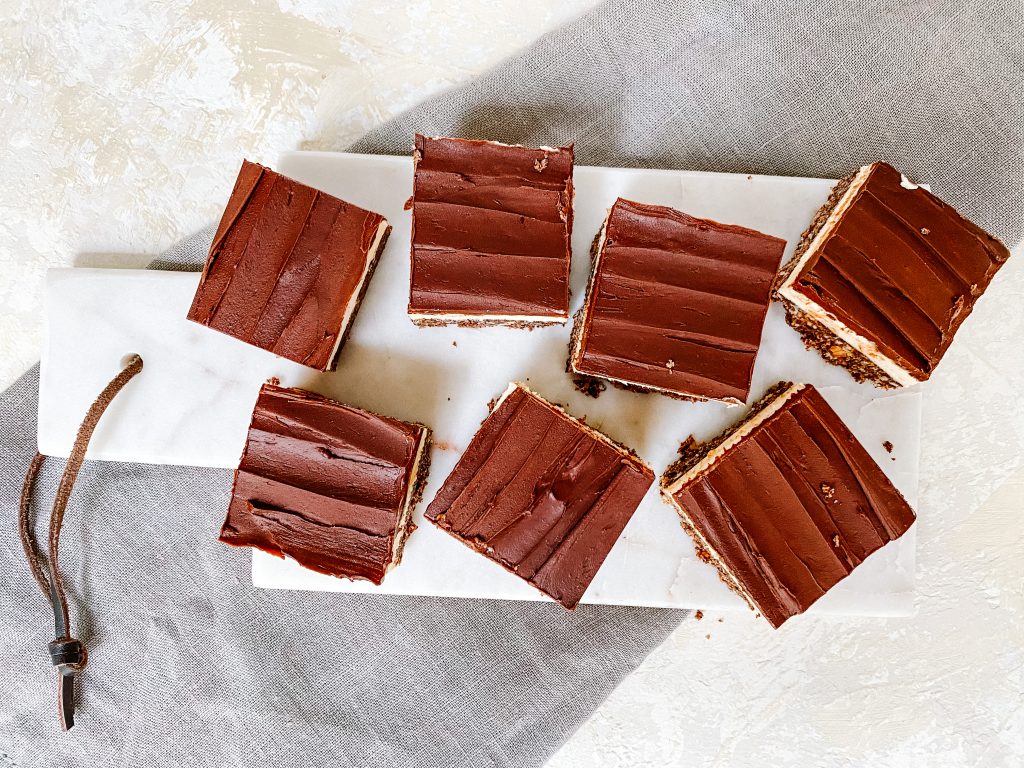
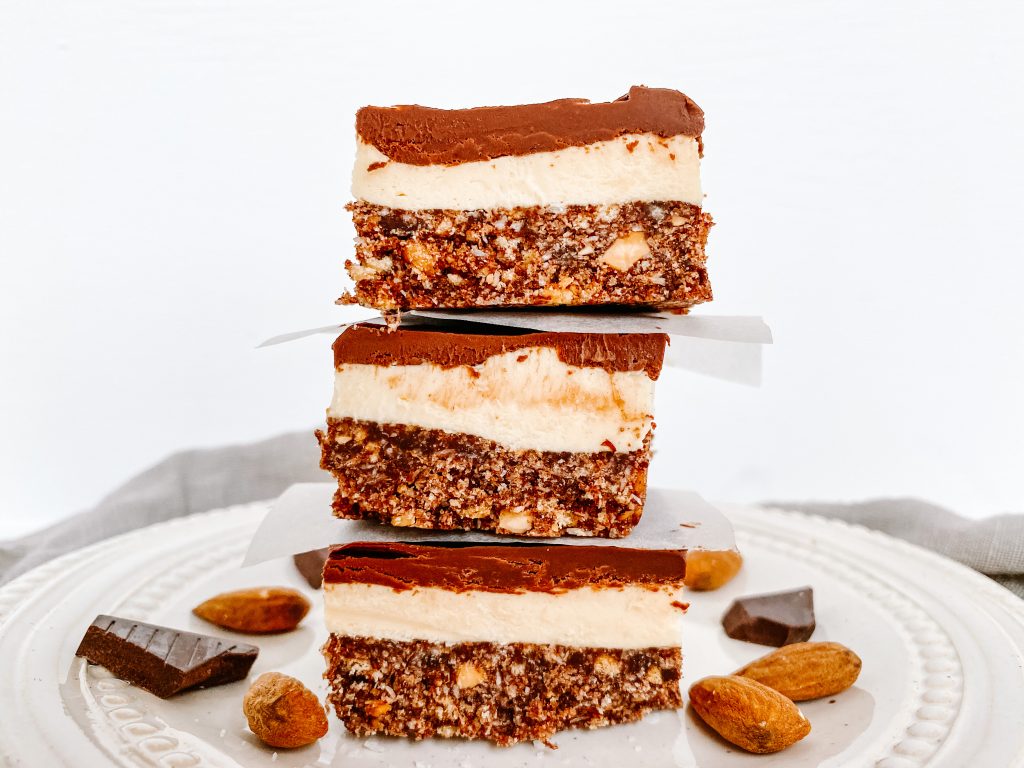
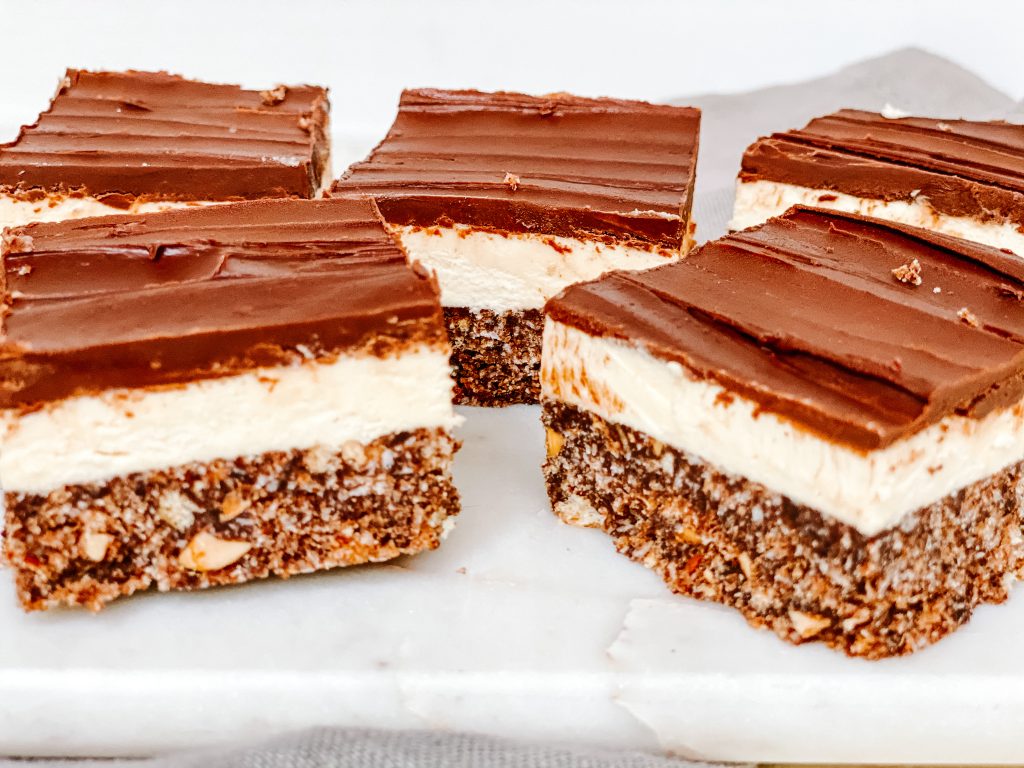
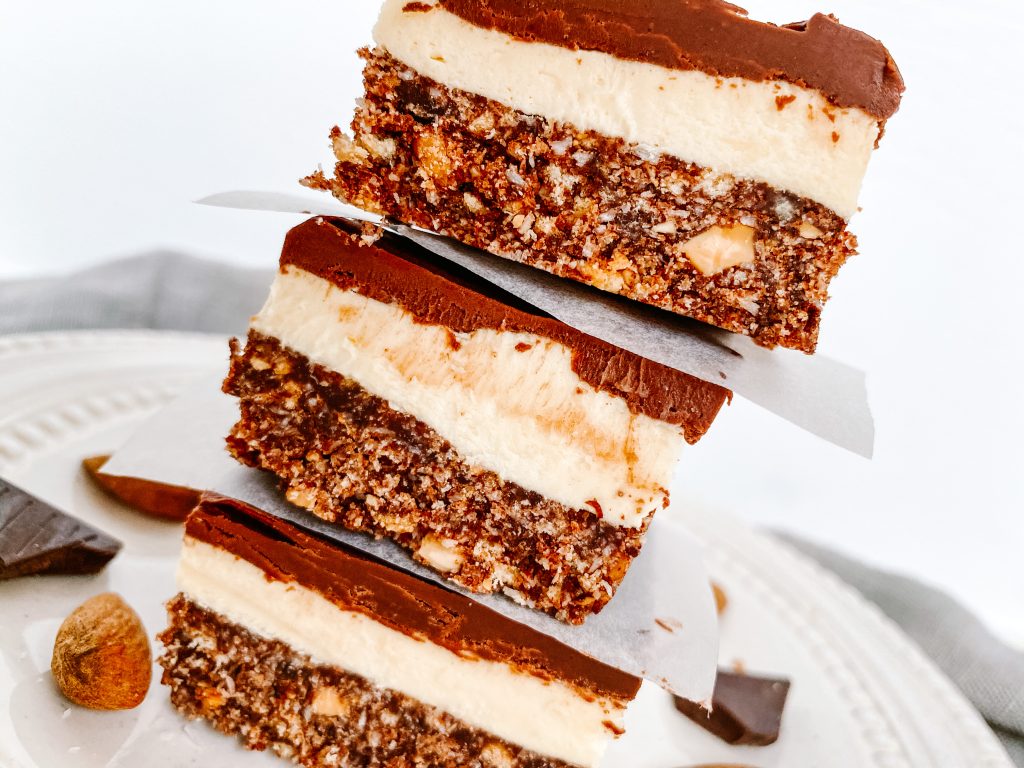
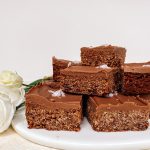
Nanaimo Bars
With a crispy, crunchy base layer loaded with chocolate, coconut, digestive biscuits and roast almonds, a rich yet light, creamy middle layer flavoured with custard and vanilla, these bars are then finished with a thick layer of chocolate ganache, with a slight salty kick. So yum. So dreamy So delicious. These ‘no-cook’ bars are quick and easy to make and it is little wonder that the legendary Nanaimo are so popular in Canada and loved by Canadians from the west to the east coast.
They originated in a city called Nanaimo, situated on the east coast of Vancouver Island in British Columbia. How they came about and when they were first made is unclear and much debated with references certainly going back to the early 1950s, and some would argue earlier than that. Whatever their history, I am enjoying these bars today and thinking of my family and friends in Canada on Canadian Thanksgiving.
I lived in Canada as a child and I have a large and extended family over there, stretching from Saskatchewan to Nova Scotia. My Dad had 2 uncles who emigrated in the 1930s and his brother followed suit in the 1960s. Over the years, we have enjoyed meeting many of our family as they travel back to Wales to follow their roots and these days, through the wonders of social media, we still enjoy a lot of contact across many age groups.
Indeed when Andrew and I visited Toronto this time last year, we met up with my Dad’s cousin and her husband and Charlotte and I had planned a road trip through Quebec, New Brunswick, Nova Scotia and PEI hoping to catch up with more family. Sadly, COVID put an end to that trip, but we will be back when life returns to whatever the new normal will be.
So, back to the important bit – the Nanaimo Bars!
How to make Nanaimo Bars
This recipe is slightly adapted from the one on the city of Nanaimo website. You can see their recipe here. The only changes I have made have been to:
- include a little salt in all the layers. These bars are rich and I think a salty kick helps cut through the richness, as well as enhance all the flavours.
- roast the almonds before including them in the base. Not going to lie, I always roast my nuts! Not only will they have added crunch, it really improves and develops their flavour. Hence my version, is not strictly ‘no bake’ but this step is really worth it.
- I replaced the graham wafer crumbs with digestive biscuit crumbs.
- I used the traditional Bird’s Custard powder but added 1 teaspoon vanilla extract to help bring out that gorgeous vanilla custard flavour.
- Oh, and I added a thicker layer of chocolate on the top! I love chocolate so make no apologies for this!
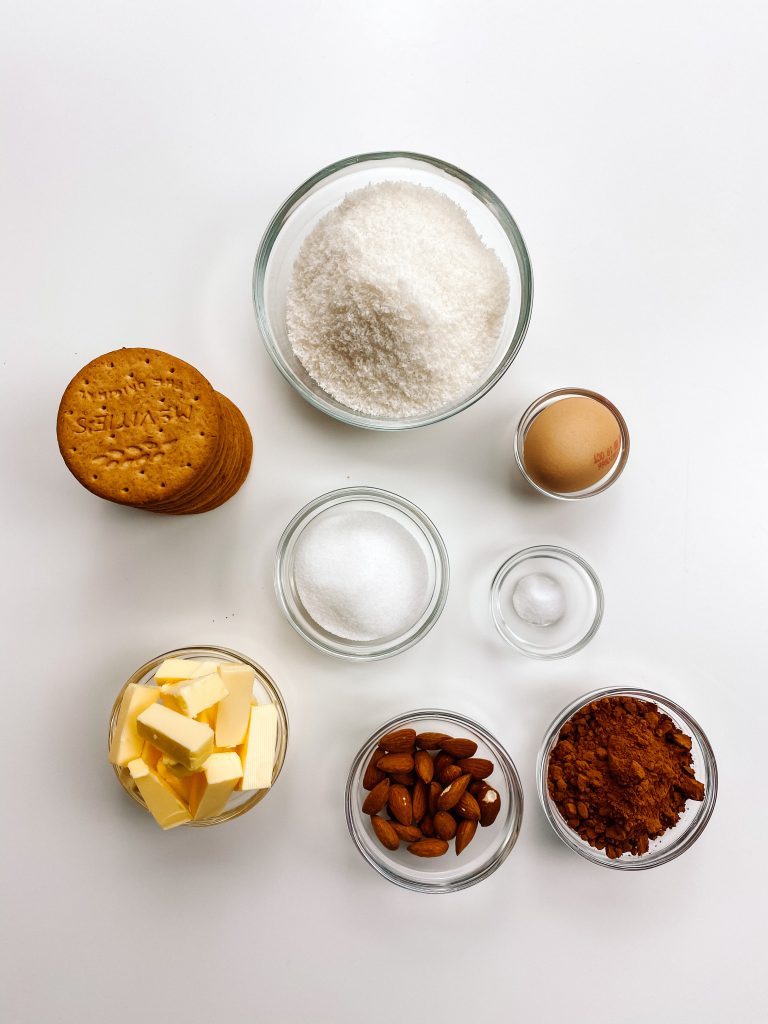
Collect all your ingredients together:
For the bottom layer:
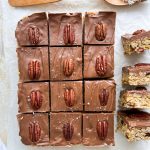
- almonds – you could also use pecans or walnuts if you prefer
- digestive biscuits
- unsalted butter
- caster sugar
- unsweetened cocoa
- large egg
- desiccated coconut
- fine salt
For the middle layer:
- unsalted butter, room temperature
- icing sugar
- Bird’s custard powder
- fine salt
- double cream
- vanilla extract
For the top layer:
- semi sweet chocolate
- unsalted butter
- fine salt
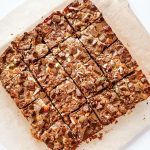
Make the bottom layer:
- The first thing to do is to roast the nuts in a preheated oven for around 8 minutes, remembering to give them a shake or stir after 4 minutes.
- Crush the digestives. The easiest way to do this, is to put them in a plastic bag and use rolling pin to crush them.
- You can either chop the nuts or put them in a small food processor, like I do, and pulse until you get the texture you like. I like a mix of larger and smaller pieces.
- Put the butter, cocoa, sugar and salt in a small saucepan
- Heat over a moderate temperature and whisk with a balloon whisk until melted and no lumps remain.
- Add the beaten egg and mix well
- Cook over a moderate heat for 3-4 minutes. This ensures the egg cooks. It will look grainy and as if it has separated but that is OK. It will come together.
- Add the digestives, chopped nuts and coconut.
- Stir to mix – it is important to ensure you do this thoroughly. It can take a good few minutes.
- Tip into a lined square baking tin and level the surface, making sure you press down quite hard and push it into the corners of the tin.
- Put in the fridge to harden whilst you make the middle layer.
Ingredients for the bottom layer 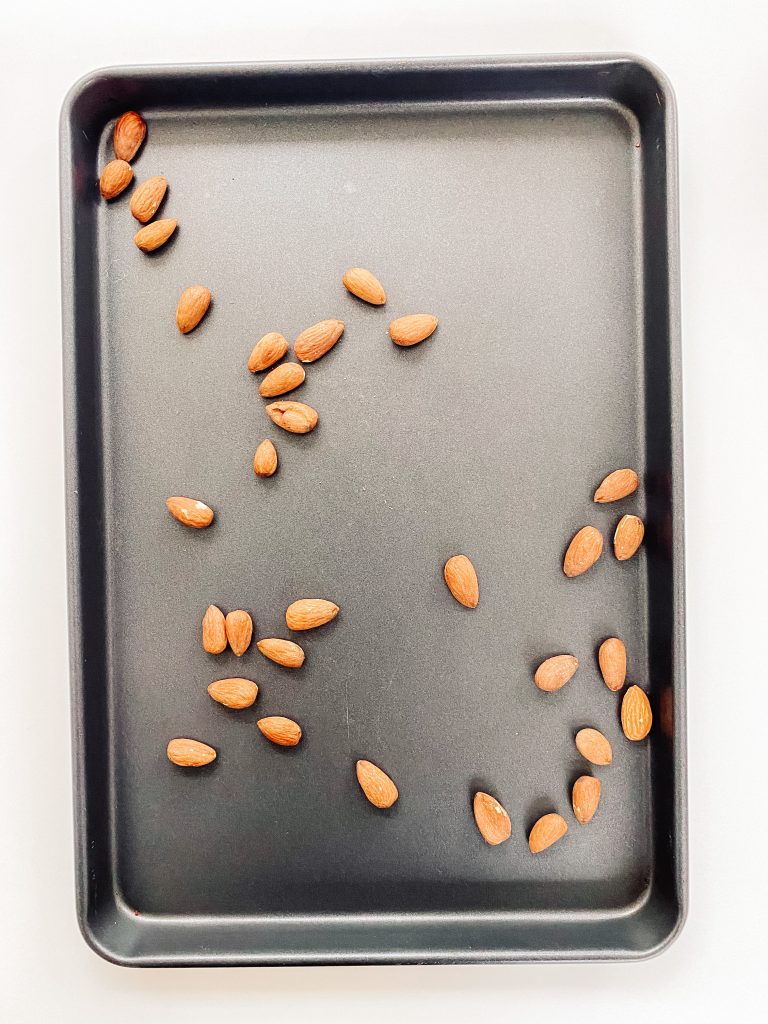
1 Roast the nuts 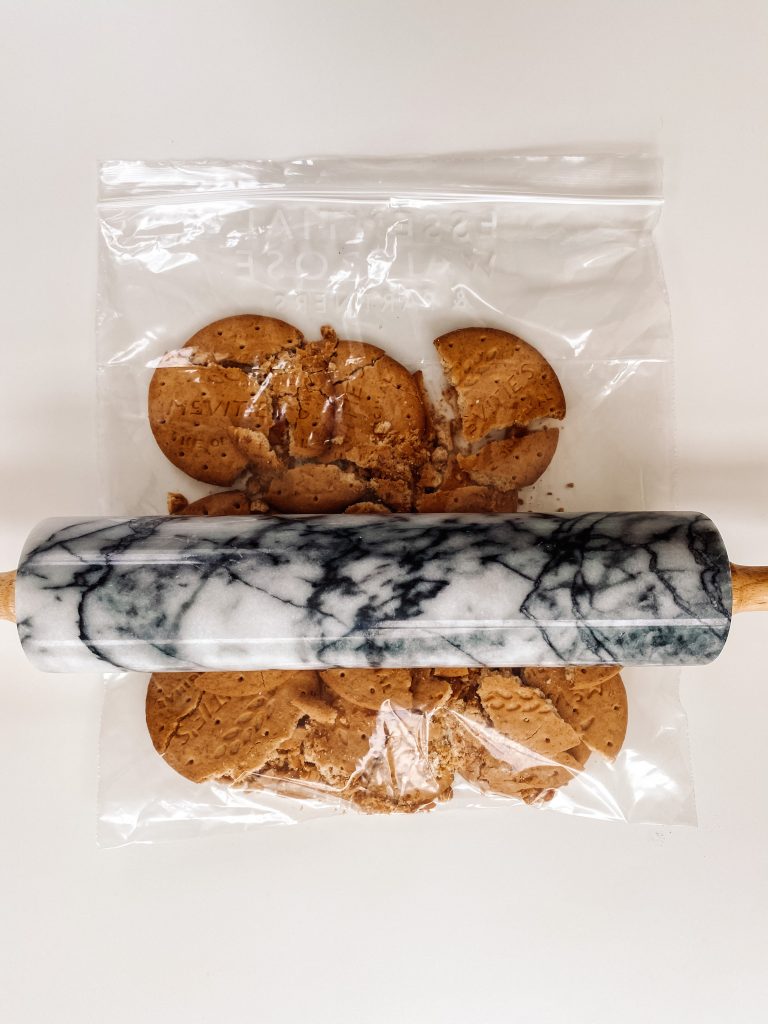
2 Crush the digestives…. 
…..to make crumbs 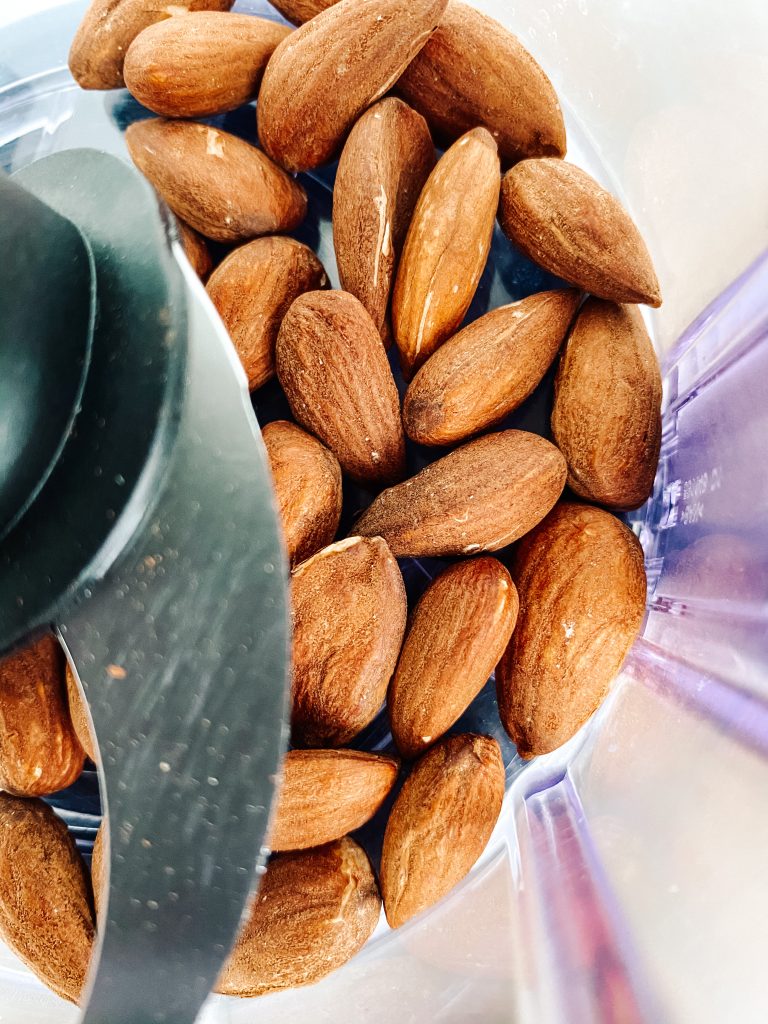
3 Grind the nuts 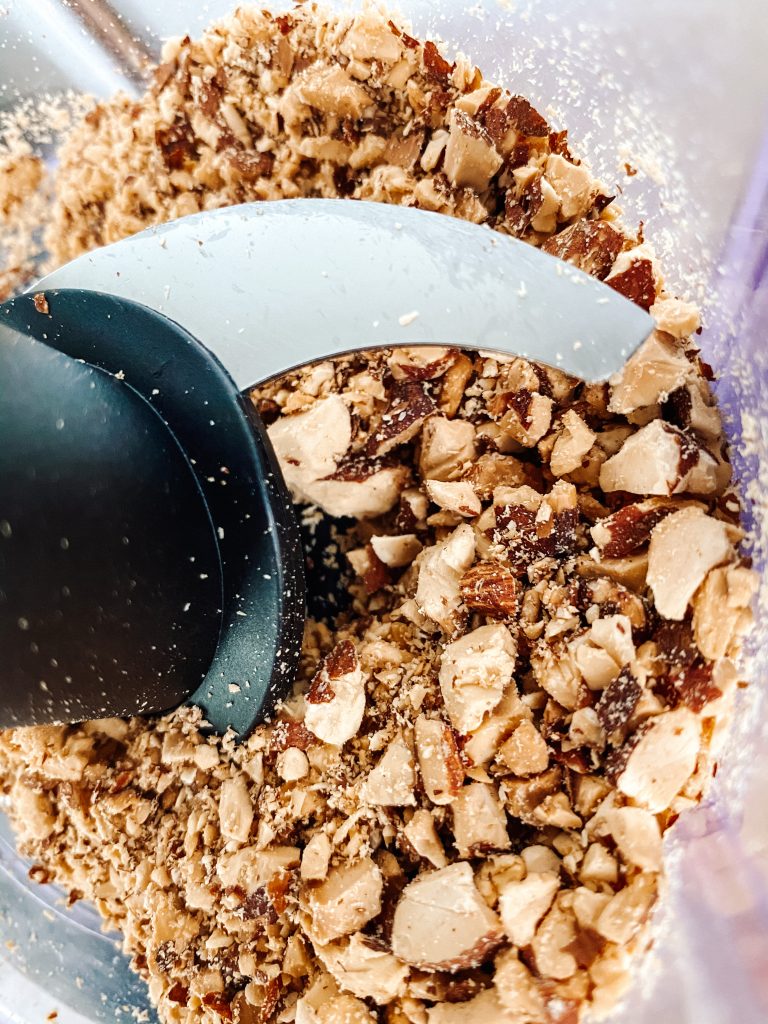
I like a mix of textures 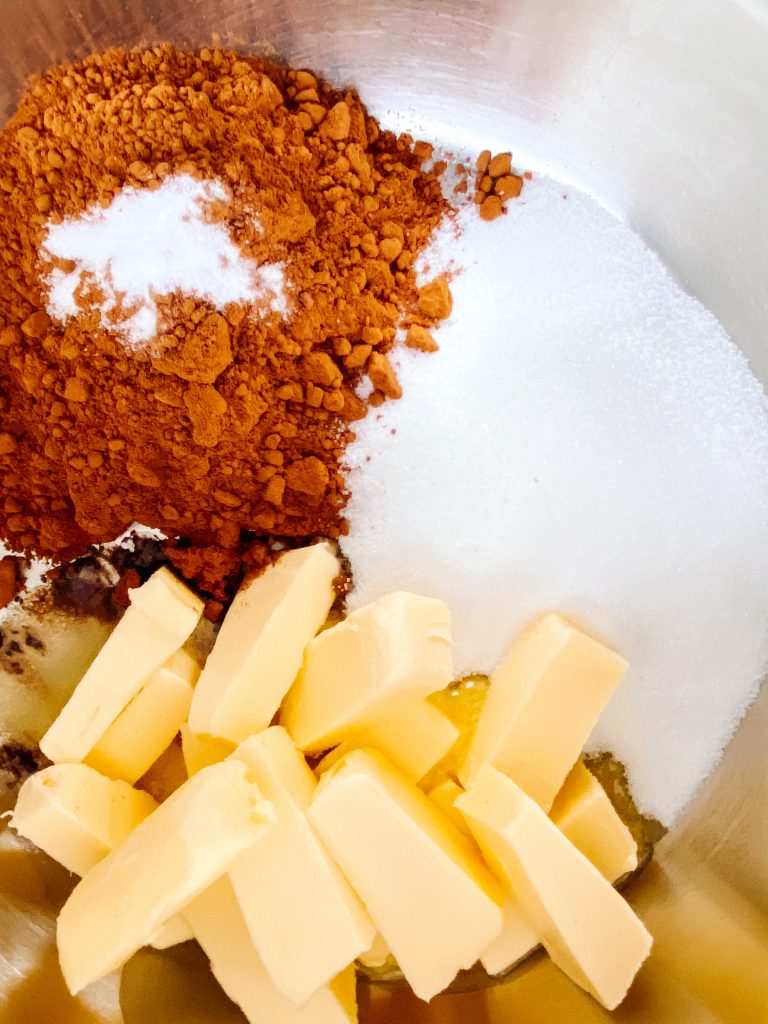
4 Cocoa, butter, sugar and salt in a saucepan 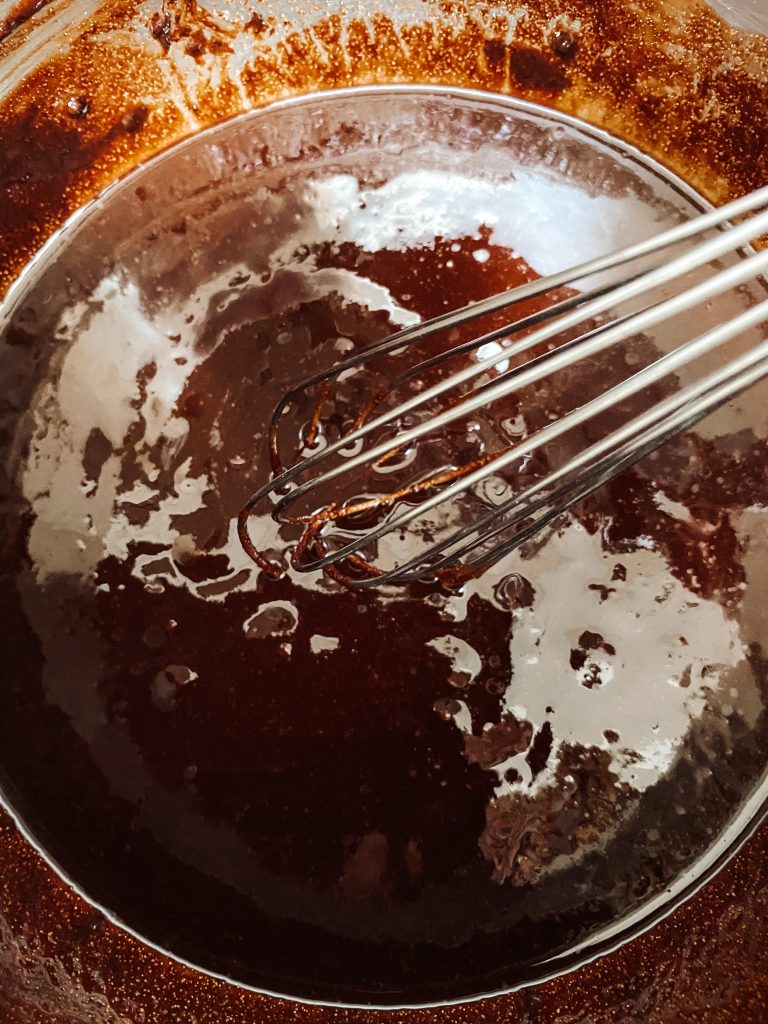
5 Heat and whisk to mix 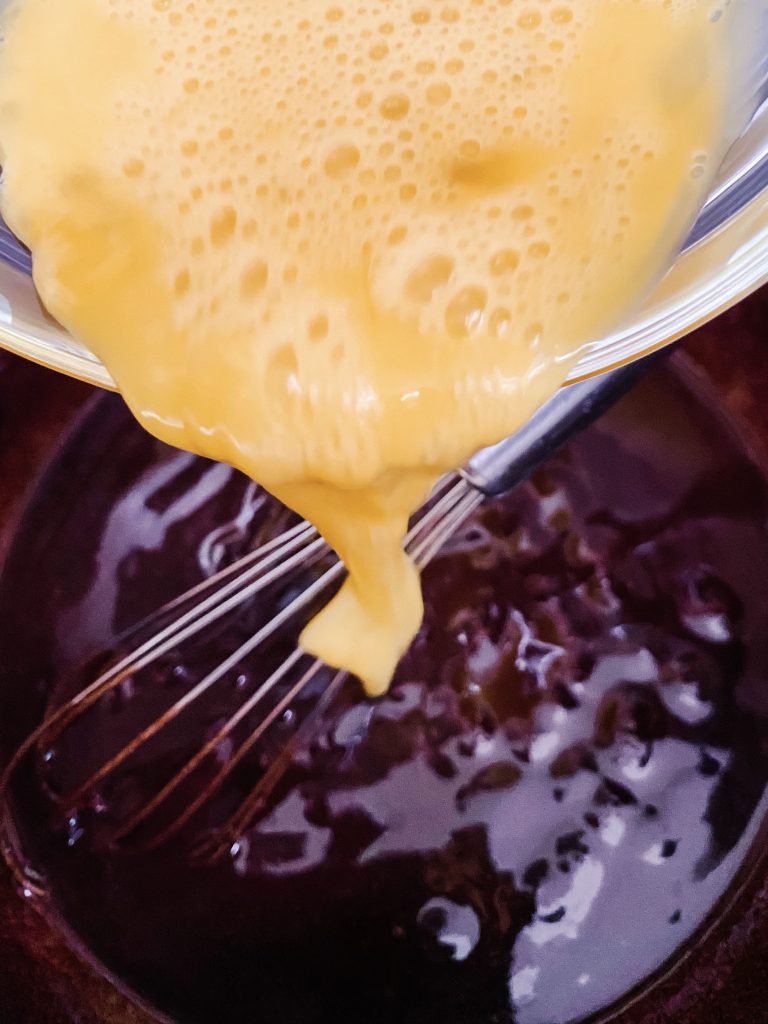
6. Add a beaten egg 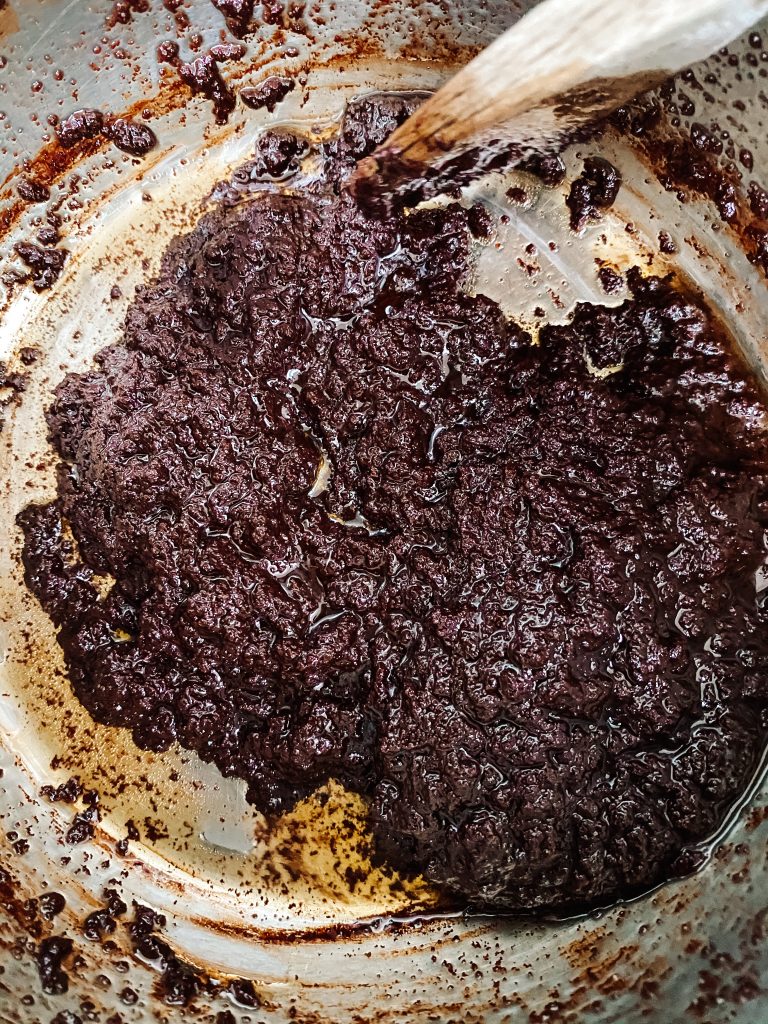
7 Cook over a moderate heat for 2-3 minutes 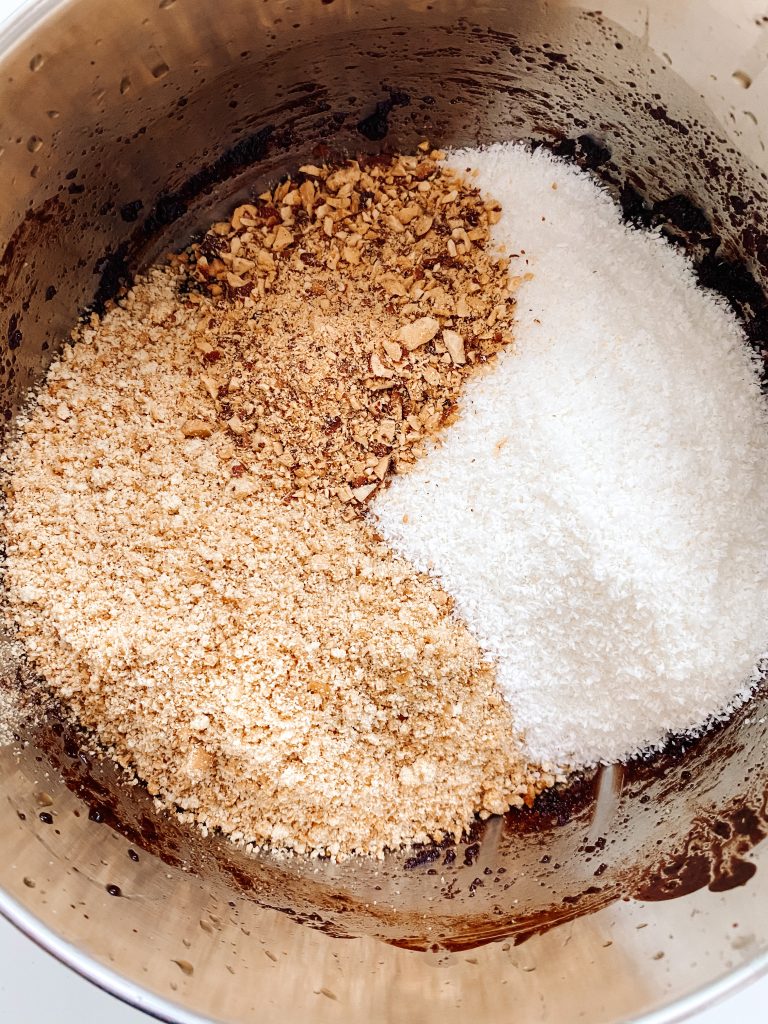
8 Add the digestives, chopped nuts and coconut 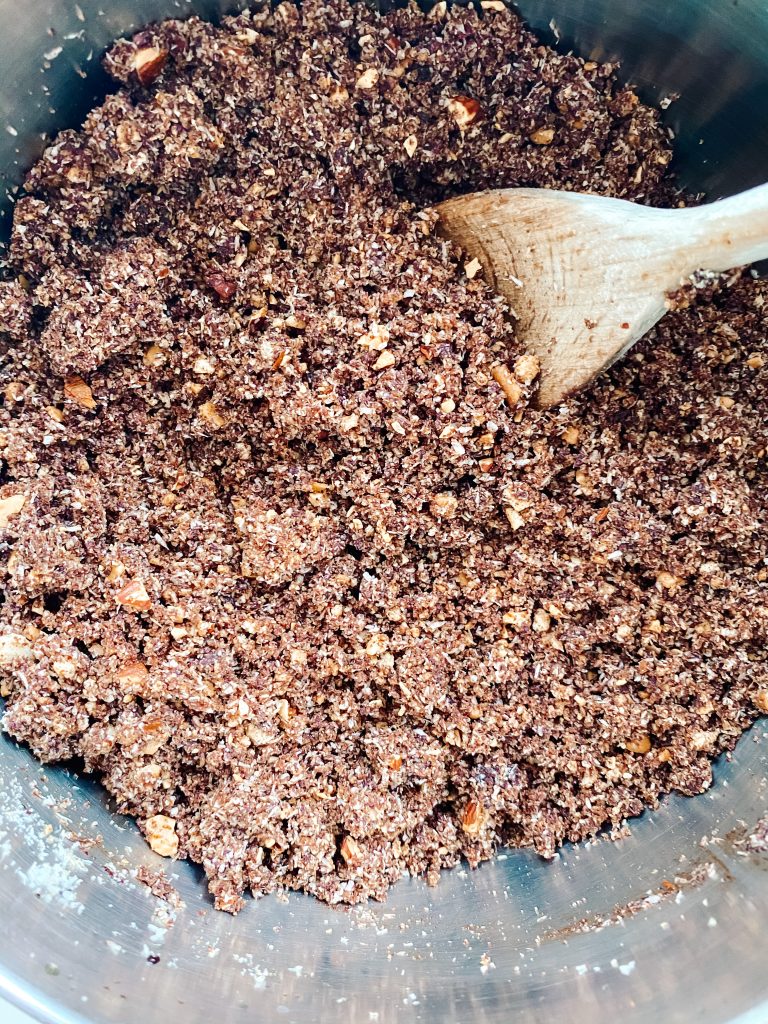
9 Stir to mix thoroughly 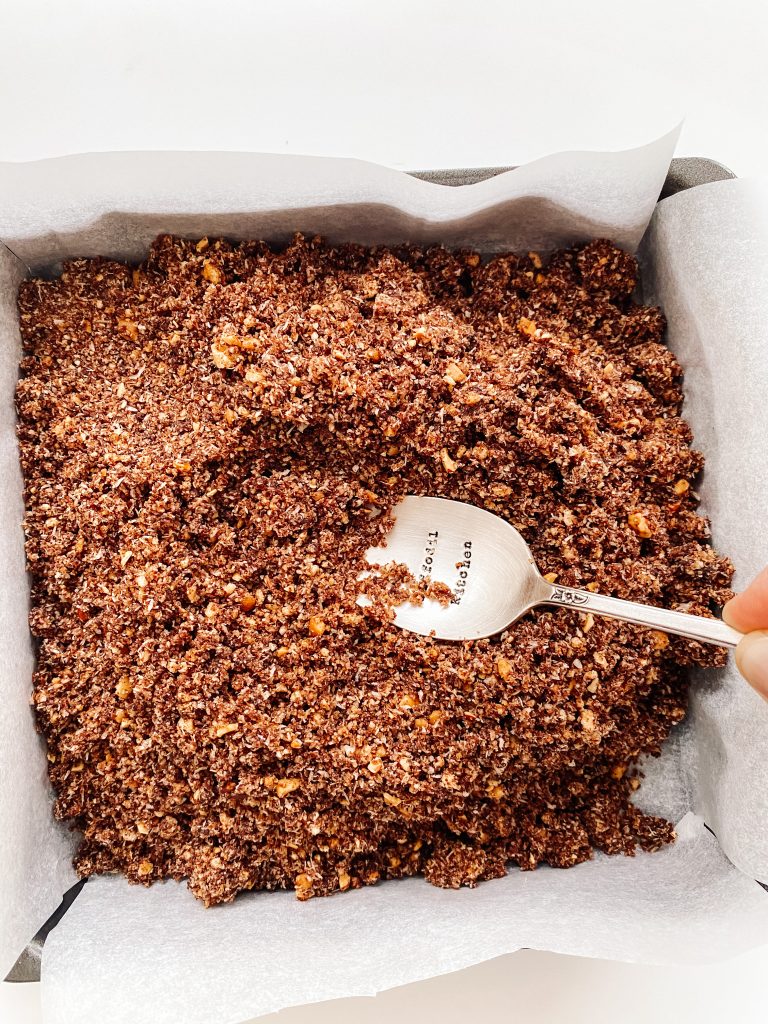
10 Tip into a lined square baking tin and level the surface…. 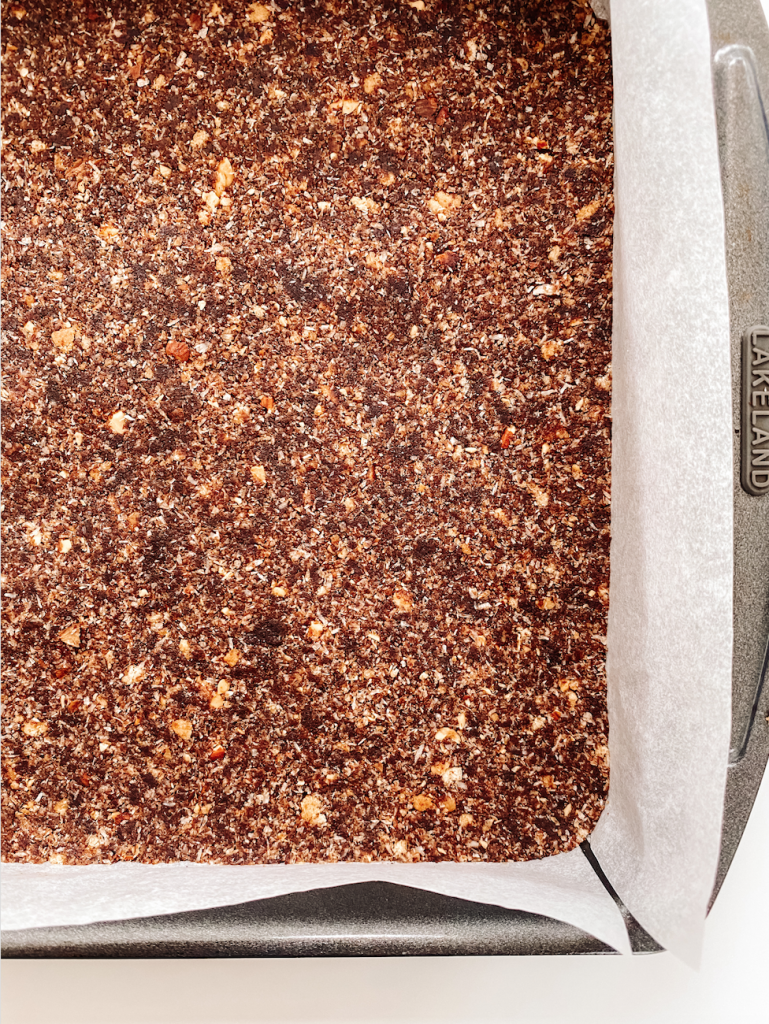
…. press down hard and make sure you get into the corners
Make the middle layer:
- Beat the butter until light and fluffy
- Scrape down the sides of the bowl, add ½ of the icing sugar and mix in by hand. (This avoids an icing sugar cloud and lots of mess over the kitchen!)
- Now add the custard powder and the salt and mix again, by hand.
- Beat again with an electric whisk.
- Fold in the remaining icing sugar, cream and vanilla extract by hand, before beating again until light and fluffy.
- Top the bottom layer with the custard cream and level the surface.
- Put in the fridge whilst you make the top layer.
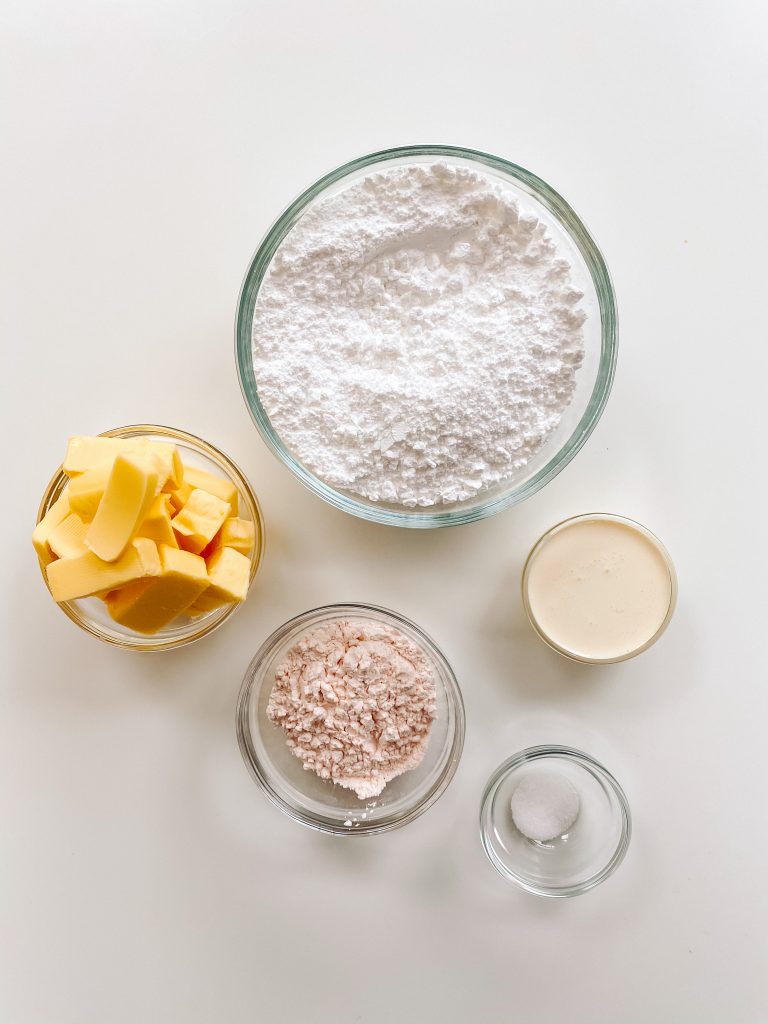
Ingredients for the middle layer 
1 Beat the butter until light and fluffy 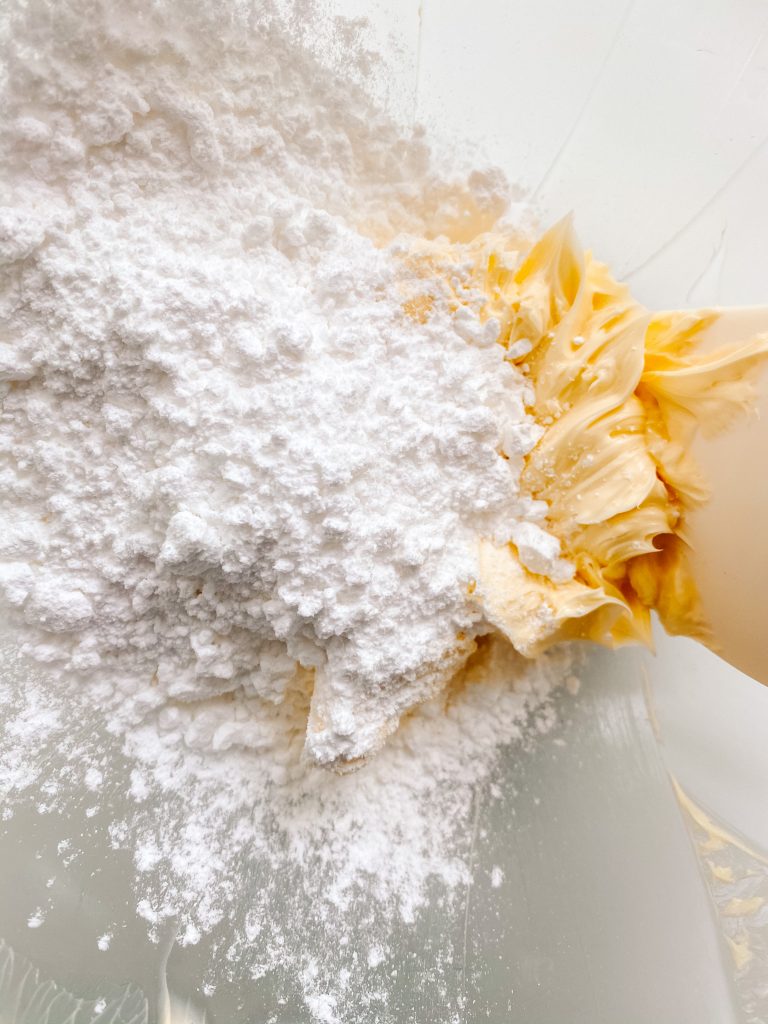
2 add 1/2 of the icing sugar …. 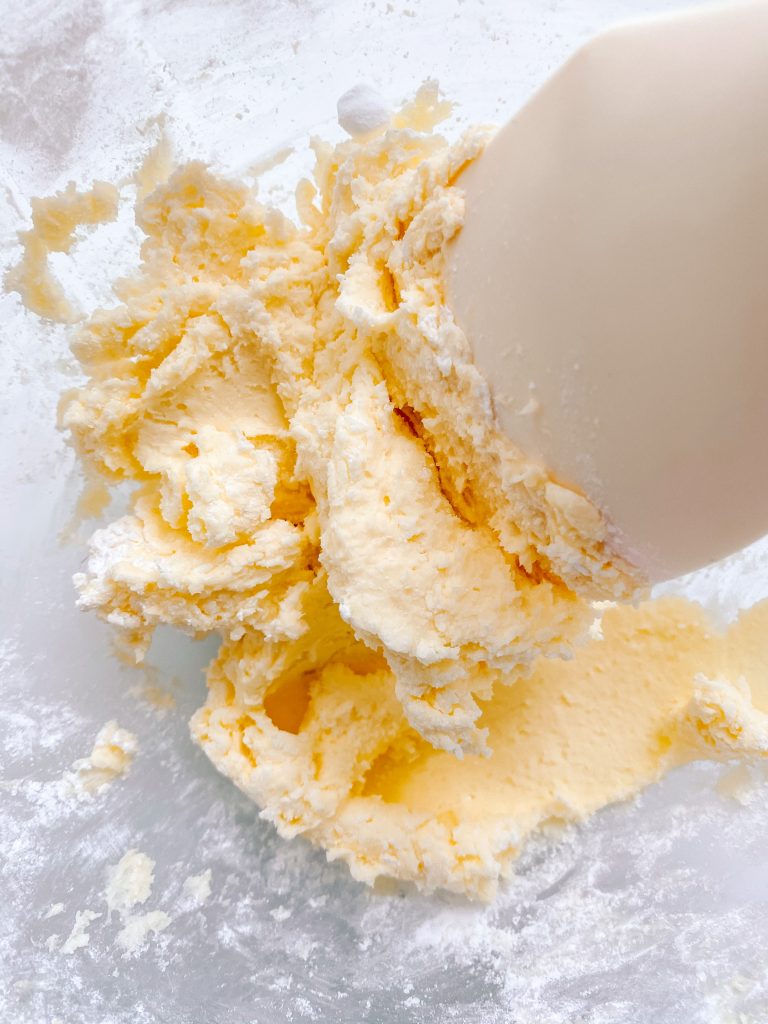
….and mix in by hand. 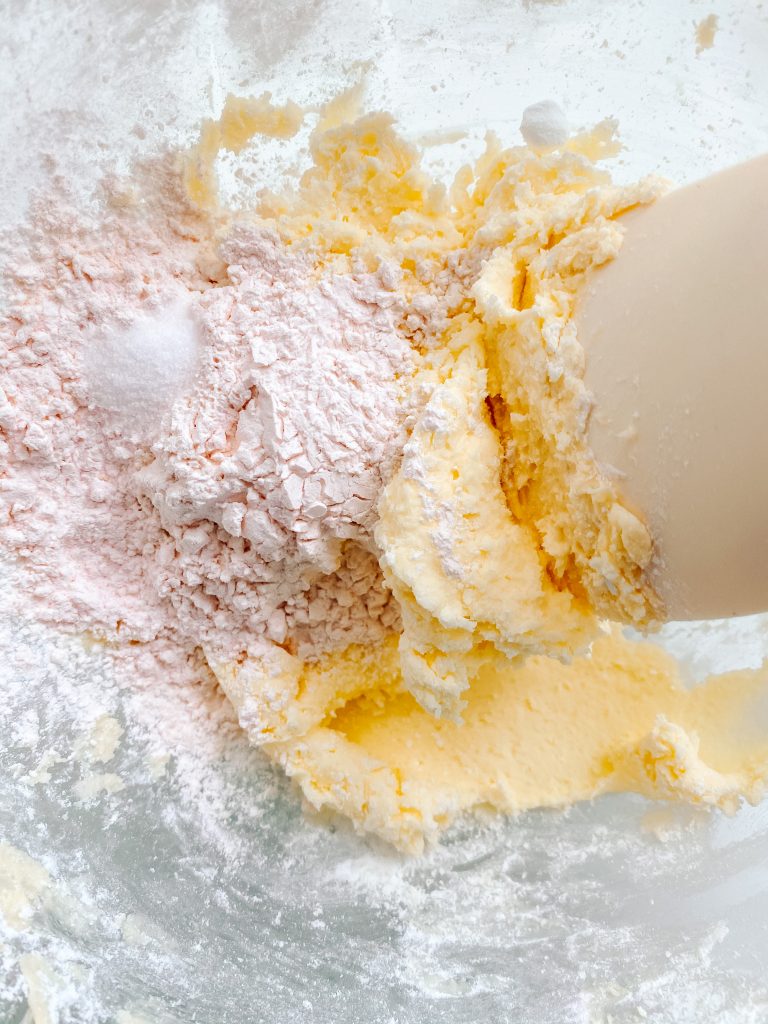
3 now add the custard powder and the salt … 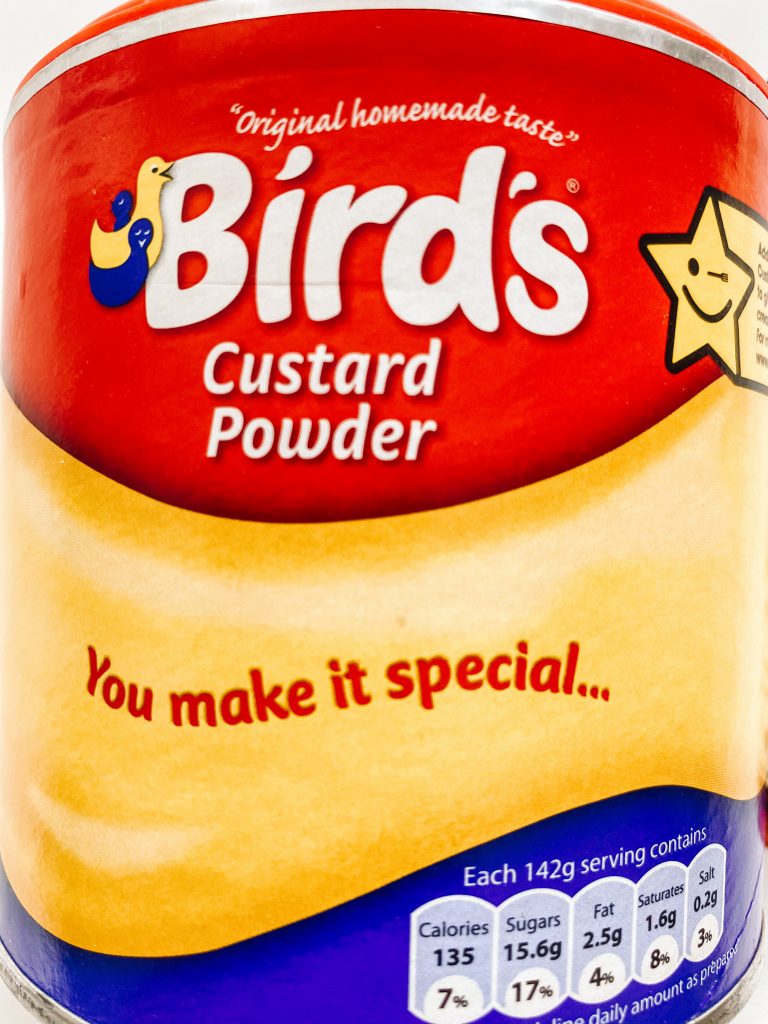
(Bird’s Custard Powder is traditionally used) 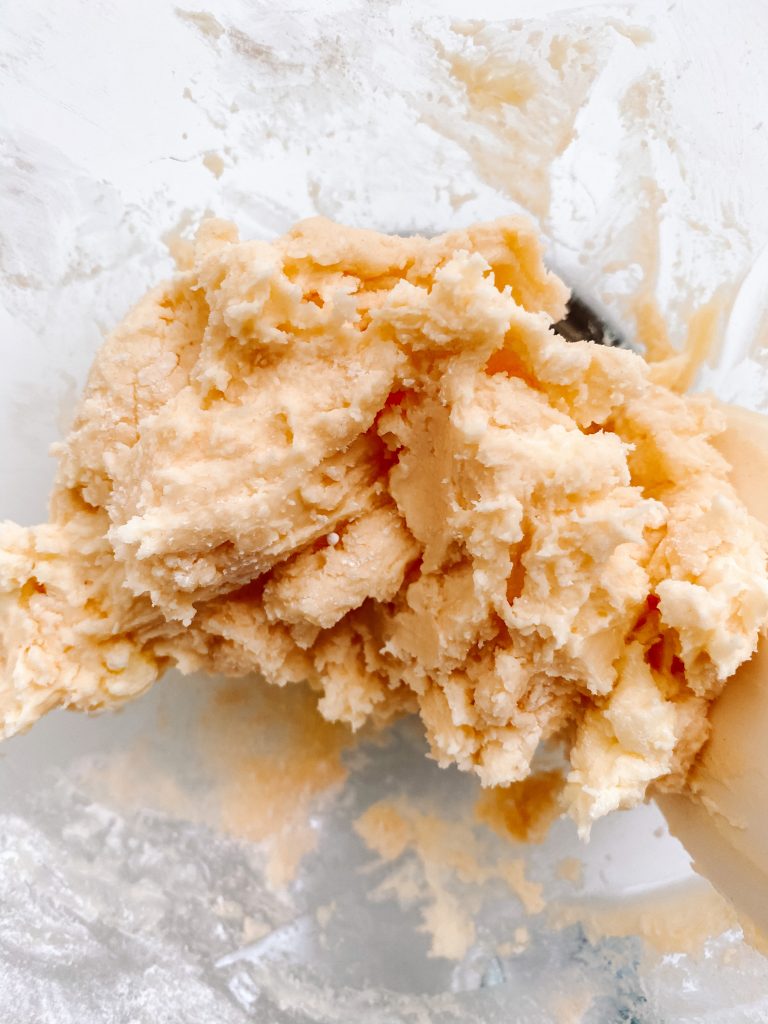
….and mix again, by hand. 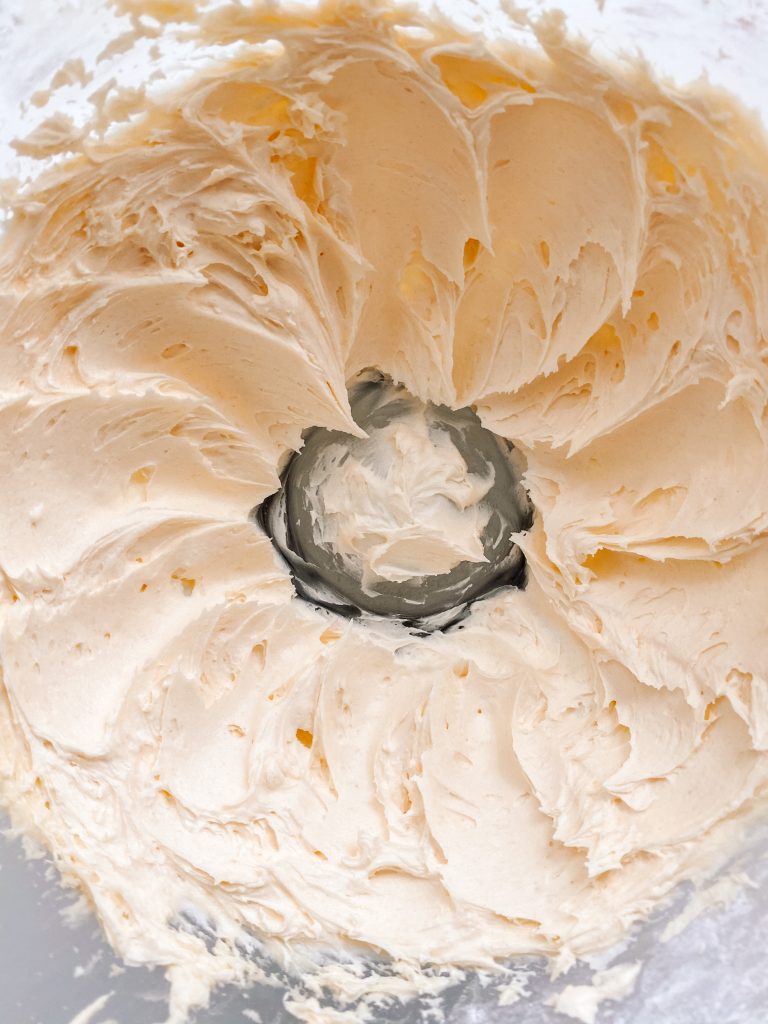
4 beat again with an electric whisk. 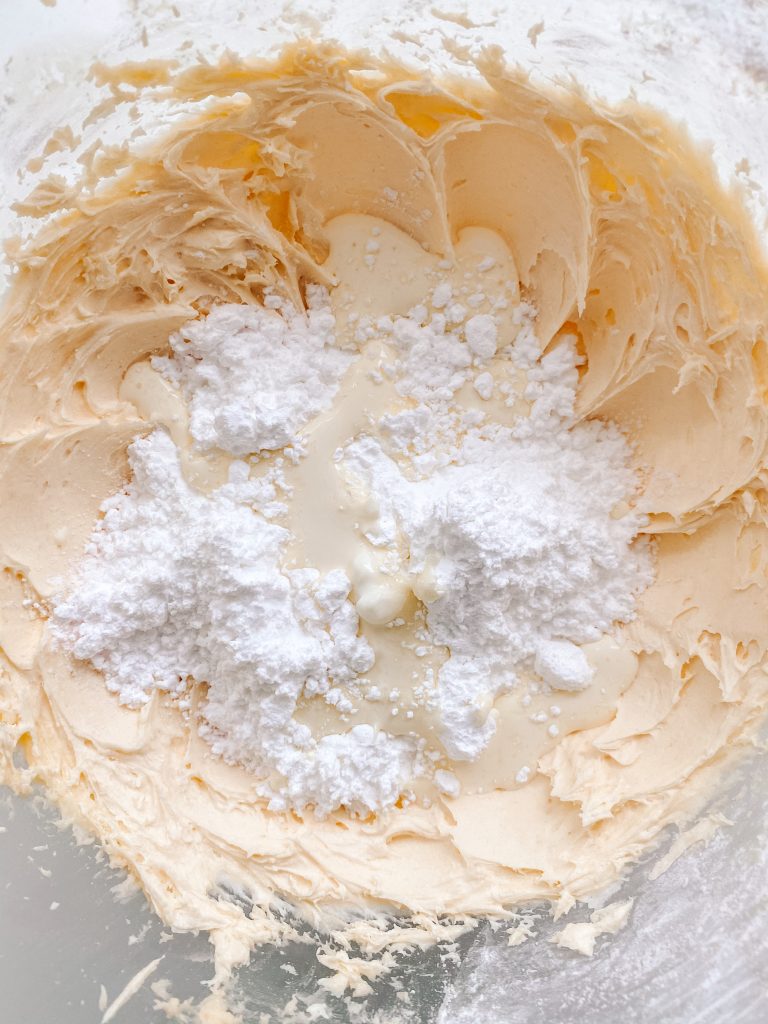
5 add the remaining icing sugar, cream and vanilla extract 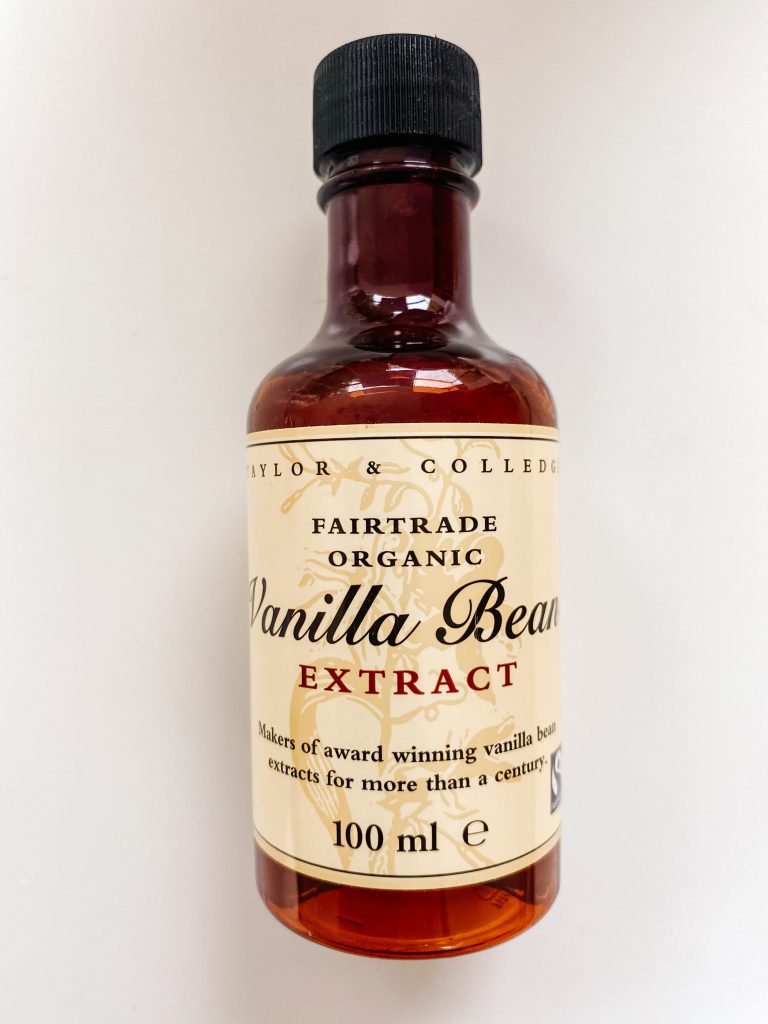
(I add vanilla extract to enhance the custard flavour) 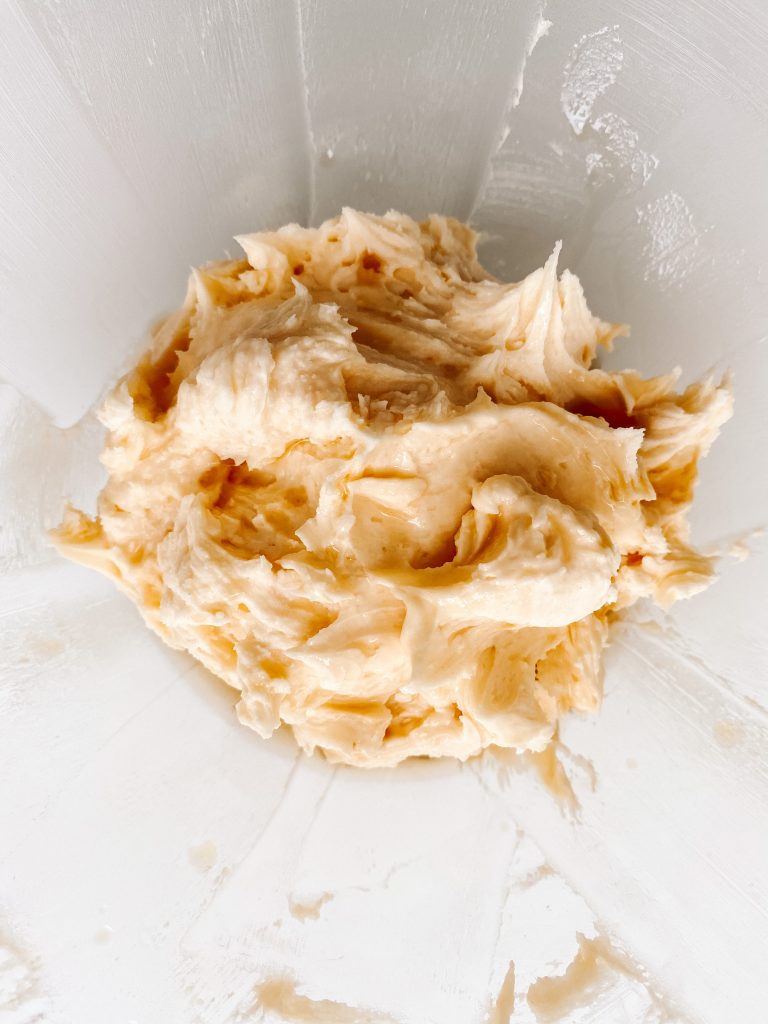
….fold in by hand 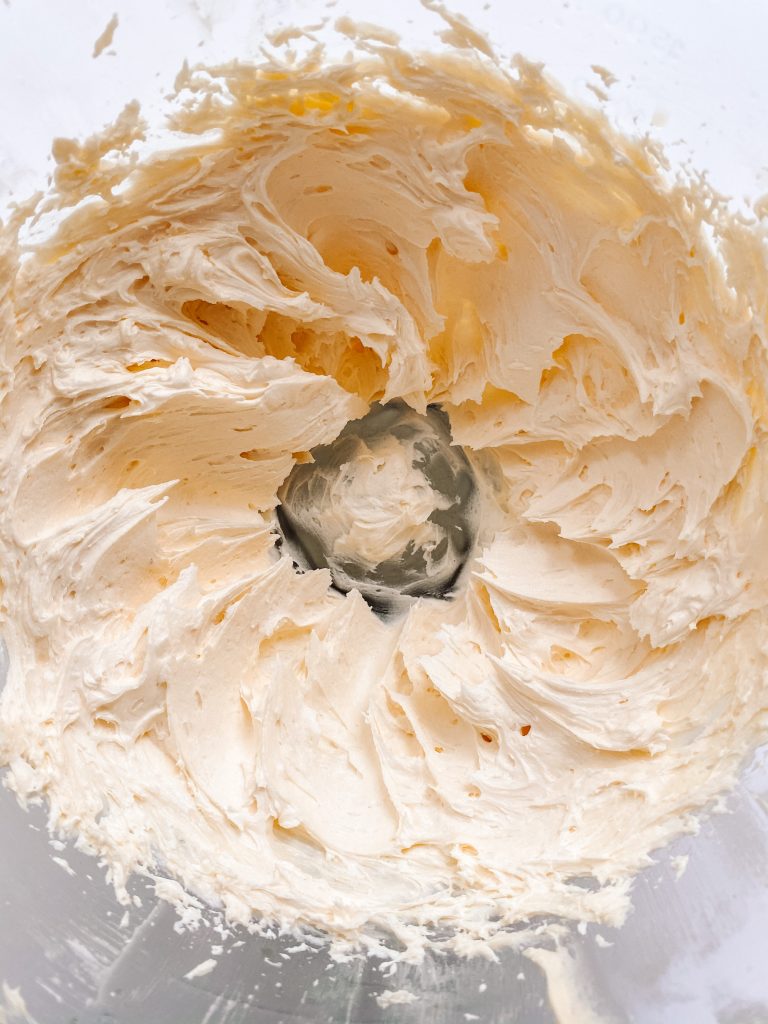
….beat again until light and fluffy. 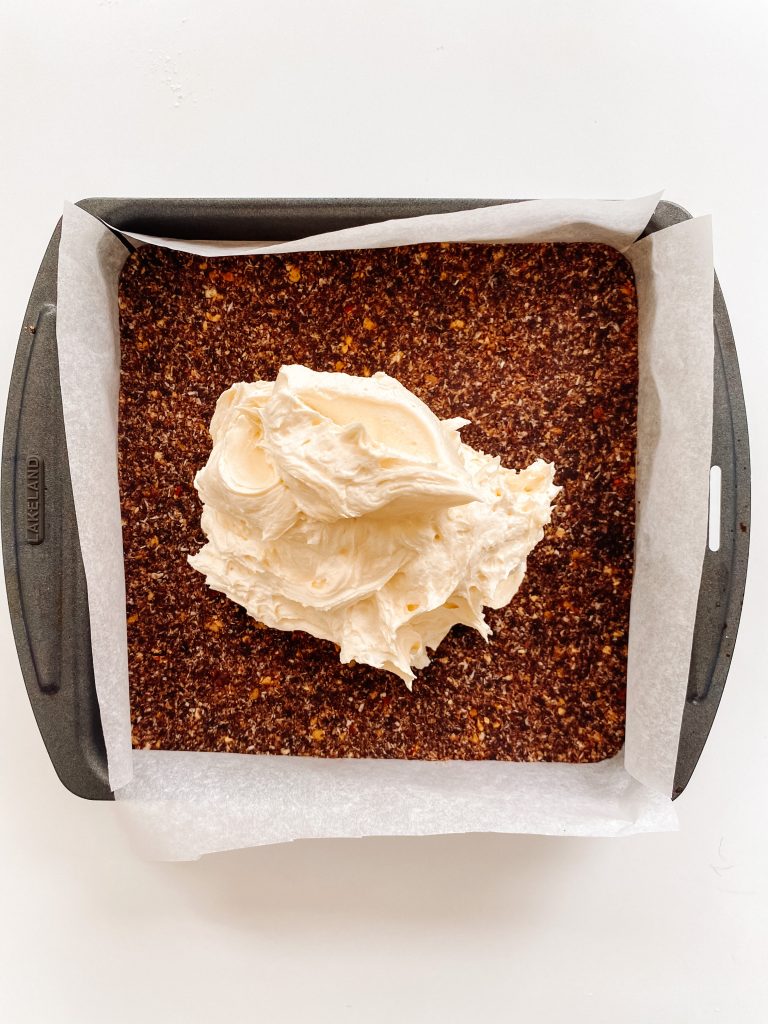
6 Top the bottom layer with the custard cream 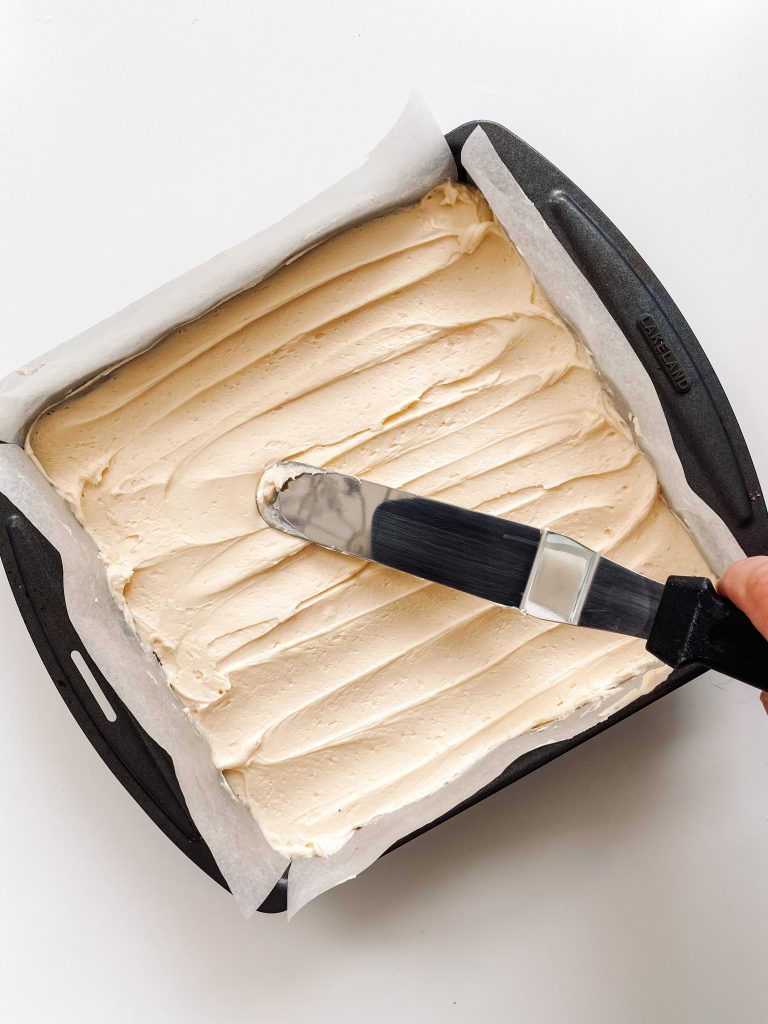
….and level the surface. 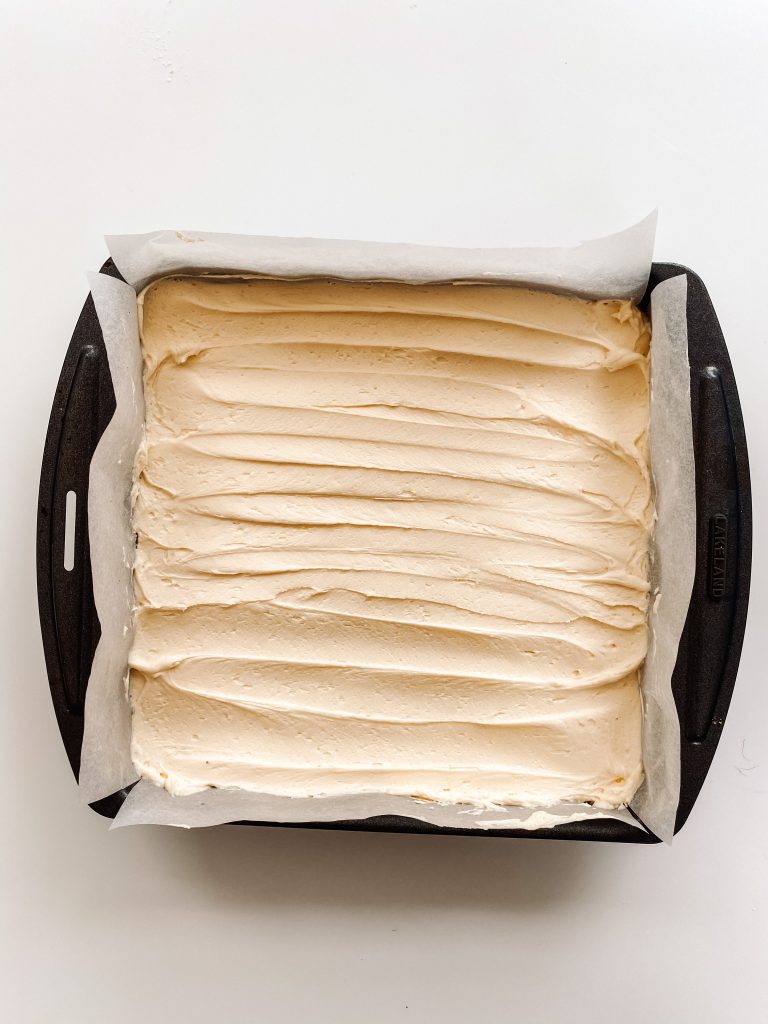
7 Put in the fridge whilst you make the top layer.
Make the top layer:
- Melt the chocolate a bain marie or in the microwave.
- Add the butter and salt.
- Stir to mix thoroughly. It will thicken as you do this. Leave to cool completely before using – this is important or it will melt the middle layer.
- When it is cool, spread gently over the cream layer.
- Use a palette knife to make a nice pattern!
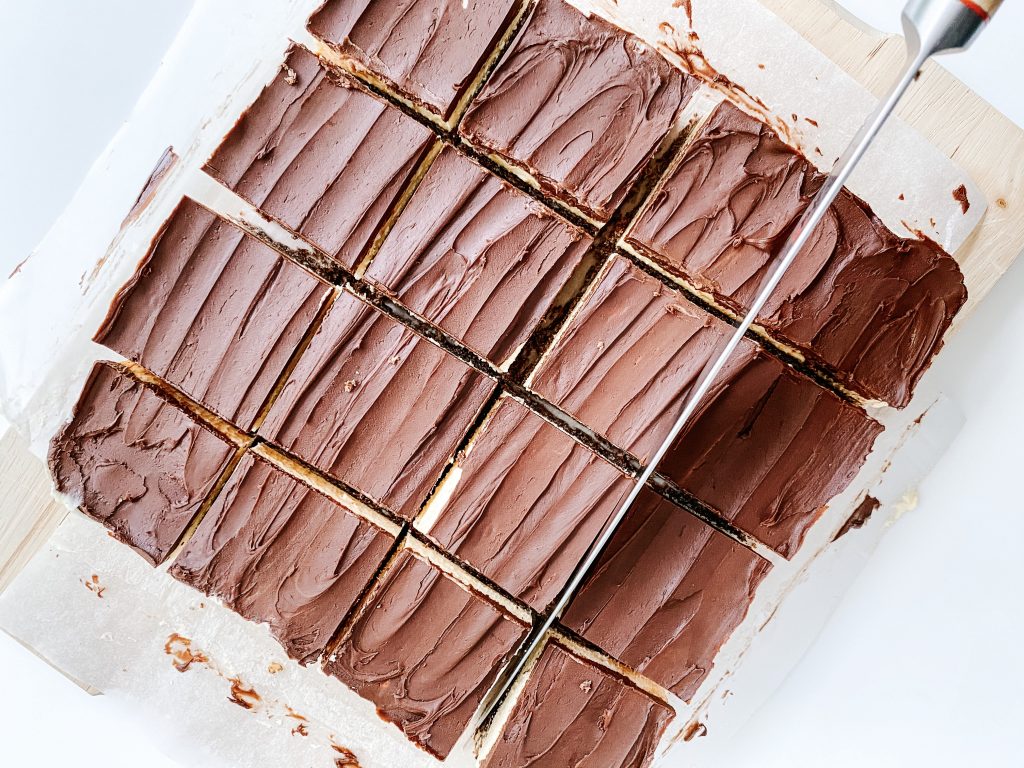
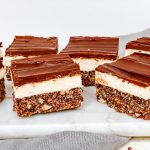
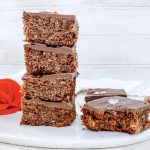
- When the ganache has set, cut into 16 sweet, creamy, delicious Nanaimo bars! Enjoy.

Ingredients for the top layer 
1 Melt the chocolate. 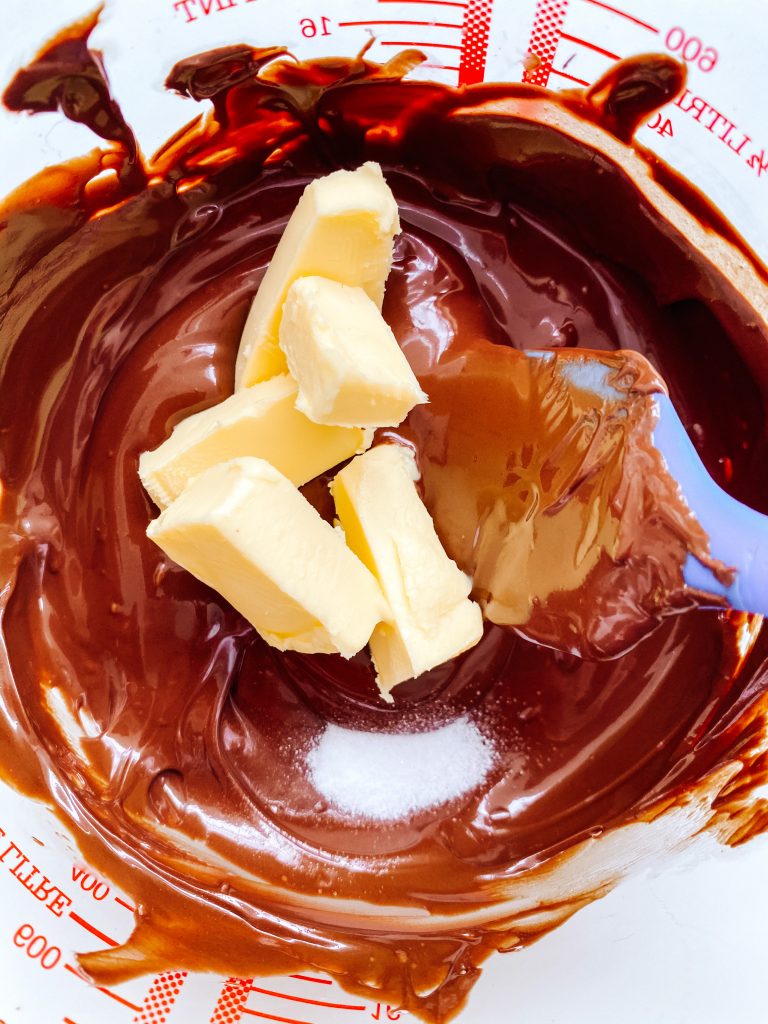
2 Add the butter and salt. 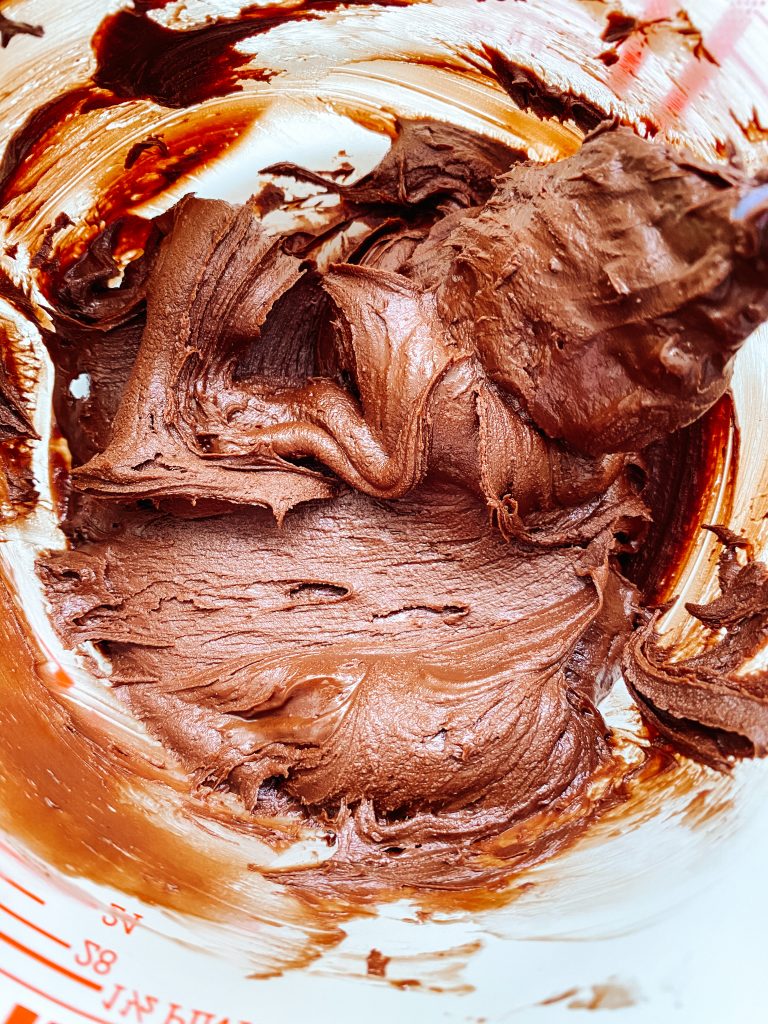
3 Stir to mix thoroughly. It will thicken as you do this. Cool. 
4 When it is cool, spread gently over the cream layer. 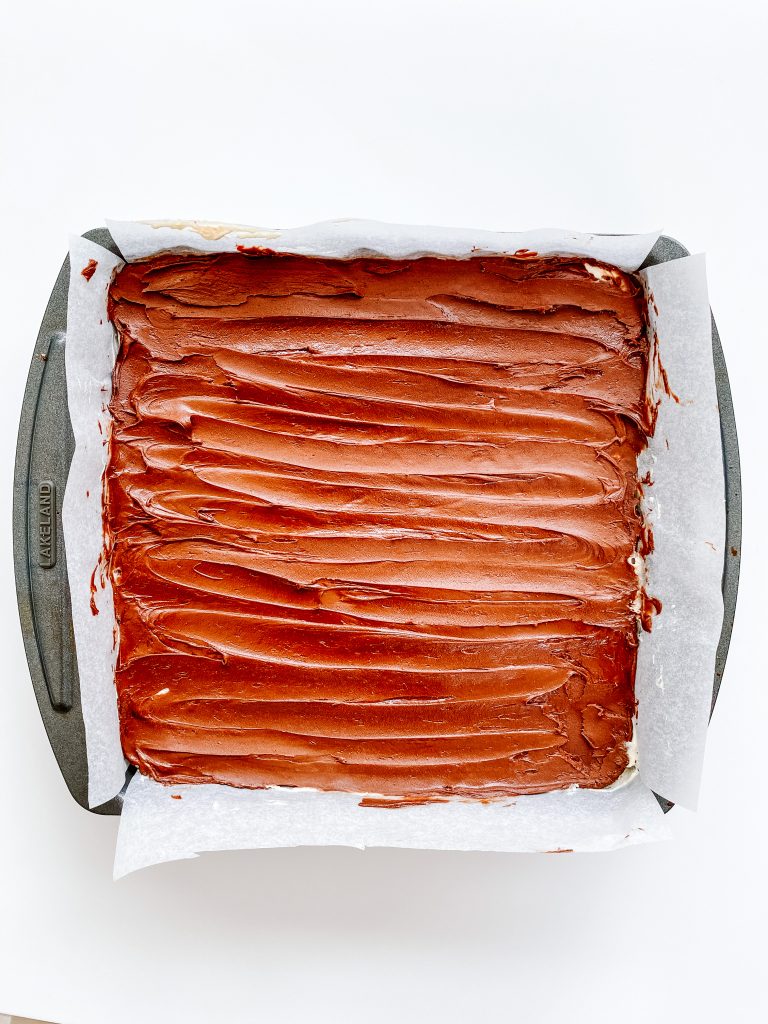
5 Use a palette knife to make a nice pattern!
These bars are best stored in the fridge but served at room temperature when the cream layer will be at its creamy best!
Made this recipe?
If you make this recipe, do please tag me on instagram @daffodilkitchen. You could also leave a comment in the box directly below the recipe.
Nanaimo Bars
With a crispy, crunchy base layer loaded with chocolate, coconut, digestive biscuits and roast almonds, a rich yet light, creamy middle layer flavoured with custard and vanilla, these bars are then finished with a thick layer of chocolate ganache, with a slight salty kick.
Ingredients
For the bottom layer:
- 35g whole almonds
- 115g unsalted butter
- 50g caster sugar
- 40g unsweetened cocoa
- 1 large egg
- 180g digestive biscuits (12 biscuits)
- 100g desiccated coconut
- ¼ teaspoon fine salt
For the middle layer:
- 115g unsalted butter, at room temperature
- 240g icing sugar
- 2 tablespoons custard powder
- ⅛ teaspoon fine salt
- 2 tablespoons double cream
- 1 teaspoon vanilla extract
For the topping:
- 180g semi sweet chocolate (I used Bournville)
- 30g unsalted butter
- ⅛ teaspoon fine salt
Instructions
-
Collect together your equipment (see Recipe Notes below) and ingredients.
-
Make the bottom layer: preheat oven to Fan Oven 180°C /200°C/400°F/Gas 6
-
Roast the nuts in a preheated oven for around 8 minutes, remembering to give them a shake or stir after 4 minutes.
-
Crush the digestives. The easiest way to do this, is to put them in a plastic bag and use rolling pin to crush them.
-
Chop the nuts or put them in a small food processor and pulse until you get the texture you like. I like a mix of larger and smaller pieces.
-
Put the butter, cocoa, sugar and salt in a small saucepan, heat over a moderate temperature and whisk with a balloon whisk until melted and no lumps remain.
-
Add the beaten and mix well. Cook over a moderate heat, stirring, for 3-4 minutes. This ensures the egg cooks. It will look grainy and as if it has separated but that is OK. It will come together.
-
Add the digestives, chopped nuts and coconut. Stir to mix – it is important to ensure you do this thoroughly. It can take a good few minutes.
-
Tip into a lined square baking tin and level the surface, making sure you press down quite hard and push it into the corners of the tin.
-
Put in the fridge to harden whilst you make the middle layer.
-
Make the middle layer: beat the butter until light and fluffy
-
Scrape down the sides of the bowl, add ½ of the icing sugar and mix in by hand. (This avoids an icing sugar cloud and lots of mess over the kitchen!)
-
Now add the custard powder and the salt and mix again, by hand before beating again with an electric whisk.
-
Fold in the remaining icing sugar, cream and vanilla extract by hand, before beating again until light and fluffy.
-
Top the bottom layer with the custard cream and level the surface.
-
Put in the fridge whilst you make the top layer.
-
Make the top layer: Melt the chocolate a bain marie or in the microwave. (See comments below)
-
Add the butter and salt. Stir to mix thoroughly. It will thicken as you do this. Leave to cool completely before using – this is important or it will melt the middle layer.
-
When it is cool, spread gently over the cream layer.
-
Use a palette knife to make a nice pattern!
-
When the ganache has set, cut into 16 sweet, creamy, delicious Nanaimo bars! Enjoy.
Recipe Notes
Equipment:
- kitchen scales and measuring spoons
- chopping board and knife
- baking tray
- small food processor
- saucepan
- electric whisk and mixing bowl
- microwave sage jug or bowl
Be very careful melting the chocolate. Chocolate can be very difficult to work with. You can overheat it very easily and the mixture will go grainy.
Microwave: I give the chocolate and butter a minute in the microwave, take it out and stir it well, then let it sit for a few minutes to see if it continues melting sufficiently to melt all the chocolate. If not, I then continue with the microwave but in 10 – 15 second bursts.
Bain Marie: if you do not have a microwave, put the chocolate and butter in a heatproof bowl over a saucepan of gently simmering water. Do not let the base of the bowl touch the water. Heat until the chocolate and butter are very nearly melted then take it off the heat and take the bowl off the saucepan. Be very careful not to burn yourself as the bowl will be hot and steam will escape from the saucepan. Allow the mixture to sit for a few minutes for the residual heat to melt the remainder of the mixture. Again, be careful not to over-heat.


Low Fashion

Niku Jaga
You May Also Like

Almond Croissants

Lyngen Lodge, Lyngen Alps, Norway, April 2022